Samsung BRF365200AP User Manual - Page 30
Anti-tip bracket considerations, When installing the product into the cabinet, Product
 |
View all Samsung BRF365200AP manuals
Add to My Manuals
Save this manual to your list of manuals |
Page 30 highlights
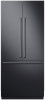
Installation instructions Anti-tip bracket considerations Wall Product Anti-Tip-Bracket 1. Bracket positioning: follow the cabinetspecific height table. 2. Screws: Tighten all 3 screws on the brackets. 3. Push the product up against the rear wall of the cabinet. 4. Spacer: If using the spacer, you must follow the positioning specifications of the bracket (see the table above). CAUTION • The height of the spacer must be calculated based on the depth of the cabinet. • The spacer must be fixed separately from the cabinet. When installing the product into the cabinet Tape or Fixer Before positioning the product in the cabinet, plug in the power cord. Then, attach the power cord near the front of the cabinet opening using tape or fixer such as clip, pin, etc. After positioning the product inside the cabinet, make sure the power cord is positioned on the top of the product (as shown in the in the figure). 30 English FDR_BRF8000M_IM_DA68-03621C-02_EN.indd 30 2017-12-14 2:01:31
-
 1
1 -
2
-
3
-
4
-
5
-
6
-
7
-
8
-
9
-
10
-
11
-
12
-
13
-
14
-
15
-
16
-
17
-
18
-
19
-
20
-
21
-
22
-
23
-
24
-
 25
25 -
 26
26 -
 27
27 -
 28
28 -
 29
29 -
 30
30 -
 31
31 -
 32
32 -
 33
33 -
 34
34 -
 35
35 -
36
-
37
-
38
-
39
-
40
-
41
-
42
-
43
-
44
-
45
-
46
-
47
-
48
-
49
-
50
-
51
-
52
-
53
-
54
-
55
-
56
-
57
-
58
-
59
-
60
-
61
-
62
-
63
-
64
-
65
-
66
-
67
-
68
-
69
-
70
-
71
-
72
-
73
-
74
-
75
-
76
-
77
-
78
-
79
-
80
-
81
-
82
-
83
-
84
-
85
-
86
-
87
-
88
-
89
-
90
-
91
-
92
-
93
-
94
-
95
-
96
-
97
-
98
-
99
-
100
-
101
-
102
-
103
-
104
-
105
-
106
-
107
-
108
-
109
-
110
-
111
-
112
-
113
-
114
-
115
-
116
-
117
-
118
-
119
-
120
-
121
-
122
-
123
-
124
-
125
-
126
-
127
-
128
-
129
-
130
-
131
-
132
-
133
-
134
-
135
-
136
-
137
-
138
-
139
-
140
-
141
-
142
-
143
-
144
-
145
-
146
-
147
-
148
-
149
-
150
-
151
-
152
-
153
-
154
-
155
-
156
 |
 |
