Samsung CHG70 User Manual - Page 25
Connecting the Power C27HG70QQ* model only
 |
View all Samsung CHG70 manuals
Add to My Manuals
Save this manual to your list of manuals |
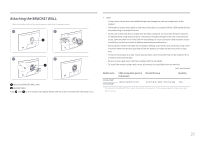
Page 25 highlights
――To detect and start a USB device faster, connect the device to the USB 3.0 port on the product. The read/write rate will be affected by the USB device and your PC. ――The product does not support media play. If you need to play a file in your USB device, please connect the product as a Hub to your PC and play the file on your PC. ――For USB-related problems caused by OS, drive programs or software, please contact relevant suppliers. ――With the launch of various USB devices on the market, we cannot guarantee that our products are matched with all USB devices. ――For an external mass-storage HDD requiring external power supply, be sure to connect it to a power source. ――The super charging can only be provided through port 2. According to the USB 3.0 battery charging specification, 2 can support a maximum current of 1.5A. The actual current value depends on the device to be charged. If the current is too high or an exception occurs, the over-current protection will be triggered. This is a normal setting of the product. ――USB devices requiring high current may not be supported. 1 can support a maximum current of 1.0A, and 2 can support a maximum current of 1.5A. ――The battery can be charged in the power-saving mode, but it cannot be charged when the product is powered off. ――Charging your USB device is not possible if the power cable is disconnected from the power socket. ――The USB device needs to be purchased separately. Connecting the Power (C27HG70QQ* model only) DP IN /SERVICE MIC IN MIC OUT 11 2 (PC IN) DC 22V 2 3 1 Connect the power cable to the AC/DC adapter. Then, connect the AC/DC adapter to the DC 22V port on the back of the product. 2 Next, connect the power cable to the power outlet. 3 Press the JOG button on the back of the monitor to turn it on. ――The input voltage is switched automatically. 25
-
 1
1 -
2
-
3
-
4
-
5
-
6
-
7
-
8
-
9
-
10
-
11
-
12
-
13
-
14
-
15
-
16
-
17
-
18
-
19
-
 20
20 -
 21
21 -
 22
22 -
 23
23 -
 24
24 -
 25
25 -
 26
26 -
 27
27 -
 28
28 -
 29
29 -
 30
30 -
31
-
32
-
33
-
34
-
35
-
36
-
37
-
38
-
39
-
40
-
41
-
42
-
43
-
44
-
45
-
46
-
47
-
48
-
49
-
50
-
51
 |
 |
