Samsung DV665JW User Manual (user Manual) (ver.1.0) (Spanish) - Page 9
Exhaust Directions, Exhaust Duct Locating Dimensions, Important To Installer - model
 |
View all Samsung DV665JW manuals
Add to My Manuals
Save this manual to your list of manuals |
Page 9 highlights
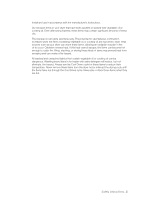
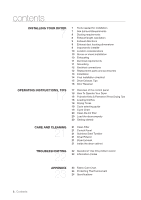
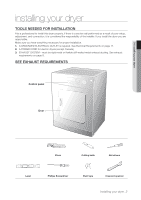
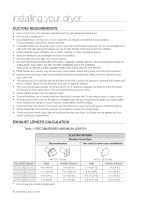
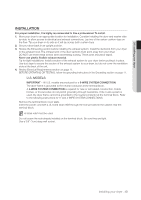
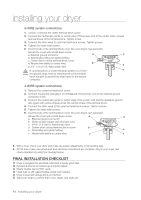
01 Installing your dryer If the new dryer is installed into an existing exhaust system you must make sure: • The exhaust system meets all local, state, and national codes. • That a flexible plastic duct is not used. • To Inspect and clean all lint buildup from inside the existing duct. • The duct is not kinked or crushed. • The exhaust hood damper opens and closes freely. The static pressure in any exhaust system must not exceed 0.83 inches of water column, or be less than 0. This can be measured with the dryer running with a manometer at the point where the exhaust duct connects to the dryer. A no-heat setting should be used. The dryer tumbler should be empty and the lint filter clean. EXHAUST DIRECTIONS All dryers shipped from the factory are set up for rear exhausting. However exhausting can be on the right, left or bottom of the dryer. • Remove the access panel at back of dryer to gain access to the internal ducts. • Disconnect the duct exhaust from the blower housing. • Remove the desired knockout plate (either right or left side). • Attach a 90° elbow duct to the blower housing and facing desired opening. • Reinstall the rear access panel. Front of dryer Same as other side 4-3/8"(11cm) Blower Housing Duct Exhaust 3-3/4"(9.5cm) 5-7/8"(15cm) 13-1/2"(34cm) 3-3/4"(9.5cm) EXHAUST DUCT LOCATING DIMENSIONS Non-metallic ducts must never be used inside the dryer cabinet. WARNING SPECIAL ACCESSORY Stacking kit (Model no:SK-2A) You can obtain the stacking kit from your retailer. With this kit you can combine your Samsung dryer with a Samsung washing machine in a washing and drying column. The appliances are stacked in a space-economizing manner in this arrangement, the washing machine on the bottom and the dryer on the top! IMPORTANT TO INSTALLER Please read the following instructions carefully before installing the dryer. These instructions should be kept for future reference. REMOVE THE DOOR FROM ALL DISCARDED APPLIANCES TO AVOID THE DANGER OF A CHILD WARNING SUFFOCATING. Installing your dryer _9
-
 1
1 -
2
-
3
-
 4
4 -
 5
5 -
 6
6 -
 7
7 -
 8
8 -
 9
9 -
 10
10 -
 11
11 -
 12
12 -
 13
13 -
 14
14 -
15
-
16
-
17
-
18
-
19
-
20
-
21
-
22
-
23
-
24
-
25
-
26
-
27
-
28
-
29
-
30
-
31
-
32
-
33
-
34
-
35
-
36
-
37
-
38
-
39
-
40
-
41
-
42
-
43
-
44
-
45
-
46
-
47
-
48
-
49
-
50
-
51
-
52
-
53
-
54
-
55
-
56
-
57
-
58
-
59
-
60
 |
 |