Samsung HW-J650 User Manual - Page 12
Installing the Bracket without Referring to the Wall-Mount Installation Guide
 |
View all Samsung HW-J650 manuals
Add to My Manuals
Save this manual to your list of manuals |
Page 12 highlights
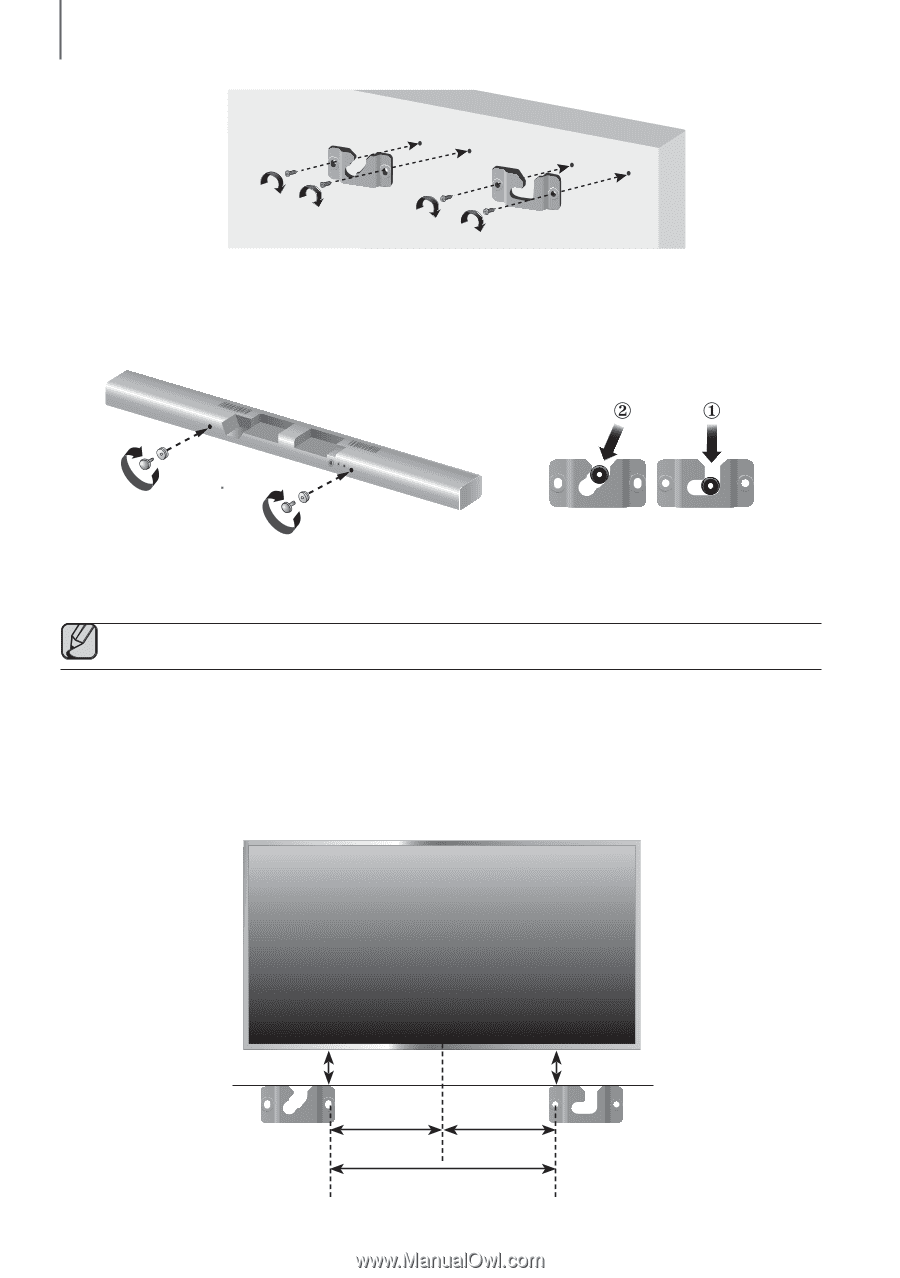
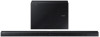
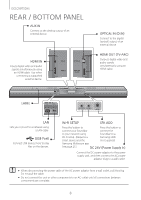
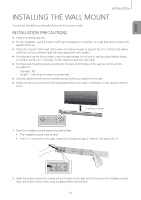
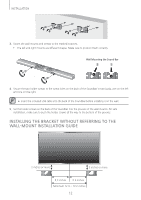
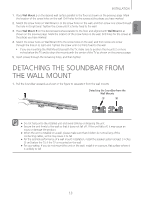
INSTALLATION 3. Fasten the wall mounts and screws to the marked locations. • The left and right mounts are different shapes. Make sure to position them correctly. Wall Mounting the Sound Bar 4. Secure the two holder screws to the screw holes on the back of the Soundbar's main body, one on the left and one on the right. ●● Insert the included USB cable into the back of the Soundbar before installing it on the wall. 5. Set the holder screws on the back of the Soundbar into the grooves of the wall mounts. For safe installation, make sure to push the holder screws all the way to the bottom of the grooves. Installing the Bracket without Referring to the Wall-Mount Installation Guide DC 24V Wi-Fi SETUP SPK ADD 2 inches or more 2 inches or more 6.3 inches 6.9 inches Minimum 12.9 ~ 13.2 inches 12
-
 1
1 -
2
-
3
-
4
-
5
-
6
-
 7
7 -
 8
8 -
 9
9 -
 10
10 -
 11
11 -
 12
12 -
 13
13 -
 14
14 -
 15
15 -
 16
16 -
 17
17 -
18
-
19
-
20
-
21
-
22
-
23
-
24
-
25
-
26
-
27
-
28
-
29
-
30
-
31
-
32
 |
 |