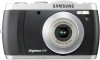
Samsung L80 User Manual - Page 64
Sound ], Connecting an External Device USB ], Auto Focus lamp ], Imprinting the recording date ]
 |
View all Samsung L80 manuals
Add to My Manuals
Save this manual to your list of manuals |
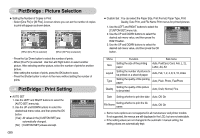
Page 64 highlights
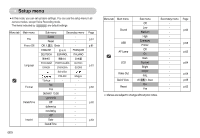
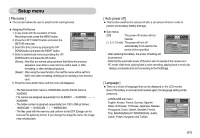
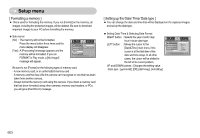
Setup menu [ Imprinting the recording date ] ƈ There is an option to include DATE / TIME on still images. ƃ Sub menus [Off] : The DATE & TIME will not be imprinted on the image file. [Date] : Only the DATE will be imprinted on the image file. [Date&Time] : The DATE & TIME will be imprinted on the image file. Power Off Language Format Date&Time Imprint Back: SETUP Off Date Date&Time Set:OK [ Sound ] ƈ If you set sound to ON, various sounds will be activated for camera startup, when buttons are pressed, so that you can be aware of the camera operation status. ƃ [Sound] sub menu : Off/ Low/ Medium/ High Language Format Date&Time Imprint Sound Back: SETUP Off Low Medium High Set:OK [ Connecting an External Device (USB) ] ƈ You can select an external device to which you want to connect the camera using the USB cable. ƃ Sub menus - [Computer] : Select this if you want to connect the camera to your PC. Refer to page 76 for instructions on how to connect the camera to your PC. - [Printer] : Select this if you want to connect the camera to your printer. Refer to page 57 for instructions on how to connect the camera to your printer. SETUP Date&Time Imprint Sound USB AF Lamp Back: Computer Printer Set:OK [ Auto Focus lamp ] ƈ You can turn on and off the Auto Focus lamp. ƃ Sub menus [Off] : The AF lamp will not light up in a low light condition. [On] : The AF lamp will light up in a low light condition. SETUP Date&Time Off Imprint On Sound USB AF Lamp Back: Set:OK ŝ63Ş
-
 1
1 -
2
-
3
-
4
-
5
-
6
-
7
-
8
-
9
-
10
-
11
-
12
-
13
-
14
-
15
-
16
-
17
-
18
-
19
-
20
-
21
-
22
-
23
-
24
-
25
-
26
-
27
-
28
-
29
-
30
-
31
-
32
-
33
-
34
-
35
-
36
-
37
-
38
-
39
-
40
-
41
-
42
-
43
-
44
-
45
-
46
-
47
-
48
-
49
-
50
-
51
-
52
-
53
-
54
-
55
-
56
-
57
-
58
-
 59
59 -
 60
60 -
 61
61 -
 62
62 -
 63
63 -
 64
64 -
 65
65 -
 66
66 -
 67
67 -
 68
68 -
 69
69 -
70
-
71
-
72
-
73
-
74
-
75
-
76
-
77
-
78
-
79
-
80
-
81
-
82
-
83
-
84
-
85
-
86
-
87
-
88
-
89
-
90
 |
 |
