Samsung LN40B650 User Manual (ENGLISH) - Page 33
You can connect the LAN viaSharer Router. - service manual
 |
UPC - 036725229365
View all Samsung LN40B650 manuals
Add to My Manuals
Save this manual to your list of manuals |
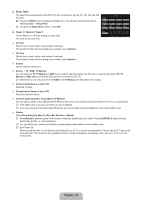
Page 33 highlights
■ LAN Connection for Static IP Environment The procedures to set up the network using a static IP address are described below. You have to manually enter the IP address, subnet mask, gateway, and DNS that are provided by your Internet Service Provider (ISP). 1. Connect the LAN port on the rear panel of the TV and the LAN port on the wall using the LAN cable. The LAN Port on the Wall TV Rear Panel 1 LAN Cable You can connect the LAN via a Sharer (Router). The LAN Port on the Wall IP Sharer TV Rear Panel LAN Cable LAN Cable N The terminals (the position of the port and the type) of the external device may differ depending on the manufacturer. N If you are using a static IP address, your ISP will inform you of the IP address, subnet mask, gateway, and DNS. You must enter these values to complete the network settings. If you do not know the values, ask your network administrator. N For the information on how to configure and connect a Sharer (Router), refer to the owner's manual for the corresponding product. N You can connect the TV to the LAN directly without connecting it through a Sharer (Router). N If you use an IP Sharer (IP Router) that supports DHCP, you can set up the device as either DHCP or static IP. N For the procedures to use a static IP address, ask your Internet Service Provider. English - 31
-
 1
1 -
2
-
3
-
4
-
5
-
6
-
7
-
8
-
9
-
10
-
11
-
12
-
13
-
14
-
15
-
16
-
17
-
18
-
19
-
20
-
21
-
22
-
23
-
24
-
25
-
26
-
27
-
 28
28 -
 29
29 -
 30
30 -
 31
31 -
 32
32 -
 33
33 -
 34
34 -
 35
35 -
 36
36 -
 37
37 -
 38
38 -
39
-
40
-
41
-
42
-
43
-
44
-
45
-
46
-
47
-
48
-
49
-
50
-
51
-
52
-
53
-
54
-
55
-
56
-
57
-
58
-
59
-
60
-
61
-
62
-
63
-
64
-
65
-
66
-
67
-
68
-
69
-
70
-
71
-
72
-
73
-
74
-
75
-
76
-
77
-
78
-
79
-
80
-
81
-
82
-
83
-
84
-
85
-
86
-
87
-
88
-
89
-
90
-
91
-
92
-
93
-
94
-
95
-
96
-
97
-
98
-
99
-
100
-
101
-
102
-
103
-
104
-
105
-
106
-
107
-
108
-
109
-
110
-
111
-
112
-
113
-
114
-
115
-
116
-
117
-
118
-
119
-
120
-
121
-
122
-
123
-
124
-
125
-
126
-
127
-
128
-
129
-
130
-
131
-
132
-
133
-
134
-
135
-
136
-
137
-
138
-
139
-
140
-
141
-
142
-
143
-
144
-
145
-
146
-
147
-
148
-
149
-
150
-
151
-
152
-
153
-
154
-
155
-
156
-
157
-
158
-
159
-
160
-
161
-
162
-
163
-
164
-
165
-
166
-
167
-
168
-
169
-
170
-
171
-
172
-
173
-
174
-
175
-
176
-
177
-
178
-
179
-
180
-
181
-
182
-
183
-
184
-
185
-
186
-
187
-
188
-
189
-
190
-
191
-
192
-
193
-
194
-
195
-
196
-
197
-
198
 |
 |
