Samsung LN46B540P8F User Manual (user Manual) (ver.1.0) (English, Spanish) - Page 21
Using Your TV as a Computer (PC) Display, Setting Up Your PC Software Based on Windows XP
 |
View all Samsung LN46B540P8F manuals
Add to My Manuals
Save this manual to your list of manuals |
Page 21 highlights
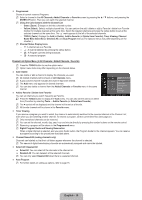
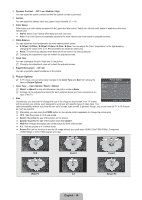
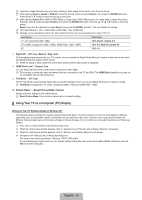
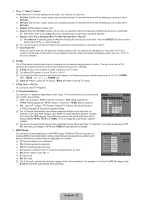
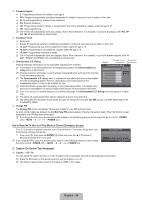
N Temporary image retention may occur when viewing a static image on the set for more than two hours. N After selecting Zoom1, Zoom2 or Wide Fit: Press the ◄ or ► button to select Position, then press the ENTERE button. Press the ▲ or ▼ button to move the picture up and down. N After selecting Screen Fit in HDMI (1080i/1080p) or Component (1080i/1080p) mode, you made need to center the picture: Press the ◄ or ► button to select Position, then press the ENTERE button. Press the or ► button to move the picture. Reset: Press the ◄ or ►button to select Reset, then press the ENTERE button. You can initialize the setting. N HD (High Definition): 16:9 - 1080i/1080p (1920x1080), 720p (1280x720) N Settings can be adjusted and stored for each external device you have connected to an input of the TV. Input Source Picture Size TV , AV, Component (480i, 480p) 16:9, Zoom1, Zoom2, 4:3 DTV(1080i), Component (1080i, 1080p), HDMI (720p, 1080i, 1080P) 16:9, 4:3, Wide Fit, Screen Fit PC 16:9, 4:3 Digital NR → Off / Low / Medium / High / Auto If the broadcast signal received by your TV is weak, you can activate the Digital Noise Reduction feature to help reduce any static and ghosting that may appear on the screen. N When the signal is weak, select one of the other options until the best picture is displayed. HDMI Black Level → Normal / Low You can select the black level on the screen to adjust the screen depth. N This function is active only when an external device is connected to the TV via HDMI. The HDMI Black Level function may not be compatible with all external devices. Film Mode → Off / Auto The TV can be set to automatically sense and process film signals from all sources and adjust the picture for optimum quality. N Film Mode is supported in TV, Video, Component (480i / 1080i) and HDMI (480i / 1080i). ❑ Picture Reset → Reset Picture Mode / Cancel Resets all picture settings to the default values. N Reset Picture Mode: Current picture values return to default settings. ¦ Using Your TV as a Computer (PC) Display Setting Up Your PC Software (Based on Windows XP) The Windows display-settings for a typical computer are shown below. The actual screens on your PC will probably be different, depending upon your particular version of Windows and your particular video card. However, even if your actual screens look different, the same basic set-up information will apply in almost all cases. (If not, contact your computer manufacturer or Samsung Dealer.) 1. First, click on 'Control Panel' in the Windows start menu. 2. When the control panel window appears, click on 'Appearance and Themes' and a display dialog-box will appear. 3. When the control panel window appears, click on 'Display' and a display dialog-box will appear. 4. Navigate to the 'Settings' tab on the display dialog-box. The correct size setting (resolution): Optimum: 1920 X 1080 pixels If a vertical frequency option exists on your display settings dialog box, the correct value is 60 or 60 Hz. Otherwise, just click OK and exit the dialog box. English - 19
-
 1
1 -
2
-
3
-
4
-
5
-
6
-
7
-
8
-
9
-
10
-
11
-
12
-
13
-
14
-
15
-
 16
16 -
 17
17 -
 18
18 -
 19
19 -
 20
20 -
 21
21 -
 22
22 -
 23
23 -
 24
24 -
 25
25 -
 26
26 -
27
-
28
-
29
-
30
-
31
-
32
-
33
-
34
-
35
-
36
-
37
-
38
-
39
-
40
-
41
-
42
-
43
-
44
-
45
-
46
-
47
-
48
-
49
-
50
-
51
-
52
-
53
-
54
-
55
-
56
-
57
-
58
-
59
-
60
-
61
-
62
-
63
-
64
-
65
-
66
-
67
-
68
-
69
-
70
-
71
-
72
-
73
-
74
-
75
-
76
-
77
-
78
-
79
-
80
-
81
-
82
-
83
-
84
-
85
-
86
-
87
-
88
-
89
 |
 |