Samsung RS27T5200SR User Manual - Page 43
Replacement, Water filter applicable models only
 |
View all Samsung RS27T5200SR manuals
Add to My Manuals
Save this manual to your list of manuals |
Page 43 highlights
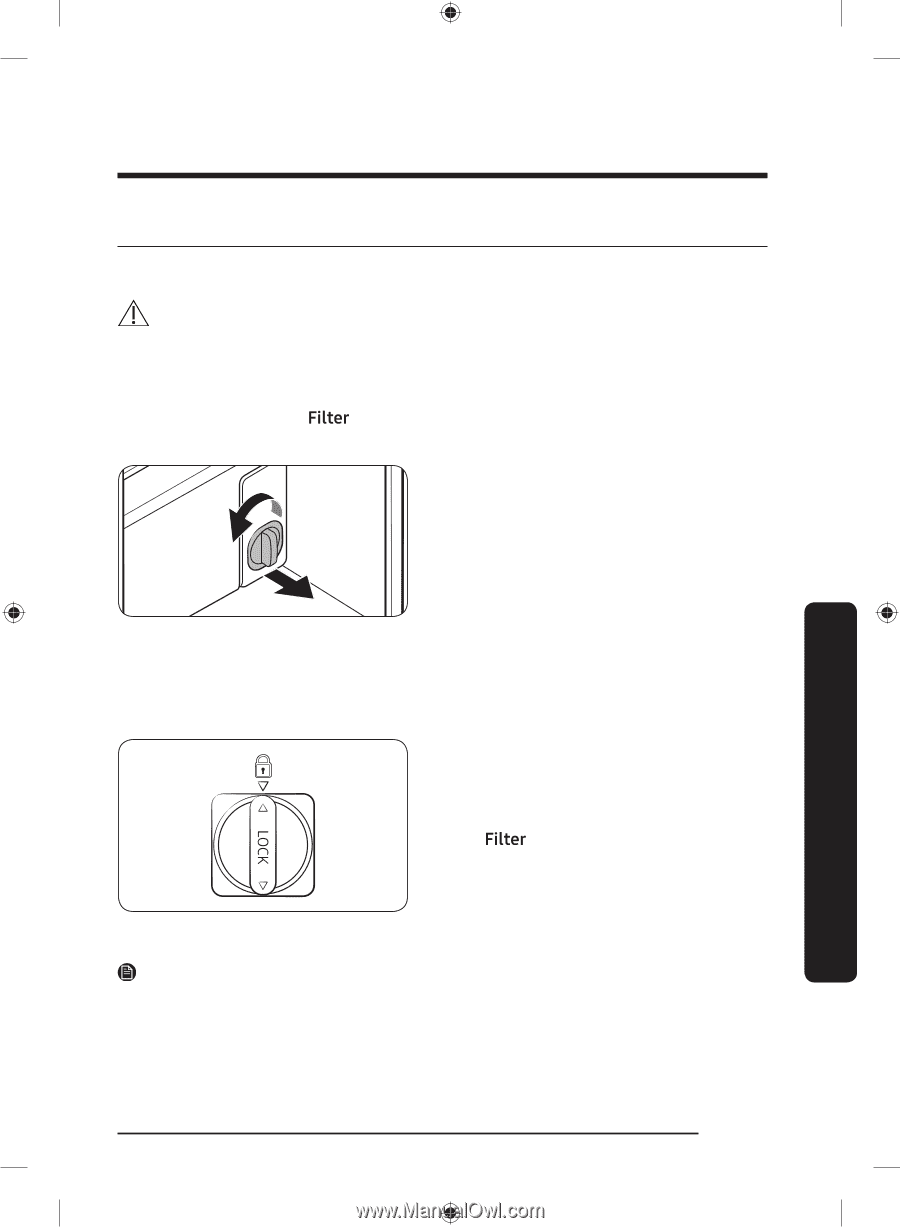
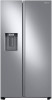
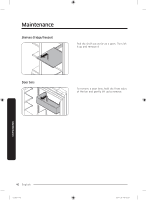
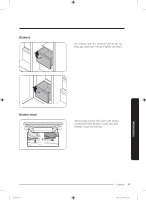
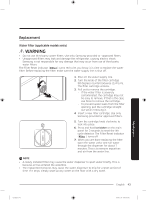
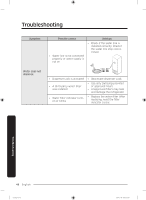
Replacement Water filter (applicable models only) WARNING • Do not use third-party water filters. Use only Samsung-provided or -approved filters. • Unapproved filters may leak and damage the refrigerator, causing electric shock. Samsung is not responsible for any damage that may occur from use of third-party water filters. The Filter Reset indicator ( ) turns red to let you know it is time to replace the water filter. Before replacing the filter, make sure the water supply line is shut off. 1. Shut off the water supply line. 2. Turn the knob of the filter cartridge 90 degrees counterclockwise (1/4 turn). The filter cartridge unlocks. 3. Pull out to remove the cartridge. - If the water filter is severely contaminated, the cartridge may not be easy to remove. If that is the case, use force to remove the cartridge. - To prevent water leaks from the filter opening, pull the cartridge straight out while removing it. 4. Insert a new filter cartridge. Use only Samsung-provided or approved filters. 5. Turn the cartridge knob clockwise to lock into place. 6. Press and hold Ice Maker on the main panel for 3 seconds to reset the life cycle detector. The Filter Reset indicator ( ) turns off. 7. When you are done replacing the filter, open the water valve and run water through the dispenser for about 7 minutes. This is to remove impurities and air from the water line. NOTE • A newly installed filter may cause the water dispenser to spurt water briefly. This is because air has entered the waterline. • The replacement process may cause the water dispenser to drip for a short period of time. If it drips, simply wipe up any water on the floor with a dry towel. Maintenance English 43 Untitled-4 43 2019-11-29 PM 4:01:06
-
 1
1 -
2
-
3
-
4
-
5
-
6
-
7
-
8
-
9
-
10
-
11
-
12
-
13
-
14
-
15
-
16
-
17
-
18
-
19
-
20
-
21
-
22
-
23
-
24
-
25
-
26
-
27
-
28
-
29
-
30
-
31
-
32
-
33
-
34
-
35
-
36
-
37
-
 38
38 -
 39
39 -
 40
40 -
 41
41 -
 42
42 -
 43
43 -
 44
44 -
 45
45 -
 46
46 -
 47
47 -
 48
48 -
49
-
50
-
51
-
52
-
53
-
54
-
55
-
56
-
57
-
58
-
59
-
60
-
61
-
62
-
63
-
64
-
65
-
66
-
67
-
68
-
69
-
70
-
71
-
72
-
73
-
74
-
75
-
76
-
77
-
78
-
79
-
80
-
81
-
82
-
83
-
84
-
85
-
86
-
87
-
88
-
89
-
90
-
91
-
92
-
93
-
94
-
95
-
96
-
97
-
98
-
99
-
100
-
101
-
102
-
103
-
104
-
105
-
106
-
107
-
108
-
109
-
110
-
111
-
112
-
113
-
114
-
115
-
116
-
117
-
118
-
119
-
120
-
121
-
122
-
123
-
124
-
125
-
126
-
127
-
128
-
129
-
130
-
131
-
132
-
133
-
134
-
135
-
136
-
137
-
138
-
139
-
140
-
141
-
142
-
143
-
144
-
145
-
146
-
147
-
148
-
149
-
150
-
151
-
152
-
153
-
154
-
155
-
156
-
157
-
158
-
159
-
160
-
161
-
162
-
163
-
164
-
165
-
166
-
167
-
168
 |
 |