Samsung S24E310HL User Manual
Samsung S24E310HL Manual
 |
View all Samsung S24E310HL manuals
Add to My Manuals
Save this manual to your list of manuals |
Samsung S24E310HL manual content summary:
- Samsung S24E310HL | User Manual - Page 1
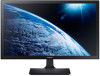
User manual S19E310HY S22E310HY S22E310H S24E310HL S27E310H The color and the appearance may differ depending on the product, and the specifications are subject to change without prior notice to improve the performance. BN46-00452A-06 - Samsung S24E310HL | User Manual - Page 2
Key guide Function Key Guide Reverse Side Installation Attaching the Stand Removing the Stand Adjusting the Product Tilt Installing a Wall-mount Kit or Desktop Stand Anti-theft Lock Before Connecting Pre-connection Checkpoints Connecting and Using a PC Connecting to a PC Connecting the Power Driver - Samsung S24E310HL | User Manual - Page 3
Angle (S19E310HY / S22E310HY / S22E310H / S27E310H) Configuring SAMSUNG MAGIC Angle SAMSUNG MAGIC Upscale Configuring SAMSUNG MAGIC Upscale Image Size Changing the Image Size HDMI Black Level Configuring the HDMI Black Level Settings Response Time (S24E310HL / S27E310H) Configuring the Response Time - Samsung S24E310HL | User Manual - Page 4
Table Of Contents CONFIGURING TINT 55 55 56 56 57 57 58 58 59 59 COORDINATING OSD 60 60 61 61 62 62 63 63 SETUP AND RESET 64 64 65 65 66 66 67 68 68 Red Configuring Red Green Configuring Green Blue Configuring Blue Color Tone Configuring the Color Tone Settings Gamma Configuring Gamma Language - Samsung S24E310HL | User Manual - Page 5
Box Installing the Software Removing the Software Requirements Before Contacting Samsung Customer Service Center Testing the Product Checking the Resolution and Frequency Check the following. Q & A General (S19E310HY) General (S22E310HY / S22E310H) General (S24E310HL) General (S27E310H) PowerSaver - Samsung S24E310HL | User Manual - Page 6
Table Of Contents APPENDIX 89 89 89 89 90 90 91 Responsibility for the Pay Service (Cost to Customers) Not a product defect A Product damage caused by customer's fault Others Correct Disposal Correct Disposal of This Product (Waste Electrical & Electronic Equipment) Terminology - Samsung S24E310HL | User Manual - Page 7
are subject to change without notice to improve quality. © 2015 Samsung Electronics Samsung Electronics owns the copyright for this manual. Use or reproduction of this manual in parts or entirety without the authorization of Samsung Electronics is prohibited. Microsoft, Windows and Windows NT are - Samsung S24E310HL | User Manual - Page 8
as the panel and exterior of advanced LCDs are easily scratched. Take the following steps when cleaning. 1. Power off the monitor and computer. 2. Disconnect the power cord from the monitor. Hold the power cable by the plug and do not touch the cable with wet hands. Otherwise, an electric shock may - Samsung S24E310HL | User Manual - Page 9
(3.93 inches) 10 cm (3.93 inches) 10 cm (3.93 inches) 10 cm (3.93 inches) 10 cm (3.93 inches) Precautions for storage Be sure to contact Samsung Customer Service Center if the inside of the monitor needs cleaning. (A service fee will be charged.) 9 Before Using the Product - Samsung S24E310HL | User Manual - Page 10
, DO NOT REMOVE COVER (OR BACK). THERE ARE NO USER SERVICEABLE PARTS INSIDE. REFER ALL SERVICING TO QUALIFIED PERSONNEL instructions are not followed. Personal injury or damage to properties may result if instructions are not followed. Activities marked by this symbol are prohibited. Instructions - Samsung S24E310HL | User Manual - Page 11
may cause an electric shock or fire. Do not place the power cord or product near heat sources. An electric shock or fire may result. Remove foreign substances such as dust around the plug pins and power socket with a dry cloth. ! Otherwise, a fire may result. 11 Before Using the Product - Samsung S24E310HL | User Manual - Page 12
supplied by Samsung. ! An electric shock or fire may result. Keep the power socket where the power cord is connected unobstructed. If any problem occurs in the product, unplug the power cable to completely ! cut the power to the product. Power as a bookshelf or wall closet. Otherwise, - Samsung S24E310HL | User Manual - Page 13
Before Using the Product Do not install the product on an unstable or vibrating surface (insecure shelf, sloped surface, etc.). The product may fall and break or cause a personal injury. Using the product in an area with excess vibration may damage the product or cause a fire. Do not install - Samsung S24E310HL | User Manual - Page 14
fall, and your child may become injured or seriously harmed. If the product falls or the exterior is damaged, power off the product, remove the power cord, and contact Samsung Customer Service Center. Otherwise, an electric shock or fire may result. Do not put a heavy object, toy, or sweets on - Samsung S24E310HL | User Manual - Page 15
the vent or ports of the product. If water or any foreign substance enters the product, be sure to power off the product, remove the power cord, and contact Samsung Customer Service Center. Product failure, an electric shock or fire may result. Do not place objects containing liquid (vases, pots - Samsung S24E310HL | User Manual - Page 16
product at the recommended resolution and frequency. Otherwise,Your eyesight may deteriorate. Do not put DC power adapters together. Otherwise, a fire may result. Remove the plastic bag from the DC power adapter before you use it. Otherwise, a fire may result. Do not let water enter the DC - Samsung S24E310HL | User Manual - Page 17
the Product Looking at the screen too close for an extended period of time can deteriorate your eyesight. ! Do not hold the monitor upside-down or move it by holding the stand. The product may fall and break or cause a personal injury. Do not use humidifiers or stoves around the product. An - Samsung S24E310HL | User Manual - Page 18
Before Using the Product Correct posture to use the product Use the product in the correct posture as follows: Straighten your back. Allow a distance of 45 to 50 cm between your eye and the screen, and look slightly downward at the screen. Keep your eyes directly in front of the screen. Adjust - Samsung S24E310HL | User Manual - Page 19
) Regulatory guide User manual (optional) DC power adapter (Integrated) (optional) DC power adapter (Detachable) (optional) Power cable (Only provided with the detachable DC power adapter.) D-SUB cable (optional) HDMI cable (optional) HDMI-DVI cable (optional) Stand base Components - Samsung S24E310HL | User Manual - Page 20
Key Guide Move to RIGHT Move to LEFT Power LED Move to DOWN PRESS(Power on, Confirm selection) Return Icons Power LED Description This LED is power status indicator and works as Power on (Power button): Off Power saving mode: Blinking Power Off (Power button): On The power Indicator - Samsung S24E310HL | User Manual - Page 21
1 Preparations 1.2.2 Direct Key guide For guidance on shortcut keys, the OSD (On Screen Display) will appear if you press any button of [ activate the Auto Adjustment function. This function is only available in Analog mode. Press [ ] button: Display Function Key Guide. 21 1 Preparations - Samsung S24E310HL | User Manual - Page 22
Select [ ] by pressing the [ ] button on the function key guide screen. The OSD (On Screen Display) of your Monitor's feature appears. OSD control lock: Maintain the current settings, or Saver Mode is available. SETUP&RESET Power LED On is available. INFORMATION can be viewed. 22 1 Preparations - Samsung S24E310HL | User Manual - Page 23
variation, Function key guide options will be different. Please run the corresponding function based on the actual icon and description. When the monitor displays nothing (i.e. Power saving mode or Non in the slider. - Move to next depth. - Save the value and close Sublist. 23 1 Preparations - Samsung S24E310HL | User Manual - Page 24
on the product. Port About ports Connect to a source device using an HDMI cable. Connect to a PC using the D-SUB cable. Connects to the DC power adapter. 24 1 Preparations - Samsung S24E310HL | User Manual - Page 25
the table to protect the product and place the product onto the cloth so that the front of the product is facing downwards. Insert the stand head into the connection hole in the direction, as shown in the figure. Hold the main body of the product with your hand, as shown - Samsung S24E310HL | User Manual - Page 26
, pound the other fisted hand down onto the top of the stand base in the direction of the arrow to detach the stand base. Turn the connecting screw at the bottom of the stand base to separate it. Remove the stand neck from the stand base by pulling it in the direction of the arrow as - Samsung S24E310HL | User Manual - Page 27
parts may differ from what is shown. Specifications are subject to change without notice to improve quality. -2° (±2.0°) - 20° (±2.0°) You can adjust the tilt of your monitor. Hold the lower part of the product and adjust the tilt carefully. 27 1 Preparations - Samsung S24E310HL | User Manual - Page 28
1 Preparations 1.3.4 Installing a Wall-mount Kit or Desktop Stand Power the product off and remove the power cable from the power socket. 1 2 A A 3 4 B Attach the wall-mount kit or desktop stand here B Bracket (sold separately) Align the grooves and tightly fasten the screws on the bracket - Samsung S24E310HL | User Manual - Page 29
shape and locking method depend on the manufacturer. Refer to the user guide provided with your anti-theft locking device for details. The lock device -theft locking device can be purchased separately. Refer to the user guide provided with your anti-theft locking device for details. Anti-theft - Samsung S24E310HL | User Manual - Page 30
Before connecting a source device, read the user manual provided with it. The number and locations of ports on source devices may differ from device to device. Do not connect the power cable until all connections are completed. Connecting the power cable during connection may damage the product - Samsung S24E310HL | User Manual - Page 31
the back of the product and the HDMI port on the PC. 2 Connect the DC power adapter to the product and a power socket. Next, turn on the power switch on the PC. (For details, refer to "2.2.2 Connecting the Power".) 3 When the input source is not connected, use the [ ] button to change the input - Samsung S24E310HL | User Manual - Page 32
14V] port on the back of the product and to the power outlet. DC 14V The input voltage is switched automatically. Power connection using detachable DC power adapter Connect the power cable to the DC power adapter. Then, connect the DC power adapter to the [DC 14V] port on the back of the product - Samsung S24E310HL | User Manual - Page 33
. 2 Click "Windows Driver". 3 Follow the instructions given on the screen to proceed with installation. 4 Select your product model from the list of models. 5 Go to Display Properties and check that the resolution and refresh rate are appropriate. Refer to your Windows OS manual for further details - Samsung S24E310HL | User Manual - Page 34
2 Connecting and Using a Source Device 2.2.4 Setting Optimum Resolution An information message about setting optimum resolution will appear if you power on the product for the first time after purchase. Select a language on the product and change the resolution on your PC to the optimum setting. - Samsung S24E310HL | User Manual - Page 35
is not available when Eye Saver Mode is enabled. The functions available on the monitor may vary depending on the model. Refer to the actual product. 3.1.1 Configuring Brightness 1 When the Function Key Guide appears, select [ ] by pressing [ ] button on the DOME Type JOG Button. Next, press - Samsung S24E310HL | User Manual - Page 36
menu is not available when Game Mode is enabled. The functions available on the monitor may vary depending on the model. Refer to the actual product. 3.2.1 Configuring Contrast 1 When the Function Key Guide appears, select [ ] by pressing [ ] button on the DOME Type JOG Button. Next, press the - Samsung S24E310HL | User Manual - Page 37
menu is not available when Game Mode is enabled. The functions available on the monitor may vary depending on the model. Refer to the actual product. 3.3.1 Configuring Sharpness 1 When the Function Key Guide appears, select [ ] by pressing [ ] button on the DOME Type JOG Button. Next, press the - Samsung S24E310HL | User Manual - Page 38
of TÜV Rheinland "Low Blue Light Content" standards. The functions available on the monitor may vary depending on the model. Refer to the actual product. 3.4.1 Configuring Eye Saver Mode 1 When the Function Key Guide appears, select [ ] by pressing [ ] button on the DOME Type JOG Button. Next - Samsung S24E310HL | User Manual - Page 39
on the monitor may vary depending on the model. Refer to the actual product. 3.5.1 Configuring Game Mode 1 When the Function Key Guide appears, select ] button on the DOME Type JOG Button. When the monitor turns off, enters power-saving mode or changes input sources, Game Mode turns Off even - Samsung S24E310HL | User Manual - Page 40
Mode is enabled. The functions available on the monitor may vary depending on the model. Refer to the actual product. You can customize the brightness to suit your preferences. 3.6.1 Configuring SAMSUNG MAGIC Bright 1 When the Function Key Guide appears, select [ ] by pressing [ ] button on the - Samsung S24E310HL | User Manual - Page 41
this mode when the surroundings are bright. This also provides a sharp image. Movie: Select this mode when the surroundings are dark. This will save power and reduce eye fatigue. Custom: Select this mode when you want to adjust the image according to your preferences. 4 Move the focus to the - Samsung S24E310HL | User Manual - Page 42
3.7.1 Configuring SAMSUNG MAGIC Angle 1 When the Function Key Guide appears, monitor. The following screen will appear. PICTURE Brightness Contrast Sharpness Eye Saver Mode Game Mode SMAAMSGUINCG Bright SMAAMSGUINCG Angle 100 75 off 60 Lean Back ModeC1usto5m0 Lean Back Mode 2 O50ff Standing - Samsung S24E310HL | User Manual - Page 43
3 Screen Setup Group View: Select this option for more than one viewer to view from places ˝, ˠ and ˡ. Custom: Lean Back Mode 1 will be applied by default if Custom is selected. 4 Move the focus to the desired option by pressing [ ] button on the DOME Type JOG Button. Press [ ] button. 5 - Samsung S24E310HL | User Manual - Page 44
on the monitor may vary depending on the model. Refer to the actual product. 3.8.1 Configuring SAMSUNG MAGIC Upscale 1 When the Function Key Guide appears, select detail and vividness. PICTURE SMAAMSGUINCG Upscale Image Size HDMI Black Level H-Position V-Position Coarse Fine off Mode1 Mode2 - Samsung S24E310HL | User Manual - Page 45
3 Screen Setup 4 Move the focus to the desired option by pressing [ Press [ ] button. 5 The selected option will be applied. ] button on the DOME Type JOG Button. 45 3 Screen Setup - Samsung S24E310HL | User Manual - Page 46
on the monitor may vary depending on the model. Refer to the actual product. 3.9.1 Changing the Image Size 1 When the Function Key Guide appears, select picture displayed on screen. 50 50 2200 PICTURE Image Size HDMI Black Level Response Time H-Position V-Position Coarse Fine Auto Wide Choose - Samsung S24E310HL | User Manual - Page 47
ratio of the picture displayed on screen. PICTURE Image Size HDMI Black Level Response Time H-Position V-Position Coarse Fine 4:3 16:9 Screen The input signal is 480p, 576p, 720p, or 1080p and monitor can display normally (Not every model can support all of these signals.). This can only be set - Samsung S24E310HL | User Manual - Page 48
This function is only available in HDMI mode. The functions available on the monitor may vary depending on the model. Refer to the actual product. 3.10.1 Configuring the HDMI Black Level Settings 1 When the Function Key Guide appears, select [ ] by pressing [ ] button on the DOME Type JOG Button - Samsung S24E310HL | User Manual - Page 49
3 Screen Setup Normal: Select this mode when there is no contrast ratio degradation. Low: Select this mode to reduce the black level and increase the white level when there is a contrast ratio degradation. 4 Move the focus to the desired option by pressing [ ] button on the DOME - Samsung S24E310HL | User Manual - Page 50
Screen Setup 3.11 Response Time (S24E310HL / S27E310H) Accelerate the panel response rate to make video appear more vivid and natural. It is best to set Response Time to Standard or Faster when you are not viewing a movie. The functions available on the monitor may vary depending on the model - Samsung S24E310HL | User Manual - Page 51
to H-Position or V-Position and press [ ] button on the monitor. The following screen will appear. PICTURE SMAAMSGUINCG Upscale Image Size HDMI Black Level Response Time H-Position V-Position Coarse PICTURE Image Size HDMI Black Level Response Time H-Position V-Position Coarse Fine Off Wide Move - Samsung S24E310HL | User Manual - Page 52
Coarse Fine Off Wide Move the image displayed on the screen to the left or right. 50 50 2200 0 PICTURE SMAAMSGUINCG Upscale Image Size HDMI Black Level H-Position V-Position Coarse Fine Off Wide Move the image displayed on the screen up or down. 50 50 2200 0 4 Use the [ ] buttons to adjust - Samsung S24E310HL | User Manual - Page 53
available on the monitor may vary depending on the model. Refer to the actual product. 3.13.1 Adjusting Coarse 1 When the Function Key Guide appears, select [ Faster 50 50 2200 0 PICTURE SMAAMSGUINCG Upscale Image Size HDMI Black Level H-Position V-Position Coarse Fine Off Wide Adjust the - Samsung S24E310HL | User Manual - Page 54
on the monitor may vary depending on the model. Refer to the actual product. 3.14.1 Adjusting Fine 1 When the Function Key Guide appears, select . Faster 50 50 2200 0 PICTURE SMAAMSGUINCG Upscale Image Size HDMI Black Level H-Position V-Position Coarse Fine Off Wide Fine-tune the screen - Samsung S24E310HL | User Manual - Page 55
increase the intensity of the color. 4.1.1 Configuring Red 1 When the Function Key Guide appears, select [ ] by pressing [ ] button on the DOME Type JOG COLOR and press [ ] button on the monitor. ] button to move to Red and press [ ] button on the monitor. The following screen will appear. COLOR - Samsung S24E310HL | User Manual - Page 56
increase the intensity of the color. 4.2.1 Configuring Green 1 When the Function Key Guide appears, select [ ] by pressing [ ] button on the DOME Type and press [ ] button on the monitor. ] button to move to Green and press [ ] button on the monitor. The following screen will appear. COLOR Red - Samsung S24E310HL | User Manual - Page 57
increase the intensity of the color. 4.3.1 Configuring Blue 1 When the Function Key Guide appears, select [ ] by pressing [ ] button on the DOME Type JOG and press [ ] button on the monitor. ] button to move to Blue and press [ ] button on the monitor. The following screen will appear. COLOR Red - Samsung S24E310HL | User Manual - Page 58
the picture. 4.4.1 Configuring the Color Tone Settings 1 When the Function Key Guide appears, select [ ] by pressing [ ] button on the DOME Type and press [ ] button on the monitor. ] button to move to Color Tone and press [ ] button on the monitor. The following screen will appear. COLOR Red - Samsung S24E310HL | User Manual - Page 59
(Gamma) of the picture. 4.5.1 Configuring Gamma 1 When the Function Key Guide appears, select [ ] by pressing [ ] button on the DOME Type COLOR and press [ ] button on the monitor. ] button to move to Gamma and press [ ] button on the monitor. The following screen will appear. COLOR Red Green - Samsung S24E310HL | User Manual - Page 60
applied to other functions on your PC. 5.1.1 Configuring Language 1 When the Function Key Guide appears, select [ ] by pressing [ ] button on the DOME Type JOG Button press [ ] button on the monitor. ] button to move to Language and press [ ] button on the monitor. The following screen will appear - Samsung S24E310HL | User Manual - Page 61
or down. 5.2.1 Configuring Menu H-Position & Menu V-Position 1 When the Function Key Guide appears, select [ ] by pressing [ ] button on the DOME Type JOG Button on the monitor. 3 Press [ ] button to move to Menu H-Position or Menu V-Position and press [ ] button on the monitor. The following - Samsung S24E310HL | User Manual - Page 62
want the OSD menu to disappear. 5.3.1 Configuring Display Time 1 When the Function Key Guide appears, select [ ] by pressing [ ] button on the DOME Type JOG Button. [ ] button on the monitor. ] button to move to Display Time and press [ ] button on the monitor. The following screen will appear - Samsung S24E310HL | User Manual - Page 63
transparency for the menu windows. 5.4.1 Changing Transparency 1 When the Function Key Guide appears, select [ ] by pressing [ ] button on the DOME Type press [ ] button on the monitor. ] button to move to Transparency and press [ ] button on the monitor. The following screen will appear. MENU - Samsung S24E310HL | User Manual - Page 64
Settings (Reset All) 1 When the Function Key Guide appears, select [ ] by pressing [ ] on the monitor. ] button to move to Reset All and press [ ] button on the monitor. The following Power LED On Return all the settings for the product to the default factory settings. Off Acceleration Auto Stand - Samsung S24E310HL | User Manual - Page 65
[ ] button on the monitor. The following screen will appear. SETUP&RESET Reset All Eco Saving Plus Off Timer PC/AV Mode Key Repeat Time Source Detection Power LED On Off Auto Low High Adjust the power consumption of the product to save energy. Acceleration Auto Stand-by Off: Deactivate the - Samsung S24E310HL | User Manual - Page 66
Timer, then press the [ ] button on the monitor twice. The following screen will appear. SETUP&RESET Reset All Eco Saving Plus Off Timer PC/AV Mode Key Repeat Time Source Detection Power LED On Enable or disable the Off Timer. Off Acceleration Auto Stand-by Off Timer Off Timer Off Turn Off - Samsung S24E310HL | User Manual - Page 67
monitor. 6 The selected option will be applied. The off timer can be set within a range of 1 to 23 hours. The product will automatically power set to automatically activate 4 hours after the product powers on. This is done in accordance with power supply regulations. If you do not want the timer - Samsung S24E310HL | User Manual - Page 68
not support Analog mode. Supplied for the wide models only such as 16:9 or 16:10. If the monitor (when set to HDMI) is in power saving on the monitor may vary depending on the model. Refer to the actual product. 6.4.1 Configuring PC/AV Mode 1 When the Function Key Guide appears, select - Samsung S24E310HL | User Manual - Page 69
to move to Key Repeat Time and press [ ] button on the monitor. The following screen will appear. SETUP&RESET Reset All Eco Saving Plus Off Timer PC/AV Mode Key Repeat Time Source Detection Power LED On Configure the response rate of a button when the button Off is pressed. Acceleration 1 sec - Samsung S24E310HL | User Manual - Page 70
monitor may vary depending on the model. Refer to the actual product. 6.6.1 Configuring Source Detection 1 When the Function Key Guide monitor. The following screen will appear. SETUP&RESET Reset All Eco Saving Plus Off Timer PC/AV Mode Key Repeat Time Source Detection Power LED On Auto Manual - Samsung S24E310HL | User Manual - Page 71
the monitor may vary depending on the model. Refer to the actual product. 6.7.1 Configuring Power LED On 1 When the Function Key Guide Power LED On Set the status of the power LED. Off Working Auto Stand-by Working: The power LED is on when the product is turned on. Stand-by: The power - Samsung S24E310HL | User Manual - Page 72
View the current input source, frequency and resolution. The functions available on the monitor may vary depending on the model. Refer to the actual product. 7.1.1 Displaying INFORMATION 1 When the Function Key Guide appears, select [ ] by pressing [ ] button on the DOME Type JOG Button. Next - Samsung S24E310HL | User Manual - Page 73
7 INFORMATION Menu and Others 7.2 Configuring Brightness, Contrast and Sharpness from the Initial Screen When the shortcut button page is displayed, adjust the Brightness, Contrast and Sharpness settings from the initial screen using the DOME Type JOG Button. Brightness : This menu is not - Samsung S24E310HL | User Manual - Page 74
Box" enables users to use the monitor by partitioning multiple sections. 8.1.1 Installing the the Installation Wizard appears, click Next. 4 Follow the instructions given on the screen to proceed with installation. press the F5 key. Restrictions and Problems with the Installation ("Easy Setting Box - Samsung S24E310HL | User Manual - Page 75
8 Installing the Software 8.1.2 Removing the Software Click Start, select Settings/Control Panel, and then double-click Add or Remove Programs. Select "Easy Setting Box" from the program list and click the Add/Delete button. 75 8 Installing the Software - Samsung S24E310HL | User Manual - Page 76
9 Troubleshooting Guide 9.1 Requirements Before Contacting Samsung Customer Service Center 9.1.1 Testing the Product Before calling Samsung Customer Service Center, test your product as follows. If the problem persists, contact Samsung Customer Service Center. Check if your product is operating - Samsung S24E310HL | User Manual - Page 77
Troubleshooting Guide Screen issue Issues Solutions The power LED is off. The screen will not switch on. The message Check Signal Cable appears. Check that the power page 53) and Fine (page 54). Remove any accessories (video extension cable, etc page 86) in this manual and the INFORMATION menu on - Samsung S24E310HL | User Manual - Page 78
9 Troubleshooting Guide Issues There is no image on the screen and the power LED blinks every 0.5 to 1 second. Solutions The product is operating in power-saving mode. Press any key on the keyboard or move the mouse to return to normal operating mode. Source device issue Issues Solutions A - Samsung S24E310HL | User Manual - Page 79
Display Screen Resolution Advanced settings Monitor, and adjust Refresh rate under Monitor settings. Windows 10: Go to Settings System Display Advanced display settings Display adapter properties Monitor, and adjust Screen refresh rate under Monitor settings. 79 9 Troubleshooting Guide - Samsung S24E310HL | User Manual - Page 80
Power options or BIOS SETUP on the PC. Windows 10: Set power-saving mode in Settings Personalization Lock screen Screen timeout settings Power & sleep or BIOS SETUP on the PC. Refer to the user manual for your PC or graphics card for further instructions on adjustment. 80 9 Troubleshooting Guide - Samsung S24E310HL | User Manual - Page 81
Pixel Pitch Power Supply Dimensions (W x H x D) / Weight Without Stand With Stand VESA Mounting Interface data exchange between the monitor and PC system optimizes the monitor settings. Monitor installation takes place automatically www.samsung.com/recyclingdirect or call, (877) 278 - 0799 - Samsung S24E310HL | User Manual - Page 82
Pitch Power Supply Dimensions (W x H x D) / Weight Without Stand With Stand VESA Mounting data exchange between the monitor and PC system optimizes the monitor settings. Monitor installation takes place automatically www.samsung.com/recyclingdirect or call, (877) 278 - 0799 82 - Samsung S24E310HL | User Manual - Page 83
Pixel Pitch 0.2715 mm (H) x 0.2715 mm (V) 0.010689 Inches (H) x 0.010689 Inches (V) Power Supply AC 100 - 240 V ~ (+/- 10%), 50/60 Hz ± 3 Hz Dimensions (W x H x D) / Weight Without Stand With Stand VESA Mounting Interface Environmental considerations Operating Storage Refer to the label at - Samsung S24E310HL | User Manual - Page 84
mm (H) x 336.15 mm (V) 23.5 Inches (H) x 13.2 Inches (V) Pixel Pitch 0.3114 mm (H) x 0.3114 mm (V) 0.01226 Inches (H) x 0.01226 Inches (V) Power Supply AC 100 - 240 V ~ (+/- 10%), 50/60 Hz ± 3 Hz Dimensions (W x H x D) / Weight Without Stand With Stand VESA Mounting Interface Environmental - Samsung S24E310HL | User Manual - Page 85
PowerSaver Power Indicator Power Consumption (S19E310HY) Power Consumption (S22E310HY) Power Consumption (S22E310H) Power Consumption (S24E310HL) Power Consumption (S27E310H) Energy Star Power Consumption Off Typical 12.1 W Typical 20.6 W Typical 18.0 W Typical 18.9 W Typical 23.4 W Power saving - Samsung S24E310HL | User Manual - Page 86
does not support 85 Hz, change the vertical frequency to 60 Hz using the CDT monitor before you exchange it with the LCD monitor. Model Name Synchronization Resolution Horizontal Frequency Vertical Frequency Optimum Resolution Maximum Resolution S22E310HY / S22E310H / S24E310HL / S27E310H 30 - Samsung S24E310HL | User Manual - Page 87
70.069 75.029 60.000 59.790 Pixel Clock (MHz) 65.000 75.000 78.750 74.250 85.500 Sync Polarity (H/V) S22E310HY / S22E310H / S24E310HL / S27E310H Resolution IBM, 720 x 400 MAC, 640 x 480 MAC, 832 x 624 MAC, 1152 x 870 VESA, 640 x 480 VESA, 640 x 480 VESA, 640 x 480 VESA, 800 - Samsung S24E310HL | User Manual - Page 88
. Vertical Frequency Repeating the same picture dozens of times per second allows you to view natural pictures. The repeat frequency is called "vertical frequency" or "refresh rate" and is indicated in Hz. 88 10 Specifications - Samsung S24E310HL | User Manual - Page 89
to use because of another company's product. If customer requests instructions on how to use the network or another company's program. If customer requests software installation and setup for the product. If a service technician removes/cleans dusts or foreign materials inside of the product - Samsung S24E310HL | User Manual - Page 90
Appendix Correct Disposal Correct Disposal of This Product (Waste Electrical & Electronic Equipment) (Applicable in countries with separate collection systems) This marking on the product, accessories or literature indicates that the product and its electronic accessories (e.g. charger, headset, USB - Samsung S24E310HL | User Manual - Page 91
black and white. Changing the grey scale through Gamma adjustment will change the medium brightness on the screen. Scanning rate Scanning rate, or refresh rate, refers to the frequency of screen refreshes. Screen data is transmitted as it refreshes and displayed on the monitor screen. A horizontal - Samsung S24E310HL | User Manual - Page 92
resolution) and 1080 vertical lines (vertical resolution). Plug & Play The Plug & Play feature allows the automatic exchange of information between a monitor and PC to produce an optimum display environment. The monitor uses VESA DDC (international standard) to execute Plug & Play. 92 Appendix - Samsung S24E310HL | User Manual - Page 93
, 83, 84 Green 56 H HDMI Black Level 48 I Image Size 46 INFORMATION 72 Installation 25 K Key Repeat Time 69 L Language 60 O Off Timer 66 P Parts 20 PC/AV Mode 68 Power LED On 71 PowerSaver 85 Q Q & A 79 R Red 55 Requirements Before Contacting Samsung Customer Service Center 76 Reset All 64 Response - Samsung S24E310HL | User Manual - Page 94
Index S Safety Precautions 10 SAMSUNG MAGIC Angle 42 SAMSUNG MAGIC Bright 40 SAMSUNG MAGIC Upscale 44 Sharpness 37 Source Detection 70 Standard Signal Mode Table 86 T Terminology 91 Transparency 63 Index 94
-
 1
1 -
 2
2 -
 3
3 -
 4
4 -
 5
5 -
 6
6 -
 7
7 -
8
-
9
-
10
-
11
-
12
-
13
-
14
-
15
-
16
-
17
-
18
-
19
-
20
-
21
-
22
-
23
-
24
-
25
-
26
-
27
-
28
-
29
-
30
-
31
-
32
-
33
-
34
-
35
-
36
-
37
-
38
-
39
-
40
-
41
-
42
-
43
-
44
-
45
-
46
-
47
-
48
-
49
-
50
-
51
-
52
-
53
-
54
-
55
-
56
-
57
-
58
-
59
-
60
-
61
-
62
-
63
-
64
-
65
-
66
-
67
-
68
-
69
-
70
-
71
-
72
-
73
-
74
-
75
-
76
-
77
-
78
-
79
-
80
-
81
-
82
-
83
-
84
-
85
-
86
-
87
-
88
-
89
-
90
-
91
-
92
-
93
-
94
 |
 |

User manual
S19E310HY
S22E310HY
S22E310H
S24E310HL
S27E310H
The color and the appearance may differ depending on
the product, and the specifications are subject to
change without prior notice to improve the performance.
BN46-00452A-06