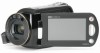
Samsung SC-HMX10 User Manual - Page 23
Installing The Button Type Battery, Using The Cradle
 |
UPC - 036725301849
View all Samsung SC-HMX10 manuals
Add to My Manuals
Save this manual to your list of manuals |
Page 23 highlights
INSTALLING THE BUTTON TYPE BATTERY Installing the button type battery in the remote control 1, Turn the battery holder counterclockwise (as indicated with (®) mark) using your fingernail or a coin to open it. The battery holder opens. 2, Insert the battery into the battery holder with the positive (+) terminal facing down and press it firmly until you hear a locking sound. 3, Place the battery holder back in the remote control, match its (®) mark with the (O) mark on the remote control, and turn the battery holder clockwise to lock it. Precautions regarding the button type battery ,, There is a danger of explosion if button type battery is incorrectly replaced. Replace only with the same or equivalent type. ,, Do not pick up the batten/using tweezers or other metal tools. This will cause a short circuit. ,, Do not recharge, disassemble, heat or immerse the battery in water, to avoid the risk of explosion. Z_ Keep the button type battery out of the reach of the children. WAR,,.SQhould any battery be swallowed, consult a doctor immediately. USING THE CRADLE The cradle is a connection plate which can be used to make the camcorder more stable when charging the battery, or connecting to an external device _ PC, etc.). If you connect your HD camcorder to the provided cradle o using more than one type of cable to output image, the order of priority of the output signal is as follows: USB cable -, Component/Multi AV cable. Do not connect the connection cables at the same time, it DC IN ja¢k ;: may cause conflict and may not work properly. If this occurs, remove all the connected cables and try the connection again. Cradle F receptacle ponoo ou,,, '°_ English 11
-
 1
1 -
2
-
3
-
4
-
5
-
6
-
7
-
8
-
9
-
10
-
11
-
12
-
13
-
14
-
15
-
16
-
17
-
 18
18 -
 19
19 -
 20
20 -
 21
21 -
 22
22 -
 23
23 -
 24
24 -
 25
25 -
 26
26 -
 27
27 -
 28
28 -
29
-
30
-
31
-
32
-
33
-
34
-
35
-
36
-
37
-
38
-
39
-
40
-
41
-
42
-
43
-
44
-
45
-
46
-
47
-
48
-
49
-
50
-
51
-
52
-
53
-
54
-
55
-
56
-
57
-
58
-
59
-
60
-
61
-
62
-
63
-
64
-
65
-
66
-
67
-
68
-
69
-
70
-
71
-
72
-
73
-
74
-
75
-
76
-
77
-
78
-
79
-
80
-
81
-
82
-
83
-
84
-
85
-
86
-
87
-
88
-
89
-
90
-
91
-
92
-
93
-
94
-
95
-
96
-
97
-
98
-
99
-
100
-
101
-
102
-
103
-
104
-
105
-
106
-
107
-
108
-
109
-
110
-
111
-
112
-
113
-
114
-
115
-
116
-
117
-
118
-
119
-
120
-
121
-
122
-
123
-
124
 |
 |
