Samsung SCH-A850 User Manual (user Manual) (ver.f6) (English) - Page 67
Adding a Contact - ringtones
 |
View all Samsung SCH-A850 manuals
Add to My Manuals
Save this manual to your list of manuals |
Page 67 highlights
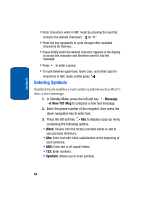
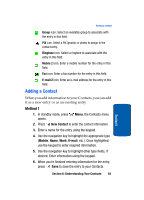
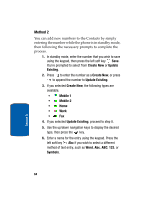
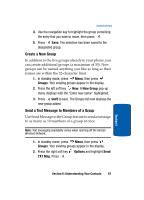
Adding a Contact Group icon. Select an available group to associate with the entry in this field. PIX icon. Select a PIX (graphic or photo) to assign to the contact entry. Ringtone icon. Select a ringtone to associate with the entry in this field. Mobile 2 icon. Enter a mobile number for the entry in this field. Fax icon. Enter a fax number for the entry in this field. E-mail 2 icon. Enter an e-mail address for the entry in this field. Adding a Contact When you add information to your Contacts, you can add it as a new entry or as an existing entry. Method 1 1. In standby mode, press Menu, the Contacts menu opens. 2. Press New Contact to enter the contact information. 3. Enter a name for the entry using the keypad. 4. Use the navigation key to highlight the appropriate type (Mobile, Home, Work, E-mail, etc.). Once highlighted, use the keypad to enter required information. 5. Use the navigation key to highlight other type fields, if desired. Enter information using the keypad. 6. When you're finished entering information for the entry, press Save to save the entry to your Contacts. Section 6: Understanding Your Contacts 63 Section 6
-
 1
1 -
2
-
3
-
4
-
5
-
6
-
7
-
8
-
9
-
10
-
11
-
12
-
13
-
14
-
15
-
16
-
17
-
18
-
19
-
20
-
21
-
22
-
23
-
24
-
25
-
26
-
27
-
28
-
29
-
30
-
31
-
32
-
33
-
34
-
35
-
36
-
37
-
38
-
39
-
40
-
41
-
42
-
43
-
44
-
45
-
46
-
47
-
48
-
49
-
50
-
51
-
52
-
53
-
54
-
55
-
56
-
57
-
58
-
59
-
60
-
61
-
 62
62 -
 63
63 -
 64
64 -
 65
65 -
 66
66 -
 67
67 -
 68
68 -
 69
69 -
 70
70 -
 71
71 -
 72
72 -
73
-
74
-
75
-
76
-
77
-
78
-
79
-
80
-
81
-
82
-
83
-
84
-
85
-
86
-
87
-
88
-
89
-
90
-
91
-
92
-
93
-
94
-
95
-
96
-
97
-
98
-
99
-
100
-
101
-
102
-
103
-
104
-
105
-
106
-
107
-
108
-
109
-
110
-
111
-
112
-
113
-
114
-
115
-
116
-
117
-
118
-
119
-
120
-
121
-
122
-
123
-
124
-
125
-
126
-
127
-
128
-
129
-
130
-
131
-
132
-
133
-
134
-
135
-
136
-
137
-
138
-
139
-
140
-
141
-
142
-
143
-
144
-
145
-
146
-
147
-
148
-
149
-
150
-
151
-
152
-
153
-
154
-
155
-
156
-
157
-
158
-
159
-
160
-
161
-
162
-
163
-
164
-
165
-
166
-
167
-
168
-
169
-
170
-
171
-
172
-
173
-
174
-
175
-
176
-
177
-
178
 |
 |
