Samsung SMH9187B User Manual (user Manual) (ver.1.0) (English) - Page 20
Using The Vent Buttons 5 Speed & On/off, Using The Light Hi/lo/off Button - manual
 |
UPC - 036725569317
View all Samsung SMH9187B manuals
Add to My Manuals
Save this manual to your list of manuals |
Page 20 highlights
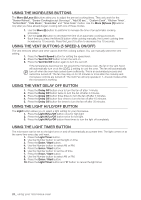
Using the More/Less buttons The More (9)/Less (1) buttons allow you to adjust the pre-set cooking times. They only work for the "Sensor Reheat", "Sensor Cooking(except Beverage)", "Add 30 sec.", "Custom Cook", "Kitchen Timer", "Soften/Melt", "Kids Meals", "Snack Bar" and "Time Cook" modes. Use the More (9)/Less (1) buttons only after you have already begun cooking with one of these modes. 1. Use the More (9) button to add time to increase the time of an automatic cooking procedure. 2. Use the Less (1) button to decrease the time of an automatic cooking procedure. • Each time you press the More (9) button while cooking manually, the current cooking time increases by 10 seconds. Press the Less (1) button to decrease it by 10 seconds. Using the Vent buttons (5 speed & on/off) The vent removes steam and other vapors from the cooking surface. You can manually select the vent setting. 1. Press the Vent 5 Speed button for setting the speed level. 2. Press the Vent On/Off button to turn the vent on. 3. Press the Vent On/Off button again to turn the vent off. If the temperature becomes too hot around the microwave oven, the fan in the vent hood will automatically turn on at the LEVEL 2 setting to cool the oven. The fan will automatically turn off when the oven has cooled down sufficiently. This is an automated process and cannot be turned off. The fan may stay on for 30 minutes or more after the cooktop and microwave controls are turned off. The Vent Fan will only operate in 1~4 levels modes while the microwave is working. Using the Vent delay off button 1. Press the Delay Off button once to turn the fan off after 1 minute. 2. Press the Delay Off button twice to turn the fan off after 3 minutes. 3. Press the Delay Off button three times to turn the fan off after 5 minutes. 4. Press the Delay Off button fiour times to turn the fan off after 10 minutes. 5. Press the Delay Off button five times to turn the fan off after 30 minutes. Using the Light hI/LO/off button The Light button allows you to select a light setting for your microwave. 1. Press the Light Hi/Lo/Off button once for high light. 2. Press the Light Hi/Lo/Off button twice for low light. 3. Press the Light Hi/Lo/Off button three times to turn the light off completely. Using the Light timer button The microwave can be set so the light turns on and off automatically at a preset time. The light comes on at the same time every day until reset. 1. Press the Light Timer button. 2. Use the Number button to set the light on time. 3. Press the Enter / Start button. 4. Use the Number button to select AM or PM. 5. Press the Enter / Start button. 6. Use the Number button to set the off time. 7. Press the Enter / Start button. 8. Use the Number button to select AM or PM. 9. Press the Enter / Start button. 10. Press the Light Timer button and "0" button to cancel the light timer. 20_ using your microwave oven
-
 1
1 -
2
-
3
-
4
-
5
-
6
-
7
-
8
-
9
-
10
-
11
-
12
-
13
-
14
-
 15
15 -
 16
16 -
 17
17 -
 18
18 -
 19
19 -
 20
20 -
 21
21 -
 22
22 -
 23
23 -
 24
24 -
 25
25 -
26
-
27
-
28
-
29
-
30
-
31
-
32
-
33
-
34
-
35
-
36
-
37
-
38
-
39
-
40
-
41
-
42
-
43
-
44
-
45
-
46
-
47
-
48
 |
 |
