Samsung SMH9207ST User Manual (user Manual) (ver.1.0) (English) - Page 40
Storing And Repairing Your Microwave Oven, Replacing The Cooktop/night Bulb, Replacing The Oven Bulb - filter
 |
View all Samsung SMH9207ST manuals
Add to My Manuals
Save this manual to your list of manuals |
Page 40 highlights
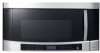
cleaning and maintaining your microwave oven Storing And Repairing Your Microwave Oven If you need to store your microwave oven for a short or extended period of time, choose a dust-free, dry location. Dust and dampness may adversely affect the ability of the microwave parts. Do not repair, replace or service any parts of your microwave oven yourself. Allow only a qualified WARNING service technician to perform repairs. If the oven is faulty and needs servicing, or you are in doubt about its condition, unplug the oven from the power outlet and contact your nearest service center. Do not use the oven if the microwave oven is damaged, in particular when the door or door seals are damaged. This could be a broken hinge, a worn out seal or distorted/bent casing. Do not remove the oven from its casing. This microwave oven is for home use only and is not intended for commercial use. Replacing The Cooktop/Night Bulb When replacing the cooktop/night light, make sure that you are wearing gloves to avoid injury from the WARNING heat of the bulb. 1. Unplug the oven or turn off the power at the main power supply. 2. Remove the bulb cover and mounting screw. 3. Replace bulb with 40 watt incandescent bulb. 4. Reassemble the bulb cover and mounting screw. 5 Turn the power back on at the main power supply. screw filter bulb cover bulb grease filter Replacing The Oven Bulb When replacing the oven light, make sure that you are wearing gloves to avoid injury from the heat of WARNING the bulb. 1. Unplug the oven or turn off the power at the main power supply. 2. Remove the two screws holding the top vent grille in place. 3. Next, remove the top vent grille. 4. Remove the bracket duct upper by remove screw. 5. Replace the bulb with a 40 watt incandescent bulb. 6. Reassemnbly by reverse. screw screw bracket duct upper bulb 40_ cleaning and maintaining your microwave oven top vent grille
-
 1
1 -
2
-
3
-
4
-
5
-
6
-
7
-
8
-
9
-
10
-
11
-
12
-
13
-
14
-
15
-
16
-
17
-
18
-
19
-
20
-
21
-
22
-
23
-
24
-
25
-
26
-
27
-
28
-
29
-
30
-
31
-
32
-
33
-
34
-
 35
35 -
 36
36 -
 37
37 -
 38
38 -
 39
39 -
 40
40 -
 41
41 -
 42
42 -
 43
43 -
 44
44 -
 45
45 -
46
-
47
-
48
 |
 |
