Samsung SMT-1722 User Guide - Page 14
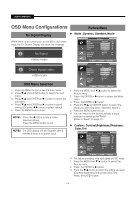
Setting up Your PC Software, Based on Windows XP, Display Modes
 |
UPC - 836164369482
View all Samsung SMT-1722 manuals
Add to My Manuals
Save this manual to your list of manuals |
Page 14 highlights
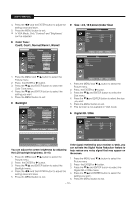
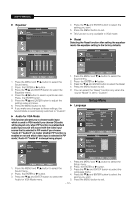
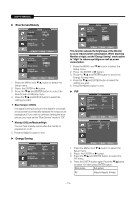
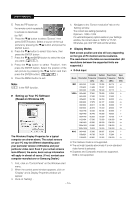
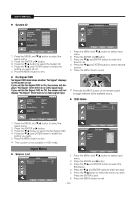
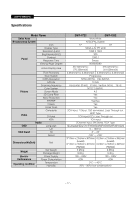
USER'S MANUAL Press the PIP button on the remote control repeatedly to activate or deactivate the "PIP". 5. Press the / button to select "Source", then press ENTER button. Select a source of the sub picture by pressing the / button and press the ENTER button. 6. Press the / button to select Size menu, then press the ENTER button . 7. Press the / and ENTER button to select the size you want ( ). 8. Press the / button to select "Position", then press the ENTER button. Select the position of the sub picture by pressing the / button and then press the ENTER button( ). 9. Press the MENU button to exit. Note: is the PBP function. Setting up Your PC Software (Based on Windows XP) The Windows Display Properies for a typical computer are shown above. The actual screens on your PC may be different depending upon your particular version of Windows and your particular video card. Even if your actual screens look different, the same, basic set-up information will apply in almost all cases. (If not, contact your computer manufacturer or Samsung Dealer.) 4. Navigate to the "Screen resolution" tab on the Setting window. The correct size setting (resolution): Optimum- 1280 x 1024 If a vertical-frequency option exists on your Settings window, the correct value is "60Hz" or "75 Hz". Otherwise, just click "OK" and exit the window. Display Modes Both screen position and size will vary depending on the type of PC monitor and its resolution. The resolutions in the table are recommended. (All resolutions between the supported limits are supported.) • D-Sub Input Mode Horizontal Vertical Pixel Clock Resolution Frequency Frequency Frequency (kHz) (Hz) (MHz) Sync Polarity (H/V) IBM 640×350 31.469 70.086 25.175 +/- 720×400 31.469 70.087 28.322 -/+ 640×480 31.469 59.940 25.175 -/- VESA 640×480 37.861 72.809 31.500 -/- 640×480 37.500 75.000 31.500 -/- 800x600 35.156 56.250 36.000 +-/+- 800×600 37.879 60.317 40.000 +/+ 800×600 48.077 72.188 50.000 +/+ 800×600 46.875 75.000 49.500 +/+ 1024×768 48.363 60.004 65.000 -/- 1024×768 56.476 70.069 75.000 -/- 1024×768 60.023 75.029 78.750 + /+ 1152×864 67.500 75.000 108.000 +/+ 1280×960 60.000 60.000 108.000 +/+ 1280x1024 63.981 60.020 108.000 +/+ 1280×1024 79.976 75.025 135.000 +/+ MAC 640×480 35.000 66.667 30.240 -/- 832x624 49.726 74.551 57.284 -/- 1152x870 68.681 75.062 100.000 +/+ The interlace mode is not supported. The set might operate abnormally if a non-standard video format is selected. Separate and Composite modes are supported. SOG is not supported. 1. First, click on "Control Panel" on the Windows start menu. 2. When the control panel window appears, click on "Display" and a Display Properies window will appear. 3. Click on "Setting" . - 14 -
-
 1
1 -
2
-
3
-
4
-
5
-
6
-
7
-
8
-
 9
9 -
 10
10 -
 11
11 -
 12
12 -
 13
13 -
 14
14 -
 15
15 -
 16
16 -
 17
17 -
 18
18
 |
 |