Samsung SMX-F50SN User Manual (user Manual) (ver.1.0) (English) - Page 101
Dubbing videos, DUBBING TO VCR OR DVD/HDD RECORDERS
 |
UPC - 036725303942
View all Samsung SMX-F50SN manuals
Add to My Manuals
Save this manual to your list of manuals |
Page 101 highlights
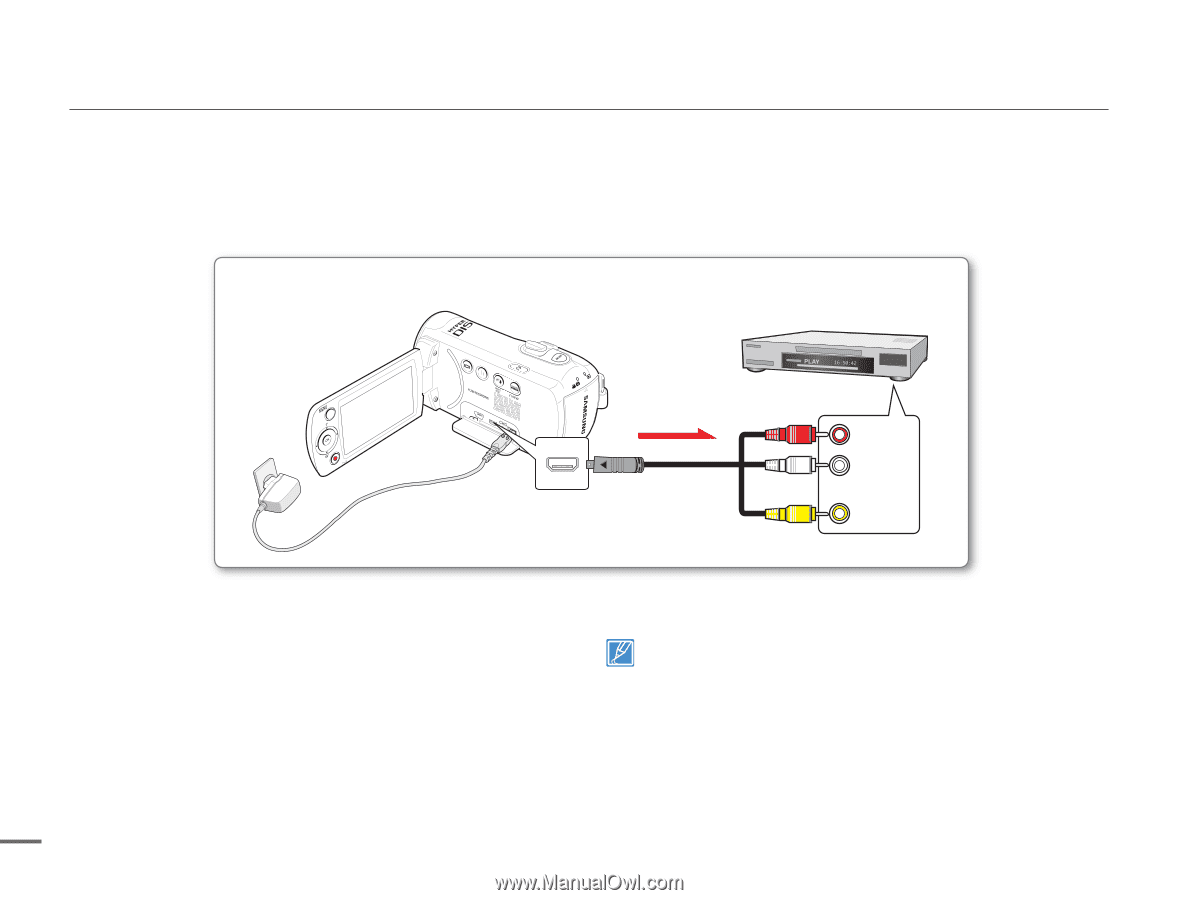
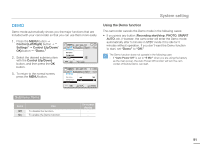
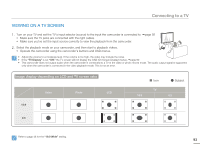
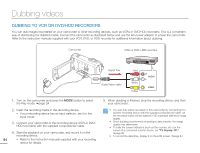
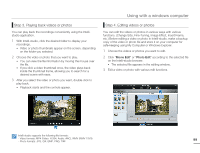
Dubbing videos DUBBING TO VCR OR DVD/HDD RECORDERS You can dub images recordered on your camcorder to other recording devices, such as VCRs or DVD/HDD recorders. This is a convenient way of distributing the dubbed media. Connect the camcorder as illustrated below and use the AC power adaptor to power the camcorder. Refer to the instruction manuals supplied with your VCR, DVD, or HDD recorder for additional information about dubbing. Camcorder VCRs or DVD/ HDD recorders Signal flow Red CARD R AUDIO L Audio/Video cable White VIDEO Yellow 1. Turn on the camcorder and press the MODE button to select the Play mode. page 24 2. Insert the recording media in the recording device. • If your recording device has an input selector, set it to the input mode. 3. Connect your camcorder to the recording device (VCR or DVD/ HDD recorders) with the supplied composite/AV cable. 4. Start the playback on your camcorder, and record it on the recording device. 94 • Refer to the instruction manuals supplied with your recording device for details. 5. When dubbing is finished, stop the recording device, and then your camcorder. • You can dub videos recorded on this camcorder by connecting it to another recording device with the supplied composite/AV cable. All the recorded videos will be dubbed in SD (standard definition) image quality. • Since dubbing is performed via analogue data transfer, the image quality may deteriorate. • To hide the screen indicators (such as the counter, etc.) on the screen of a connected monitor device, set "TV Display: Off." page 90 • To record the date/time, display it on the LCD screen. page 84
-
 1
1 -
2
-
3
-
4
-
5
-
6
-
7
-
8
-
9
-
10
-
11
-
12
-
13
-
14
-
15
-
16
-
17
-
18
-
19
-
20
-
21
-
22
-
23
-
24
-
25
-
26
-
27
-
28
-
29
-
30
-
31
-
32
-
33
-
34
-
35
-
36
-
37
-
38
-
39
-
40
-
41
-
42
-
43
-
44
-
45
-
46
-
47
-
48
-
49
-
50
-
51
-
52
-
53
-
54
-
55
-
56
-
57
-
58
-
59
-
60
-
61
-
62
-
63
-
64
-
65
-
66
-
67
-
68
-
69
-
70
-
71
-
72
-
73
-
74
-
75
-
76
-
77
-
78
-
79
-
80
-
81
-
82
-
83
-
84
-
85
-
86
-
87
-
88
-
89
-
90
-
91
-
92
-
93
-
94
-
95
-
 96
96 -
 97
97 -
 98
98 -
 99
99 -
 100
100 -
 101
101 -
 102
102 -
 103
103 -
 104
104 -
 105
105 -
 106
106 -
107
-
108
-
109
-
110
-
111
-
112
-
113
-
114
-
115
-
116
-
117
-
118
-
119
-
120
-
121
-
122
-
123
-
124
 |
 |