Samsung SPH-A660B User Manual (user Manual) (ver.f1) (English) - Page 30
End-of-Call Options, Saving a Phone Number, Phone Info, Add New Entry, Mobile, r, No Label
 |
View all Samsung SPH-A660B manuals
Add to My Manuals
Save this manual to your list of manuals |
Page 30 highlights
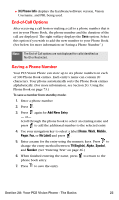
ⅷ (8) Phone Info displays the hardware/software version, Vision Username, and PRL being used. End-of-Call Options After receiving a call from or making a call to a phone number that is not in your Phone Book, the phone number and the duration of the call are displayed. The right softkey displays the Save option. Select this option if you wish to add the new number to your Phone Book. (See below for more information on"Saving a Phone Number".) Note: The End-of-Call options are not displayed for calls identified as No ID or Restricted. Saving a Phone Number Your PCS Vision Phone can store up to six phone numbers in each of 300 Phone Book entries. Each entry's name can contain 20 characters. Your phone automatically sorts the Phone Book entries alphabetically. (For more information, see Section 2G: Using the Phone Book on page 73.) To save a number from standby mode: 1. Enter a phone number. 2. Press . 3. Press again for Add New Entry. - or- Scroll through the phone book to select an existing name and press to add the additional number to the selected entry. 4. Use your navigation key to select a label (Home, Work, Mobile, Pager, Fax, or No Label) and press . 5. Enter a name for the entry using the numeric keys. Press to change the entry method between T9 (English), Alpha, Symbol, and Number. (See "Entering Text" on page 26.) 6. When finished entering the name, press to return to the phone book entry. 7. Press to save the entry. Section 2A: Your PCS Vision Phone - The Basics 22
-
 1
1 -
2
-
3
-
4
-
5
-
6
-
7
-
8
-
9
-
10
-
11
-
12
-
13
-
14
-
15
-
16
-
17
-
18
-
19
-
20
-
21
-
22
-
23
-
24
-
 25
25 -
 26
26 -
 27
27 -
 28
28 -
 29
29 -
 30
30 -
 31
31 -
 32
32 -
 33
33 -
 34
34 -
 35
35 -
36
-
37
-
38
-
39
-
40
-
41
-
42
-
43
-
44
-
45
-
46
-
47
-
48
-
49
-
50
-
51
-
52
-
53
-
54
-
55
-
56
-
57
-
58
-
59
-
60
-
61
-
62
-
63
-
64
-
65
-
66
-
67
-
68
-
69
-
70
-
71
-
72
-
73
-
74
-
75
-
76
-
77
-
78
-
79
-
80
-
81
-
82
-
83
-
84
-
85
-
86
-
87
-
88
-
89
-
90
-
91
-
92
-
93
-
94
-
95
-
96
-
97
-
98
-
99
-
100
-
101
-
102
-
103
-
104
-
105
-
106
-
107
-
108
-
109
-
110
-
111
-
112
-
113
-
114
-
115
-
116
-
117
-
118
-
119
-
120
-
121
-
122
-
123
-
124
-
125
-
126
-
127
-
128
-
129
-
130
-
131
-
132
-
133
-
134
-
135
-
136
-
137
-
138
-
139
-
140
-
141
-
142
-
143
-
144
-
145
-
146
-
147
-
148
-
149
-
150
-
151
-
152
-
153
-
154
-
155
-
156
-
157
-
158
-
159
-
160
-
161
-
162
-
163
-
164
-
165
-
166
-
167
-
168
-
169
-
170
-
171
-
172
-
173
-
174
-
175
-
176
-
177
-
178
-
179
-
180
-
181
-
182
-
183
-
184
-
185
-
186
-
187
-
188
-
189
-
190
 |
 |
