Samsung SW-208F User Manual (user Manual) (ver.1.0) (English) - Page 4
Installing the CD-R/RW Drive, Upgrading the Firmware Flash Memory, System Requirements, Your CD-R/RW - firmware download
 |
View all Samsung SW-208F manuals
Add to My Manuals
Save this manual to your list of manuals |
Page 4 highlights
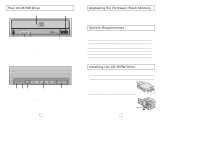
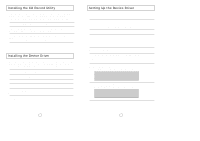
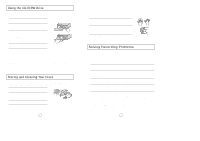
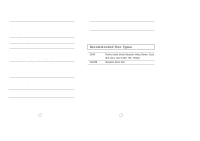
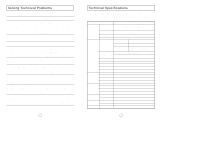
Your CD-R/RW Drive 5 6 1 23 4 1. Connector for stereo headphones with a 3.6 mm stereo mini-jack 2. Headphone volume control 3. Indicator light (when it is green, a disc is being read or recorded) 4. Disc compartment (the compartment opens and closes automatically when you press the Eject button) 5. Emergency eject hole (if the compartment does not open when you press the Eject button, power off the computer, insert a pin or unfolded paper clip in the hole and push firmly) 6. Eject button 123 4 5 1. Two-pin digital audio output terminal for use with a sound or MPEG card supporting digital audio features 2. Four-pin sound output terminal for use with a sound card (refer to the sound card documentation for further details) 3. Master/slave select terminal 4. Forty-pin host IDE interface connector 5. Four-pin power terminal 4 Upgrading the Firmware Flash Memory The product firmware can be upgraded by downloading the updated file from the following Web site: http://www.samsungelectronics.com System Requirements Before you install the CD-R/RW drive, we strongly recommend that you check that your setup meets the system requirements listed below. Item Computer Free expansion unit Disk space Windows version Description Intel Pentium II (or higher), 32 MB of RAM (or higher) with an IDE interface 5.25 inch 700 MB minimum Windows 95/98 OSR2 or Windows NT 4.0 (or higher) Installing the CD-R/RW Drive To install your CD-R/RW drive in the PC, proceed as follows. 1 Make sure that the PC is powered off and disconnected from any power source. 2 If necessary, attach a horizontal bracket to both sides of the drive. q Use of the brackets depends on your computer model; you can purchase these accessories separately from your computer dealer. 3 Remove the cover from a free expansion slot and install the CD-R/RW drive, as shown in the illustration. q If you have no free expansion slot, install the drive in place of the diskette drive. CD-R/RW drive 5
-
 1
1 -
 2
2 -
 3
3 -
 4
4 -
 5
5 -
 6
6 -
 7
7 -
 8
8 -
 9
9 -
 10
10 -
11
-
12
-
13
-
14
-
15
-
16
-
17
-
18
-
19
-
20
-
21
-
22
-
23
-
24
-
25
-
26
-
27
-
28
-
29
-
30
-
31
 |
 |
