Samsung TE310 User Manual - Page 2
Specifications, Other Information - review
 |
View all Samsung TE310 manuals
Add to My Manuals
Save this manual to your list of manuals |
Page 2 highlights
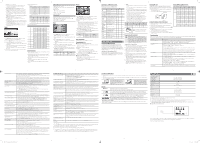
xxPTP devices are not supported. xxIf an over-power warning message is displayed while you are connecting or using a USB device, the device may not be recognized or may malfunction. xxIf the TV has no input during the time period set in Auto Protection Time, the Screensaver will run. xxIf you use a USB extension cable, the TV may not recognize the USB device or may not be able to read the files on the device. xxIf a USB device connected to the TV is not recognized, the list of files on the device is corrupted, or a file in the list is not played, connect the USB device to a PC, format the device, and check the connection. xxIf a file you deleted from the PC is still found when you run Media Play, use the "Empty the Recycle Bin" function on the PC to permanently delete the file. xxPhotos only supports the sequential jpeg format. xxThe Videos option does not support the scene search and thumbnail functions. xxIf the number of files and folders saved on a USB storage device is over approximately 4000, the files and folders may not appear and some folders may not open. xxThe maximum displayed number of files, including sub folders, in one folder of USB storage device is 2000. xxThe media may not be playing smoothly when using the device lower than USB 2.0. Videos Movie 01.avi ► 00:04:03 / 00:07:38 1/1 yySupported Subtitle Formats -- External Name MPEG-4 timed text SAMI SubRip SubViewer Micro DVD SubStation Alpha Advanced SubStation Alpha -- Internal Name Xsub SubStation Alpha Advanced SubStation Alpha SubRip MPEG-4 Timed text Container AVI MKV MKV MKV MP4 File extension .ttxt .smi .srt .sub .sub or .txt .ssa .ass Format Picture Format Text Format Text Format Text Format Text Format yySupported Video Formats File Extension Container Video Codec Divx3.11/4.12/ 5.x/6.0 *.mp4 MP4 H264 VC-1 Resolution 1920x1080 1920x1080 1920x1080 Frame Bit Audio rate(fps) rate(Mbps) Codec 6~30 6~30 6~30 20Mbps 20Mbps 20Mbps MP3 / ADPCM / AAC MJPEG 640x480 6~30 10Mbps "*.avi *.mkv" "AVI MKV" Divx3.11/4.12/ 5.x/6.0 MPEG 1/2/4 H264 MJPEG 1920x1080 1920x1080 1920x1080 640x480 6~30 6~30 6~30 6~30 20Mbps 20Mbps 20Mbps 10Mbps MP3 / AC3 / LPCM / ADPCM / DTS SUM E Pause L Jump T Tools R Return 1. In the Media Play menu, press the ◄ or ► button to select Videos, and then press the ENTERE button. 2. Press the buttons to select a video in the file list. 3. Press the ENTERE button or � (Play) button. -- The file name is displayed on the top of the screen with the playing time. -- If video time information is unknown, playing time and the progress bar are not displayed. "*.asf *.wmv" "*.ts *.trp *.tp "*.dat *.mpg *.mpeg *.vob" *.3gp ASF TS PS 3GPP Divx 3.11/4.12/ 5.x/6.0 MPEG 1/2/4 H.264 MPEG2 -TS H. 264 MPEG1 MPEG2 H. 264 MPEG 1/2/4 H.264 1920x1080 1920x1080 1920x1080 1920x1080 1920x1080 1920x1080 1920x1080 1920x1080 1920x1080 1920x1080 6~30 6~30 6~30 6~30 6~30 6~30 6~30 6~30 6~30 6~30 -- During video playback, you can search using the ◄ and ► buttons. *.flv flash formats H.264 Sorenson H.263 1920x1080 1920x1080 6~30 6~30 ✎✎ In this mode, you can play movie clips contained in a game, but you cannot play the game itself. Other Restrictions 20Mbps 20Mbps 20Mbps 20Mbps 20Mbps 20Mbps 20Mbps 20Mbps 20Mbps 20Mbps 20Mbps 20Mbps MP3 / AC3 / LPCM / ADPCM / WMA / WMA Pro AC3 / AAC / MP3 / DD+ AC3 / MPEG / LPCM / AAC MP3 MP3 yyVideo content will not play, or not play correctly, if there is an error in the content or the container. yySound or video may not work if the contents have a standard bit rate/ frame rate above the compatible Frame/sec listed in the Supported Video Formats table. yyIf the Index Table erroneous, the Seek (Jump) function is not supported. yyThe menu may take longer to appear if the video's bit rate exceeds 10Mbps. yyVideo content can not be played if there are many contents in one file. Video Decoder Supports up to H.264, Level 4.1 H.264 FMO / ASO / RS, VC1 SP / MP / AP L4 and AVCHD are not supported. MPEG4 SP, ASP : - Below 1280 x 720: 60 frame max - Above 1280 x 720: 30 frame max H.263 is not supported. GMC is not support. Audio Decoder Supports up to WMA7, 8, 9 STD, 9 PRO, 10 PRO WMA 9 PRO and WMA 10 PRO support 5.1 channel. (LBR mode of WMA Pro is not supported) WMA Lossless is not supported. Music I Love You Jhon 1st Album Pop 2010 4.2MB 01:10 / 04:02 Playlist 3/15 I Love you Jhon Music 1 No Singer Music 2 No Singer Music 3 No Singer Music 4 No Singer Music 5 No Singer SUM E Pause L Jump T Tools R Return Photos Normal Image1024.jpg 1024x768 2010/2/1 3/15 E Pause L Previous/Next T Tools R Return SUM 1. In the Media Play menu, press the ◄ or ► button to select Photos, then press the ENTERE button. 2. Press the buttons to select a photo in the file list. 3. Press the ENTERE button or � (Play) button. ✎✎ NOTE xxWhile a photo list is displayed, press the � (Play) / ENTERE button on the remote control to start a slide show. xxAll files in the file list section will be displayed in the slide show. xxDuring the slide show, files are displayed in order. xxDuring the slide show, you can adjust the slide show speed using (π) (REW) or (µ) (FF) button. xxYou can move to other files using ◄ or ► button. ✎✎ Media Play can play Music files automatically during a Slide Show if Background Music is set to On. ✎✎ You cannot change the Mode in Background Music until the Background Music file has finished loading. yySupported Photo Formats 1. In the Media Play menu, press the ◄ or ► button to select Music, and then press the ENTERE button. 2. Press the buttons to select the desired Music in the file list. 3. Press the ENTERE button or � (Play) button. ✎✎ During music playback, you can search using the ◄ and ► button. ✎✎ � (REW) and μ (FF) buttons do not function during play. ✎✎ Media Play only displays files with MP3 and PCM file extension. Other file extensions are not displayed, even if they are saved on the same USB device. ✎✎ If the sound is abnormal when playing MP3 files, adjust the Equalizer in the Sound menu. (An over-modulated MP3 file may cause a sound problem.) yySupported Music file Formats File Extension *.mp3 *.wav Type MPEG wav Codec MPEG1 Audio Layer 3 wav Image JPEG Photo Base-line Progressive Resolution 15360 x 8704 1024 x 768 Other Restrictions yyCMYK, YCCK Color space JPEG are not supported. Playing Multiple Files ■■Playing selected video/music/photo files 1. On the File List screen, highlight a file, and then press the Yellow button on your remote. 2. Repeat Step 1 to select multiple files. ✎✎ NOTE xxA c mark appears to the left of the selected files. xxTo cancel a selection, press the Yellow button again. xxTo deselect all selected files, press the TOOLS button, select Deselect All, and then the ENTERE button. 3. Press the TOOLS button, select Play Selected Contents, and then press the ENTERE button. ■■Playing a video/music/photo folder 1. With the folders on your USB device displayed, use the buttons to highlight a folder. 2. Press the TOOLS button, select Play Folder, and then press the ENTERE button. Media Play - Additional Functions ■■Videos/Music/Photos Play Option menus When playing a file, press the TOOLS button. Category Operation Videos Title You can select another video file to play directly. c Repeat Mode You can play movie and music files repeatedly. c Picture Size You can adjust the picture size to your preference. c Picture Mode You can adjust the picture setting. c Sound Mode You can adjust the sound setting. c Subtitle Setting You can play the video with Subtitles. This function only works if the subtitles have the same file c name as the video. Audio Format You can select the digital audio output format. c Audio Language You can change the audio language if the video has more than one language. c Stop Slide Show / Start Slide Show You can start or stop a Slide Show. Slide Show You can select the slide show Speed speed during the slide show. Background Music You can set and select background music when watching a Slide Show. Zoom You can zoom into images in full screen mode. Rotate You can rotate images in full screen mode. Information You can see detailed information about the played file. c Music c c c Photos c c c c c c c c Other Information Installing the Wall Mount Kit The wall mount kit allows you to mount the TV on the wall. For detailed information about installing the wall mount, see the instructions provided with the wall mount items. Contact a technician for assistance when installing the wall mount bracket. Samsung Electronics is not responsible for any damage to the product or injury to yourself or others if you elect to install the wall mount on your own. Wall Mount Kit Specifications (VESA) Install your wall mount on a solid wall perpendicular to the floor. When attaching to other building materials, please contact your nearest dealer. If you install the TV on a ceiling or slanted wall, it may fall and result in severe personal injury. ✎✎ NOTE xxStandard dimensions for wall mount kits are shown in the table below. xxDo not use screws that do not comply with the VESA standard screw specifications. xxDo not use screws that are longer than the standard dimension or do not comply with the VESA standard screw specifications. Screws that are too long may cause damage to the inside of the TV set. xxFor wall mounts that do not comply with the VESA standard screw specifications, the length of the screws may differ depending on the wall mount specifications. xxDo not fasten the screws too firmly. This may damage the product or cause the product to fall, leading to personal injury. Samsung is not liable for these kinds of accidents. xxSamsung is not liable for product damage or personal injury when a non-VESA or non-specified wall mount is used or the consumer fails to follow the product installation instructions. xxDo not mount the TV at more than a 15 degree tilt. xxAlways have two people mount the TV on a wall. Product Family Models VESA screw hole specs Standard (A * B) in millimeters Screw Quantity LED-TV LT24E310ND 75.0 * 75.0 M4 4 Do not install your Wall Mount Kit while your TV is turned on. It may result in personal injury due to electric shock. Securing the TV to the Wall Caution: Pulling, pushing, or climbing onto the TV may cause the TV to fall. In particular, ensure that your children do not hang over or destabilize the TV; doing so may cause the TV to tip over, resulting in serious injuries or death. Follow all safety precautions provided on the included Safety Flyer. For added stability, install the antifall device for safety purposes, as follows. To prevent the TV from falling ✎✎ Since the necessary brackets, screws, and string or cable are not supplied, please purchase these separately. 1. Insert the screws into the wall brackets and firmly fasten them to the wall. Make sure the screws are firmly fixed to the wall. ✎✎ We strongly recommend you drive the screws into a stud. 2. Using screws, insert the screws through the TV brackets, and then fasten the screws to the top VESA screw holes on the back of the TV. 3. Connect the brackets on the TV and the brackets on the wall with a strong string or cable, and then tie the string or cable tightly to the brackets. ✎✎ Verify all connections are properly secured. Periodically check the connections for any sign of fatigue or failure. If you have any doubt about the security of your connections, contact a professional installer. ✎✎ Install the TV close to the wall so that it does not fall. ✎✎ Connect the string or cable so that the brackets on the wall are at the same height or lower than the brackets on the TV. Untie the string or cable before moving the TV. ✎✎ To purchase a TV Holder kit, contact Samsung customer care. Kensington Lock The Kensington Lock is not supplied by Samsung. It is a device used to physically fix the system when using it in a public place. Refer to the manual provided with the Kensington Lock for additional information on proper use. ✎✎ Please find a "K" icon on the rear of the TV. The Kensington slot is beside the "K" icon. ✎✎ The position and color may differ depending on the model. Display Modes (HDMI/DVI Input) Optimal resolution: 1366 x 768 pixels Mode Resolution Horizontal Vertical Pixel Clock Sync Polarity Frequency (KHz) Frequency (Hz) Frequency (MHz) (H / V) IBM 720 x 400 31.469 70.087 28.322 -/+ 640 x 480 35.000 66.667 30.240 -/- MAC 832 x 624 49.726 74.551 57.284 -/- 640 x 480 31.469 59.940 25.175 -/- 1 640 x 480 37.861 72.809 31.500 -/- 640 x 480 37.500 75.000 31.500 -/- 800 x 600 37.879 60.317 40.000 +/+ 800 x 600 48.077 72.188 50.000 +/+ VESA DMT 800 x 600 46.875 75.000 49.500 +/+ 1024 x 768 48.363 60.004 65.000 -/- To lock the product, follow these steps: 1024 x 768 56.476 70.069 75.000 -/- 1. Wrap the Kensington lock cable around a large, stationary object such as desk or chair. 2. Slide the end of the cable with the lock attached through the looped end of the Kensington lock cable. 1024 x 768 60.023 75.029 78.750 +/+ 1280 x 720 45.000 60.000 74.250 +/+ 1366 x 768 47.712 59.790 85.500 +/+ 3. Insert the locking device into the Kensington slot on the product 1. 4. Lock the lock. ✎✎ These are general instructions. For exact instructions, see the User manual supplied with the locking device. ✎✎ The locking device has to be purchased separately. ✎✎ The location of the Kensington slot may be different depending on the TV model. Troubleshooting If the TV seems to have a problem, first review this list of possible problems and solution. If none of these troubleshooting tips apply, visit samsung.com, then click on Support, or call Samsung customer service at 1-800-SAMSUNG. Problem Flickering and Dimming Component Connections / Screen Color Screen Brightness Unwanted Powering off Stand Installation Possible Solution If your Samsung Television is flickering or dimming sporadically, you may need to disable some of its energy efficient features like the Energy Saving feature. Follow the steps below with your remote to turn these features off or on. yy Energy saving : MENU → Setup → Eco Solution → Energy Saving →Select Settings If you find that the color on your Samsung television's screen is not correct or black and white, first run a Self Diagnosis Test on the TV to make sure there are no device issues. yy Self Diagnosis : MENU → Support → Self Diagnosis → Picture Test yy If the test is ok, try making sure ; yy Your connections are all consistent. For example, if you've used the AV In jack on your TV, make sure you have used the AV Out jack on your video source. yy Try making sure you have connected to the correct jacks. For example, if you use the Component jacks, labeled Pb, Pr, and Y, to connect your TV and video source, make sure you have connected the blue Pb jack on the video source to the blue Pb jack on the TV, the red Pr jack on the source to the red Pr jack on the TV. If you find that the colors on your Samsung TV are correct but just a little too dark or bright, there are some settings you should check before calling for a repair. yy Backlight, Contrast, Brightness, Sharpness, Color, Tint (G/R) and so on. Go to "Picture" in the Menu, and then try adjusting these options. If your Samsung TV appears to turn off by itself, there may be an issue with either your Timer settings or your Eco friendly No Signal Power Off feature. First make sure the Sleep Timer is not accidentally set. The Sleep Timer lets you fall asleep with the TV still on knowing that it will turn off after a certain period of time and not waste energy. yy Sleep Timer : MENU → Setup → Time → Sleep Timer If the Sleep Timer is not activated, you may have engaged the No Signal Power Off or Auto Power Off feature. yy No Signal Power Off : MENU → Setup → Eco Solution → No Signal Power yy Auto Power Off : MENU → Setup → Eco Solution → Auto Power Off yy If you have any trouble in assembling the stand, refer to "Install the Stand" in the Wall Mount & Stand Quick setup guide. - 9 - Trouble Powering On Cannot find a channel Poor Picture The TV image does not look as good as it did in the store. The picture is distorted: macroblock error, small block, dots, pixelization. Color is wrong or missing. There is poor color or brightness. There is a dotted line on the edge of the screen. The picture is black and white. When changing channels, the picture freezes or is distorted or delayed. Sound Problems There is no sound or the sound is too low at maximum volume. The picture is good, but there is no sound. The speakers are making an inappropriate noise. No Picture, No Video The TV will not turn on. The TV turns off automatically. There is no picture/video. Before you turn the TV on, find the red light on the right or left bottom of your TV. Press the power on button on the TV or remote and the light should blink about 5 times before the TV turns on. If you find that you are having trouble powering on your Samsung television, there are a number of things to check it before making a call to the service department. If you're sure your power cord, remote control, and PC are functioning properly, you may be having a cable issue. If you have a cable or satellite box, your TV may appear to be off because the cable or satellite box is not outputting a signal. To test the signal output of your cable or satellite box, press the guide or info button on the cable or satellite box remote control. If the screen displays the guide or info data, the problem is caused by the box. • Re-run Plug & Play or run Auto Program. (go to MENU - Channel - Auto Program) First, perform the Picture Test and to see if your TV is displaying the test image properly. Go to MENU - Support - Self Diagnosis - Picture Test If the test image is properly displayed, the poor picture may be caused by the source or signal. • If you have an analog cable/satellite box, upgrade to a digital set top box. Use HDMI or Component cables to deliver HD (high definition) picture quality. • Cable/Satellite subscribers: Try HD channels from the channel line up. • Air/Cable Antenna connection: Try HD channels after running Auto Program. ✎✎ Many HD channels broadcast up scaled SD (Standard Definition) content. The picture quality of up scaled SD content is low. • Adjust the Cable/Set top box video output resolution to 1080i or 720p. • Compression of video contents may cause picture distortion, especially on fast moving pictures such as those in sports and action movies. • A weak signal can cause picture distortion. This is not a TV problem. • Mobile phones used close to the TV (within 3.3ft) may cause noise in the picture on analog and digital channels. • If you're using a component connection, make sure the component cables are connected to the correct jacks. Incorrect or loose connections may cause color problems or a blank screen. • Adjust the Picture options in the TV menu. (go to Picture Mode / Color / Brightness / Sharpness) • Adjust the Energy Saving option in the TV menu. (go to MENU - Setup - Eco Solution - Energy Saving ) • Try resetting the picture to the default picture settings. (go to MENU - Picture - Picture Reset) • If the picture size is set to Screen Fit, change it to 16:9. • Change the cable/satellite box resolution. • If you are using an AV composite input, connect the video cable (yellow) to the Green jack of Component on the TV. • If connected to a cable box, please try to reset it. (Reconnect the AC cord and wait until the cable box reboots. It may take up to 20 minutes) • Set the output resolution of the cable box to 1080i or 720p. Perform the Sound Test to confirm that your TV audio is properly operating. (go to MENU - Support - Self Diagnosis - Sound Test) If the audio is OK, the sound problem may be caused by the source or signal. • Check the volume of the device (Cable/Sat Box, DVD, Blu-ray, etc.) connected to your TV. • If you are using an external device, check the device's audio output option Ex. you may need to change your cable box's audio option to HDMI if the box is connected to your TV using an HDMI cable. • Reboot the connected device by reconnecting the device's power cable. • Check the cable connections. Make sure a video cable is not connected to an audio input. • For Antenna or Cable connections, check the signal information. A weak signal may cause sound distortion. • Perform the Sound Test as explained above. • Make sure the AC power cord is securely plugged into the wall outlet and the TV. • Make sure the wall outlet is working. • Try pressing the POWER button on the TV to make sure the problem is not the remote. If the TV turns on, refer to 'Remote control does not work' below. • Ensure the Sleep Timer is set to Off in the Time menu. • If your PC is connected to the TV, check your PC power settings. • Make sure the AC power cord is plugged securely into the wall outlet and the TV. • When you are watching TV connected to an antenna or cable connection, the TV will turn off after 10 - 15 minutes if there is no signal. • Check the cable connections. (Remove and reconnect all cables connected to the TV and external devices). • Set your external device's (Cable/Sat Box, DVD, Blu-ray etc) video outputs to match the connections to the TV input. For example, if an external device's output is HDMI, it should be connected to an HDMI input on the TV. • Make sure your connected devices are powered on. • Be sure to select the correct input source by pressing the SOURCE button on the remote control. • Reboot the connected device by reconnecting the device's power cable. - 10 - RF (Cable/Antenna) Connection The TV is not receiving all channels. No Caption on digital channels. • Make sure the coaxial cable is connected securely. • Run Auto Program to add available channels to the channel list. go to MENU - Channel - Auto program then select Auto and make sure the correct Cable TV signal type is set in the menu. There are 3 options. (STD, HRC and IRC) • Verify the antenna is positioned correctly. • Check the Caption Setup menu. Try changing Caption Mode Service 1 to CC1. • Some channels may not have caption data. The picture is distorted: macroblock, error, small block, dots, pixelization. Others • Compression of video contents may cause picture distortion, especially on fast moving pictures such as those in sports and action movies. • A weak signal can cause picture distortion. This is not a TV problem. Purple/green rolling horizontal bars and • Remove the left and right audio connections from the set-top-box. If the buzzing stops, this indicates that the setbuzzing noise from the TV speakers with top-box has a grounding issue. Replace the Component video cables with an HDMI connection. Component cable connection. The picture will not display in full screen. The remote control does not work. The cable/set top box remote control does not turn the TV on or off, or adjust the volume. • HD channels will have black bars on either side of the screen when displaying up scaled SD (4:3) contents. • Black bars on the top and bottom appear when movies that have aspect ratios different from your TV play on the TV. • Adjust the picture size option on your external device or change the TV to full screen. • Replace the remote control's batteries. Make sure you insert them with the polarity (+/-) correct . • Clean the transmission window located on the top of the remote control. • Try pointing the remote directly at the TV from 5~6 feet away. • Program the Cable/Set top box remote control to operate the TV. Refer to the Cable/Set top box user manual for the SAMSUNG TV code. A "Mode Not Supported" message appears. • Check the supported resolution of the TV and adjust the external device's output resolution accordingly. Refer to resolution settings in this manual. Caption on the TV menu is greyed out. • You cannot select Caption in the TV menu when watching content from a device connected via HDMI or Component. • Caption must be activated on the external device. There is a plastic smell from the TV. TV Signal Strength is unavailable in the Self Diagnosis Test menu. TV is tilted to the right or left side. • This smell is normal and will dissipate in a few days. • This function is only available for digital channels received through an Antenna / RF/Coax connection. • Remove the stand base from the TV and reassemble it. The Channel menu is grey out (unavailable). • The Channel menu is only available when you select the TV source. Your settings are lost after 5 minutes or every time the TV is turned off. • If TV is in the Store Demo mode, it will reset audio and picture settings every 5 minutes. Please change from Store Demo mode to Home Use mode using the Plug & Play procedure. Press the SOURCE button to select TV mode, go to MENU → Setup → Plug & Play → ENTERE. You have intermittent loss of audio or video. • Check the cable connections and reconnect them. • Loss of audio or video can be caused by using overly rigid or thick cables. Make sure the cables are flexible enough for long term use. If mounting the TV to the wall, we recommend using cables with 90 degree connectors. You see small particles when you look closely at the edge of the frame of the TV. • This is part of the product's design and is not a defect. • POP (TV's internal banner ad) appears on the screen. • Select Home Use under Plug & Play mode. For details, refer to Plug & Play (Initial Setup). ✎✎ This TFT LED panel uses a panel consisting of sub pixels which require sophisticated technology to produce. However, there may be a few bright or dark pixels on the screen. These pixels will have no impact on the performance of the product. ✎✎ Watch these troubleshooting on video at www.samsung.com/spsn. ✎✎ Some functions and pictures shown in this manual are available on specific models only. ✎✎ You can keep your TV in optimum condition by upgrading it with the latest firmware from the Samsung web site (samsung.com → Support → Downloads). To upgrade, download the firmware to your computer, copy the firmware file to a USB memory stick, insert the USB memory stick into the TV's USB slot, and then select Support > Software Upgrade in the TV's menu. - 11 - Storage and Maintenance ✎✎ If a sticker was attached to the TV screen, some debris can remain after you remove the sticker. Please clean it before watching the TV. ✎✎ The exterior and screen of the product can get scratched during cleaning. Be sure to wipe the exterior and screen carefully using a soft cloth to prevent scratches. Do not spray water directly onto the product. Any liquid that goes into the product may cause a failure, fire, or electric shock. Clean the product with a soft cloth dampened with in a small amount of water. Do not use a flammable liquid (e.g. benzene, thinners) or a cleaning agent. License Manufactured under license from Dolby Laboratories. Dolby and the double-D symbol are trademarks of Dolby Laboratories. For DTS patents, see http://patents.dts.com. Manufactured under license from DTS Licensing Limited. DTS, the Symbol, & DTS and the Symbol together are registered trademarks, and DTS 2.0 Channel is a trademark of DTS, Inc. © DTS, Inc. All Rights Reserved. For DTS patents, see http://patents.dts.com. Manufactured under license from DTS Licensing Limited. DTS, the Symbol, DTS in combination with the Symbol, and DTS Studio Sound are registered trademarks or trademarks of DTS, Inc. in the United States and/or other countries. © DTS, Inc. All Rights Reserved. The terms HDMI and HDMI High-Definition Multimedia Interface, and the HDMI Logo are trademarks or registered trademarks of HDMI Licensing LLC in the United States and other countries. Open Source License Notice Open Source used in this product can be found on the following webpage. (http://opensource.samsung.com) Open Source License Notice is written only English. - 12 - Specifications Environmental Considerations Operating Temperature Operating Humidity Storage Temperature Storage Humidity Model Name Display Resolution Screen Size (Diagonal) Sound Output Dimensions (W x H x D) Body With stand Weight Without Stand With Stand 50°F to 104°F (10°C to 40°C) 10% to 80%, non-condensing -4°F to 113°F (-20°C to 45°C ) 5% to 95%, non-condensing LT24E310ND 1366 x 768 24" Class (23.6" measured diagonally) 5 W x 2 22.1 x 13.4 x 2.1 inches (561.1 x 340.0 x 52.3 mm) 22.1 x 14.8 x 4.9 inches (561.1 x 376.1 x 123.3 mm) 7.7 lbs (3.5 kg) 8.4 lbs (3.8 kg) ✎✎ Design and specifications are subject to change without prior notice. ✎✎ This device is a Class B digital apparatus. ✎✎ For information about the power required and more about power consumption, refer to the label attached to the product. ✎✎ Typical power consumption is measured according to Energy Star Program requirements for televisions. ✎✎ Dispose unwanted electronics through an approved recycler. To find the nearest recycling location, go to our website: www. samsung.com/recyclingdirect or call, (877) 278-0799. ■■JACK PANEL DETAIL / REAR VIEW B NOTE: All drawings are not necessarily to scale. Some dimensions are subject to change without prior notice. Refer to the dimensions prior to performing installation of your TV. Not responsible for typographical or printed errors. © 2016 Samsung Electronics America, Inc TE310_ZA_BN68-08158A-02_ENG.indb 2 - 13 - - 14- - 15 - - 16 - 2016-11-01 오후 5:00:15
-
 1
1 -
 2
2
 |
 |
