Samsung WF337AAL User Manual (ENGLISH) - Page 9
Important Note To Installer
 |
View all Samsung WF337AAL manuals
Add to My Manuals
Save this manual to your list of manuals |
Page 9 highlights
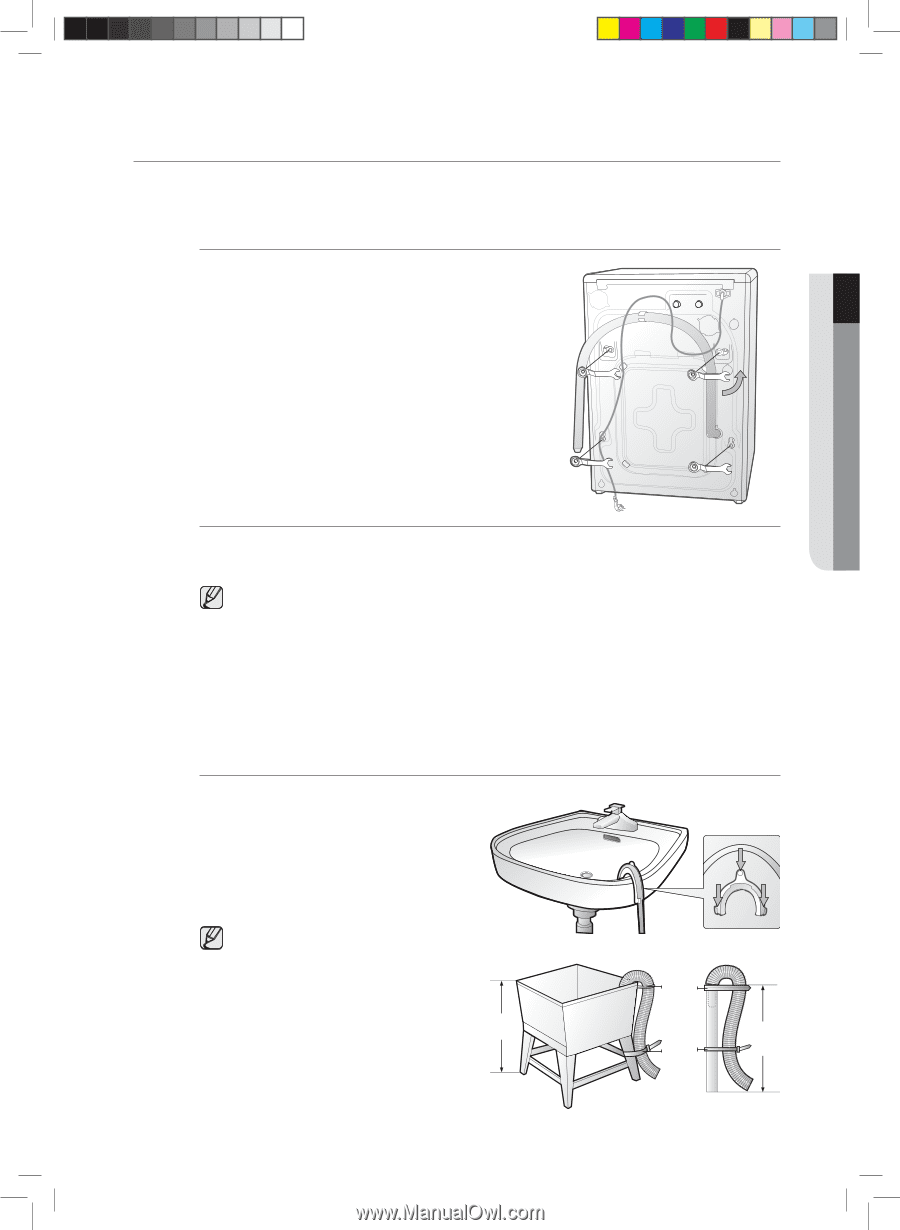
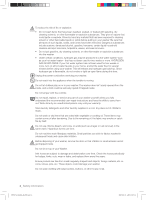
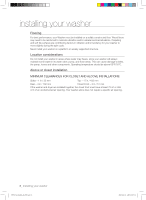
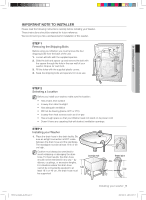
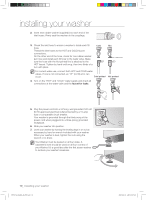
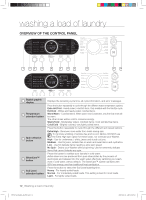
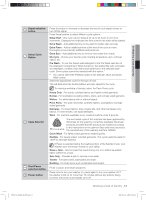
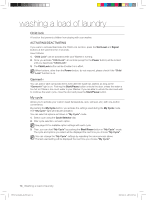
01 Installing your washer IMPORTANT NOTE TO INSTALLER Please read the following instructions carefully before installing your Washer. These instructions should be retained for future reference. We recommend you hire a professional for installation of this washer. STEP 1 Removing the Shipping Bolts Before using your Washer, you must remove the four shipping bolts from the back of the unit. 1. Loosen all bolts with the supplied spanner. 2. Slide the bolt and spacer up and remove the bolt with the spacer through the hole in the rear wall of your washer. Repeat for each bolt. 3. Fill the holes with the supplied plastic covers. 4. Keep the shipping bolts and spacers for future use. STEP 2 Selecting a Location Before you install your washer, make sure the location: • Has a hard, level surface • Is away from direct sunlight • Has adequate ventilation • Will not be freezing (below 32°F or 0°C) • Is away from heat sources such as oil or gas • Has enough space so that your Washer need not stand on its power cord • Doesn't have any carpeting that will obstruct ventilation openings. STEP 3 Installing your Washer 1. Place the drain hose in the drain facility. Be sure an airtight connection is NOT made between the drain hose and the standpipe. The standpipe must be at least 18 in or 46 cm high. Caution must always be exercised to avoid collapsing or damaging the drain hose. For best results, the drain hose should not be restricted in any way - by elbows, couplings, or excessive lengths. For situations where the drain hose 96" Max cannot be conveniently elevated to at 18" Min least 18 in or 46 cm, the drain hose must be supported. Laundry tub Stand pipe Hose retainer Tie strap 96" Max 18" Min WF337A-02440A-06_EN.indd 9 Installing your washer _9 2007-08-10 ¿ÀÈÄ 2:07:37
-
 1
1 -
2
-
3
-
 4
4 -
 5
5 -
 6
6 -
 7
7 -
 8
8 -
 9
9 -
 10
10 -
 11
11 -
 12
12 -
 13
13 -
 14
14 -
15
-
16
-
17
-
18
-
19
-
20
-
21
-
22
-
23
-
24
-
25
-
26
-
27
-
28
-
29
-
30
-
31
-
32
-
33
-
34
-
35
-
36
-
37
-
38
-
39
-
40
-
41
-
42
-
43
-
44
-
45
-
46
-
47
-
48
-
49
-
50
-
51
-
52
-
53
-
54
-
55
-
56
-
57
-
58
-
59
-
60
-
61
-
62
-
63
-
64
-
65
-
66
-
67
-
68
-
69
-
70
-
71
-
72
-
73
-
74
-
75
-
76
-
77
-
78
-
79
-
80
-
81
-
82
-
83
-
84
-
85
-
86
-
87
-
88
 |
 |