Sanyo DP42861 Internet Guide 0.2Mb - Page 4
Wireless Lan Connection - remote
 |
View all Sanyo DP42861 manuals
Add to My Manuals
Save this manual to your list of manuals |
Page 4 highlights
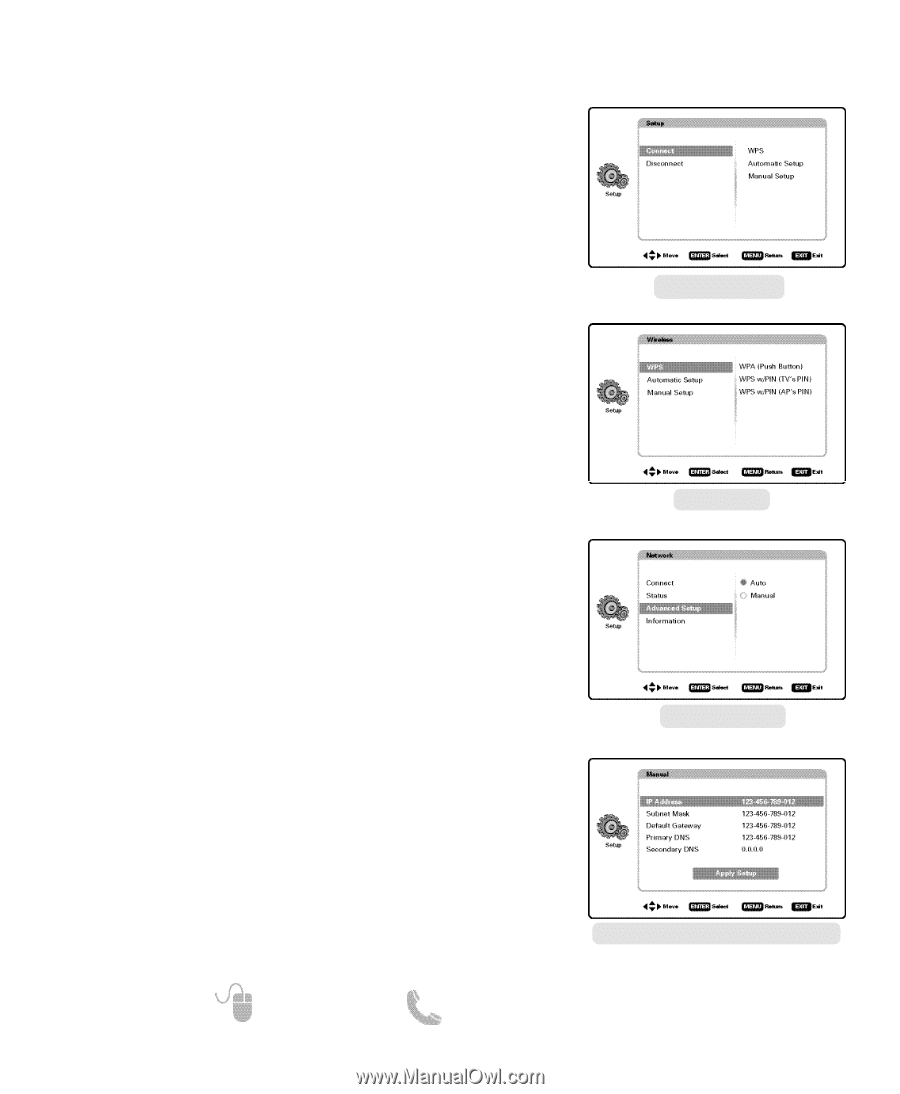
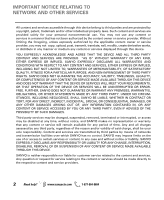
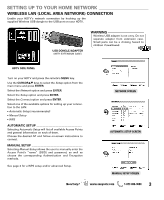
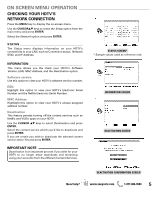
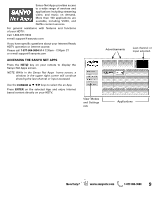
SETTING UP TO YOUR HOME NETWORK WIRELESS LAN CONNECTION (CONTINUED) WPS WPS (Push Button) If your Access Point has the Push Button feature, select the WPS (Push Button) option and press ENTER. Follow the on-screen instructions to enable and search for the "activated" Access Point. WPS with HDTV's PIN Use this option if you need to enter the HDTV's PIN into the Access Point you wish to connect to. Follow the on-screen instructions to connect to the desired Access Point. CONNECT SCREEN WPS with Access Point's PIN Select this option to search for an available Access Point from your LAN. Choose the desired Access Point, if the AP is protected (locked) you will need to enter its PIN using the remote's NUMERIC keys. NOTE: The Access Point with stronger signal appears higher in the list. Follow the on-screen instructions to connect to the desired Access Point. WPS SCREEN ADVANCED SETUP The Advanced Setup menu allows the user to manually enter the values for IP Address, Subnet Mask, Default Gateway, and DNS Server. Press the MENU key to open up the on-screen menu. Use the CURSORLM keys to select the Setup option from the main menu and press ENTER. Select the Network option and press ENTER. Select the Advanced Setup option and press ENTER. Choose the setting you wish to adjust and press ENTER. Use the remote control's NUMERIC keys to enter the desired value. Select Apply Setup and press ENTER to establish a connection using the applied values. NETWORK SCREEN 4 Need help? www.sanyoctv.com ADVANCED SETUP (MANUAL) SCREEN * * Sample values used as reference only 1-877-864-9604
-
 1
1 -
 2
2 -
 3
3 -
 4
4 -
 5
5 -
 6
6 -
 7
7 -
 8
8 -
 9
9 -
 10
10 -
11
-
12
-
13
-
14
-
15
-
16
-
17
-
18
-
19
-
20
-
21
-
22
-
23
-
24
-
25
-
26
-
27
-
28
 |
 |