Sanyo PDG DSU21 Instruction Manual, PDG-DSU21B - Page 30
Order Replacement Lamp - pdg dsu21b
 |
View all Sanyo PDG DSU21 manuals
Add to My Manuals
Save this manual to your list of manuals |
Page 30 highlights
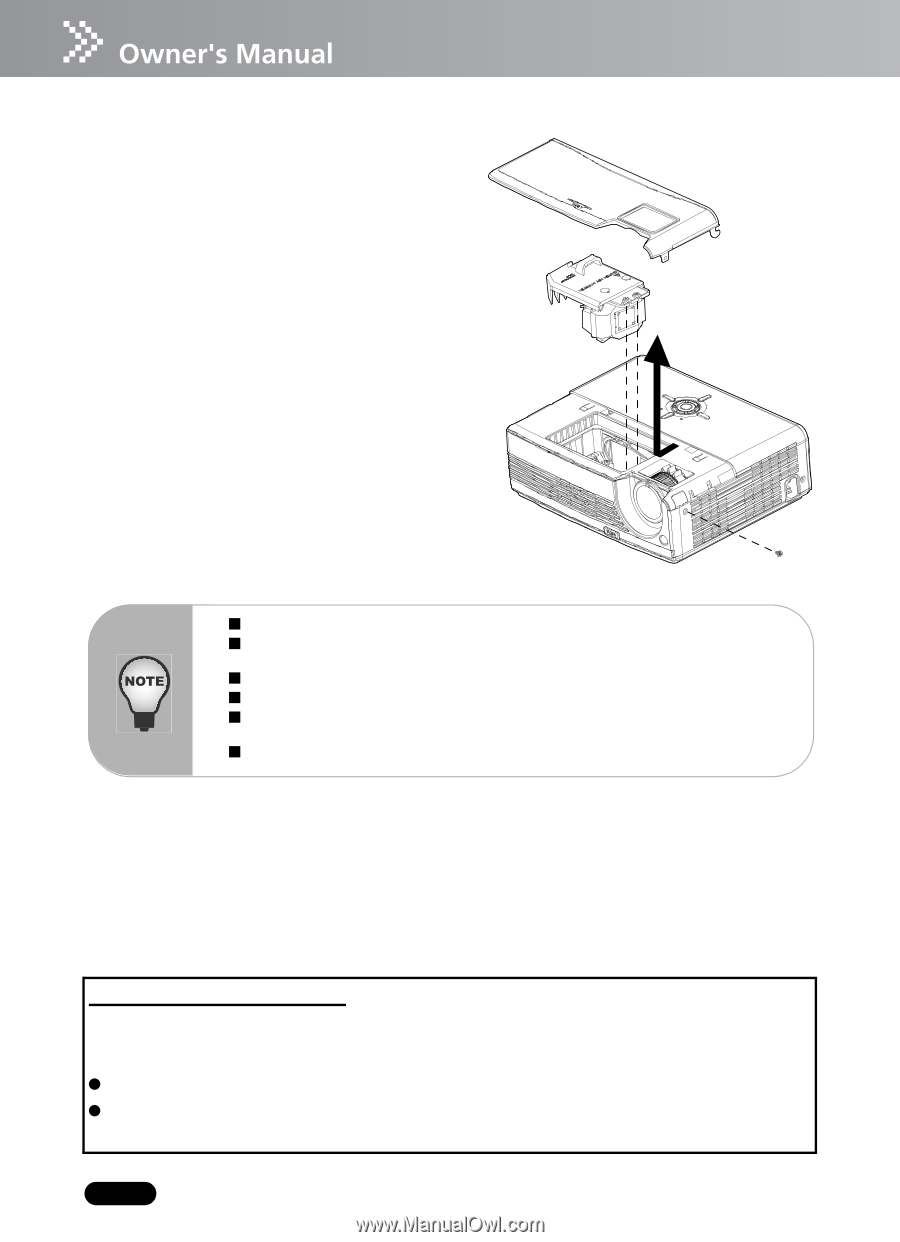
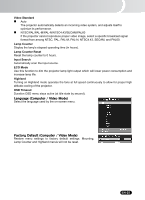
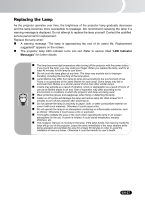
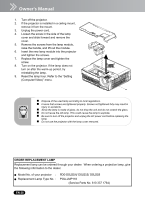
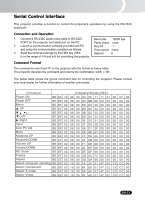
1. Turn off the projector. 2. If the projector is installed in a ceiling mount, remove it from the mount. 3. Unplug the power cord. 4. Loosen the screw in the side of the lamp cover and slide forward and remove the cover. 5. Remove the screws from the lamp module, raise the handle, and lift out the module. 6. Insert the new lamp module into the projector and tighten the screws. 7. Replace the lamp cover and tighten the screw. 8. Turn on the projector. If the lamp does not turn on after the warm-up period, try reinstalling the lamp. 9. Reset the lamp hour. Refer to the "Setting (Computer/Video)" menu. „ Dispose of the used lamp according to local regulations. „ Ensure that screws are tightened properly. Screws not tightened fully may result in injury or accidents. „ Since the lamp is made of glass, do not drop the unit and do not scratch the glass. „ Do not reuse the old lamp. This could cause the lamp to explode. „ Be sure to turn off the projector and unplug the AC power cord before replacing the lamp. „ Do not use the projector with the lamp cover removed. ORDER REPLACEMENT LAMP Replacement lamp can be ordered through your dealer. When ordering a projection lamp, give the following information to the dealer. Q Model No. of your projector : Q Replacement Lamp Type No. : PDG-DSU21N/ DSU21E/ DSU21B POA-LMP118 (Service Parts No. 610 337 1764) EN-28
-
 1
1 -
2
-
3
-
4
-
5
-
6
-
7
-
8
-
9
-
10
-
11
-
12
-
13
-
14
-
15
-
16
-
17
-
18
-
19
-
20
-
21
-
22
-
23
-
24
-
 25
25 -
 26
26 -
 27
27 -
 28
28 -
 29
29 -
 30
30 -
 31
31 -
 32
32 -
 33
33 -
 34
34 -
 35
35 -
36
-
37
-
38
 |
 |