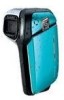
Sanyo VPC E1 Instruction Manual, VPC-E1090 - Page 32
Using Macro Mode, Setting the Flash Mode, Using the Zoom in/out Function
 |
UPC - 086483067532
View all Sanyo VPC E1 manuals
Add to My Manuals
Save this manual to your list of manuals |
Page 32 highlights
English 20 Getting Started Using Macro Mode Macro mode is designed for close-up photography and can capture all detail even when your subject is very close to the camera. Press the LEFT/MACRO navigation button. The Macro icon displays on the LCD screen. Macro mode range: 10-70cm(Wide) 35-70cm(Tele) Setting the Flash Mode You can choose from 4 flash modes to suit various lighting conditions. Press the UP/FLASH /DELETE navigation button to scroll through the four modes on the LCD screen. The flash setting remains the same for subsequent photos until you change it as described above. Auto flash: The flash fires automatically when needed. Flash off: The flash is turned off. Fill flash: The flash always fires. Anti Red-eye: The flash fires twice so as to reduce the red-eye effect. Using the Zoom in/out Function The camera comes equipped with 3x optical zoom and 5x digital zoom that allows you to zoom in on your subject. To use the zoom: 1. Press the right side of the ZOOM button T to zoom in on your subject. 2. Press the left side of the ZOOM button W to zoom out from your subject. Using the Self-timer and Burst Photography The camera comes equipped with a self-timer which allows you to take photos after a predefined delay. The burst photography feature allows you to take multiple consecutive photos by pressing and holding the SHUTTER button. The multi-burst photography feature allows you to take multiple (16) consecutive VGA photos by pressing the SHUTTER button once. Taking your First Photo
-
 1
1 -
2
-
3
-
4
-
5
-
6
-
7
-
8
-
9
-
10
-
11
-
12
-
13
-
14
-
15
-
16
-
17
-
18
-
19
-
20
-
21
-
22
-
23
-
24
-
25
-
26
-
 27
27 -
 28
28 -
 29
29 -
 30
30 -
 31
31 -
 32
32 -
 33
33 -
 34
34 -
 35
35 -
 36
36 -
 37
37 -
38
-
39
-
40
-
41
-
42
-
43
-
44
-
45
-
46
-
47
-
48
-
49
-
50
-
51
-
52
-
53
-
54
-
55
-
56
-
57
-
58
-
59
-
60
-
61
-
62
-
63
-
64
-
65
-
66
-
67
-
68
-
69
-
70
 |
 |
