Schwinn 431 Elliptical Assembly Manual - Page 11
Step 2 Install front stabilizer and Extrusion Assembly - instructions
 |
View all Schwinn 431 Elliptical manuals
Add to My Manuals
Save this manual to your list of manuals |
Page 11 highlights
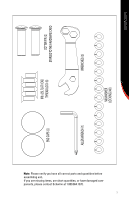
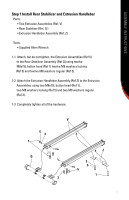
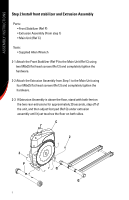
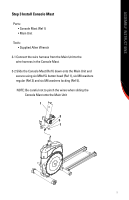
ASSEMBLY INSTRUCTIONS Step 2 Install front stabilizer and Extrusion Assembly Parts: • Front Stabilizer (Ref P) • Extrusion Assembly (From step 1) • Main Unit (Ref C) Tools: • Supplied Allen Wrench 2-1 Attach the Front Stabilizer (Ref P) to the Main Unit (Ref C) using two M8x25 flat head screws (Ref 2) and completely tighten the hardware. 2-2 Attach the Extrusion Assembly from Step 1 to the Main Unit using four M8x25 flat head screws (Ref 2) and completely tighten the hardware. 2-3 If Extrusion Assembly is above the floor, stand with both feet on the two rear extrusions for approximately 20 seconds, step off of the unit, and then adjust foot pad (Ref Q) under extrusion assembly until it just touches the floor on both sides. C 2 2 P 8 Q Q
-
 1
1 -
2
-
3
-
4
-
5
-
 6
6 -
 7
7 -
 8
8 -
 9
9 -
 10
10 -
 11
11 -
 12
12 -
 13
13 -
 14
14 -
 15
15 -
 16
16 -
17
-
18
-
19
-
20
-
21
-
22
 |
 |
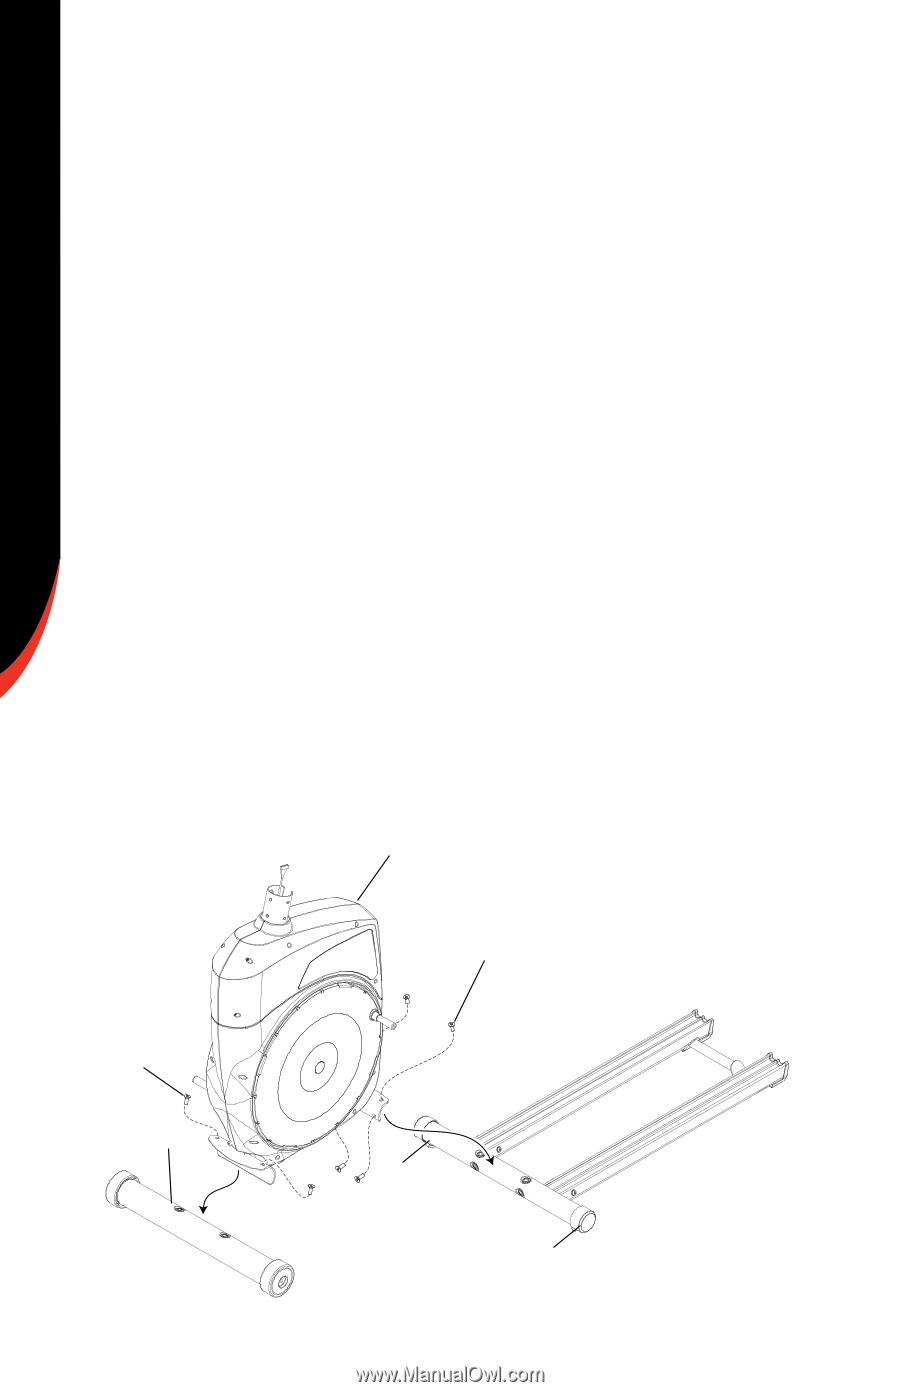
ASSEMBLY INSTRUCTIONS
8
Step 2 Install front stabilizer and Extrusion Assembly
Parts:
• Front Stabilizer (Ref P)
• Extrusion Assembly (From step 1)
• Main Unit (Ref C)
Tools:
• Supplied Allen Wrench
2-1 Attach the Front Stabilizer (Ref P) to the Main Unit (Ref C) using
two M8x25 flat head screws (Ref 2) and completely tighten the
hardware.
2-2 Attach the Extrusion Assembly from Step 1 to the Main Unit using
four M8x25 flat head screws (Ref 2) and completely tighten the
hardware.
2-3
If Extrusion Assembly is above the floor, stand with both feet on
the two rear extrusions for approximately 20 seconds, step off of
the unit, and then adjust foot pad (Ref Q) under extrusion
assembly until it just touches the floor on both sides.
C
P
2
2
Q
Q