Schwinn Airdyne AD6 Assembly and Owner's Manual - Page 9
Remove Hardware and Install Batteries into Console, Connect Cables and Attach the Console Support
 |
View all Schwinn Airdyne AD6 manuals
Add to My Manuals
Save this manual to your list of manuals |
Page 9 highlights
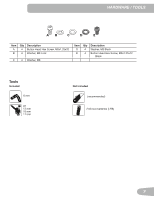
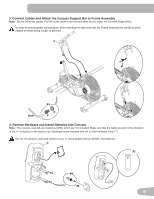
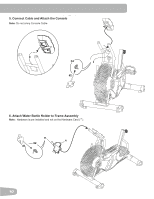
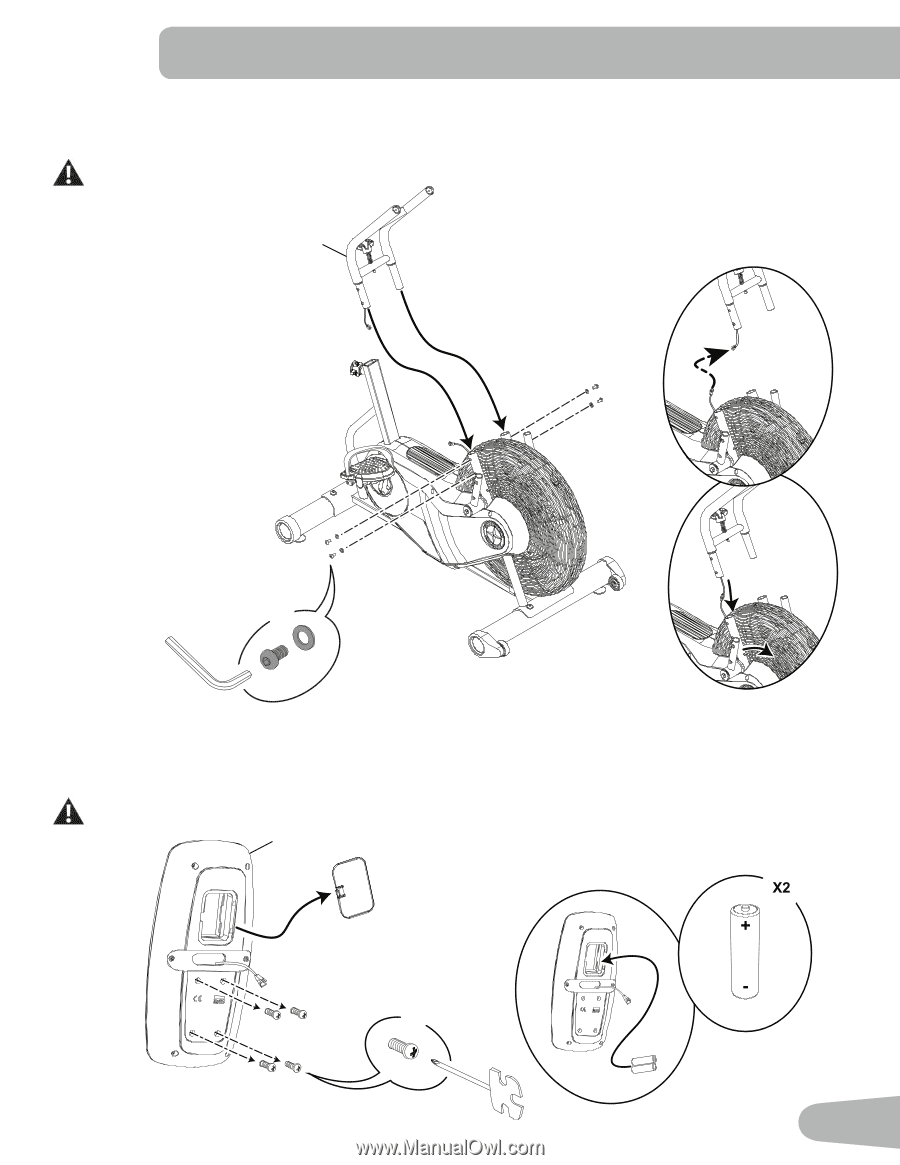
3. Connect Cables and Attach the Console Support Bar to Frame Assembly Note: Do not crimp the cables. Pull the lower cable to remove any slack as you insert the Console Support Bar. In order to avoid possible serious injury, when inserting the tube ends into the Frame Assembly be careful to avoid fingers or hands being caught or pinched. 2 6mm X4 D E 4. Remove Hardware and Install Batteries into Console Note: The console uses AA size batteries (LR6), which are not included. Make sure that the batteries point in the direction of the +/- indicators in the battery bay. Hardware is pre-installed and not on the Hardware Card ( * ). Do not mix alkaline, standard (carbon-zinc), or rechargeable (Ni-Cd, Ni-MH, etc) batteries. 3 * X4 #2 9
-
 1
1 -
2
-
3
-
 4
4 -
 5
5 -
 6
6 -
 7
7 -
 8
8 -
 9
9 -
 10
10 -
 11
11 -
 12
12 -
 13
13 -
 14
14 -
15
-
16
-
17
-
18
-
19
-
20
-
21
-
22
-
23
-
24
-
25
-
26
-
27
-
28
 |
 |
9
2
6mm
X4
D
E
4. Remove Hardware and Install Batteries into Console
Note:
The console uses AA size batteries (LR6), which are not included. Make sure that the batteries point in the direction
of the +/– indicators in the battery bay. Hardware is pre-installed and not on the Hardware Card (
*
).
Do not mix alkaline, standard (carbon-zinc), or rechargeable (Ni-Cd, Ni-MH, etc) batteries.
3. Connect Cables and Attach the Console Support Bar to Frame Assembly
Note:
Do not crimp the cables. Pull the lower cable to remove any slack as you insert the Console Support Bar.
In order to avoid possible serious injury, when inserting the tube ends into the Frame Assembly be careful to avoid
fingers or hands being caught or pinched.
3
*
X4
#2