Schwinn IC Pro Indoor Cycling Bike Assembly Manual - Page 8
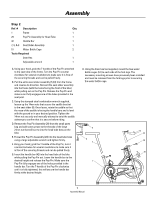
Step 3
 |
View all Schwinn IC Pro Indoor Cycling Bike manuals
Add to My Manuals
Save this manual to your list of manuals |
Page 8 highlights
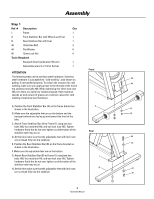
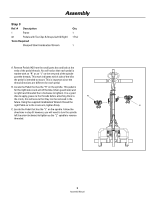
Assembly Step 3 Ref. # Description 1 Frame 43 Pedals with Toe Clips & Straps (Left & Right) Tools Required Stamped Steel Combination Wrench Qty 1 1 Pair 1 A. Remove Pedals (43) from the small parts box and look at the ends of the pedal threads. You will notice that each pedal is market with an "R" or an "L" on the very end of the spindle past the threads. This mark indicates which side of the bike the pedal is intended to mount. This is important since the thread directions are different for each pedal. B. Locate the Pedal that has the "R" on the spindle. This pedal is for the right side crank arm of the bike (chain guard side) and is right hand threaded (turn clockwise to tighten). It is a good idea to apply grease to the threads before attaching them to 43 the crank, this will assure that they can be removed in the future. Using the supplied Combination Wrench thread the right Pedal on to the crank arm, tighten firmly. 43 C. Locate the Pedal that has the "L" on the spindle. Follow the directions in step B. however, you will need to turn the spindle left (counterclockwise) to tighten as the "L" spindle is reverse threaded. 8 Assembly Manual
-
 1
1 -
2
-
 3
3 -
 4
4 -
 5
5 -
 6
6 -
 7
7 -
 8
8 -
 9
9 -
 10
10 -
 11
11 -
 12
12
 |
 |