Seagate BlackArmor NAS 400 BlackArmor NAS 440/420 Cooling Fan Replacement Proc - Page 1
Seagate BlackArmor NAS 400 Manual
 |
View all Seagate BlackArmor NAS 400 manuals
Add to My Manuals
Save this manual to your list of manuals |
Page 1 highlights
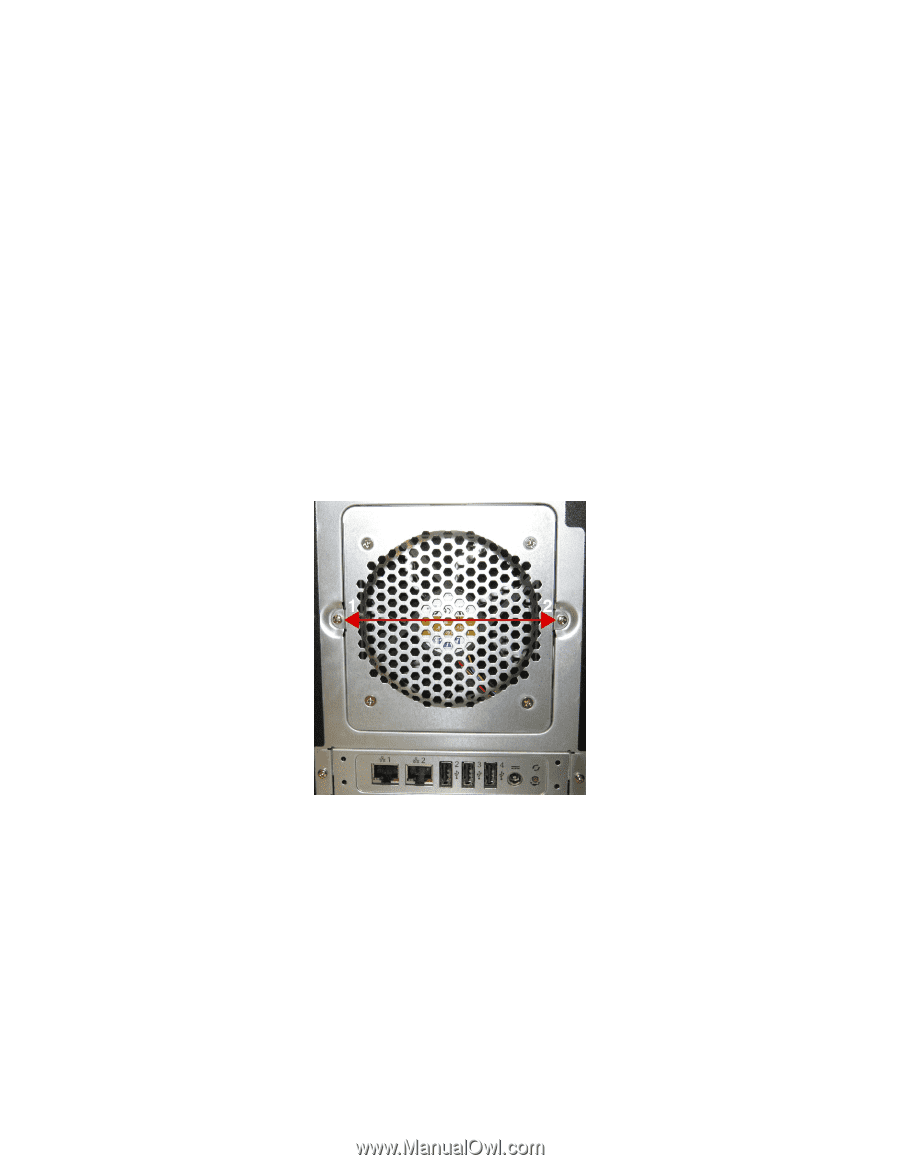
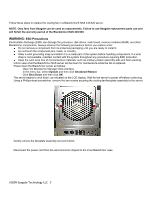
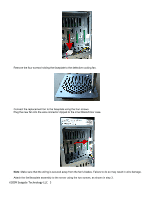
BlackArmor® NAS 440/420 Cooling Fan Replacement Procedures Follow these steps to replace the cooling fan in a BlackArmor® NAS 440/420 server. NOTE: Only fans from Seagate can be used as replacements. Failure to use Seagate replacement parts can and will forfeit the warranty period of the BlackArmor NAS 440/420. WARNING: ESD Precautions Electrostatic discharge (ESD) can damage the processor, disk drives, main board, memory modules (RAM), and other BlackArmor components. Always observe the following precautions before you replace a fan: ● Do not remove a component from its protective packaging until you are ready to install it. ● Do not touch the component pins, leads, or circuitry. ● Wear a wrist grounding strap and attach it to a metal part of the system before handling components. If a wrist strap is not available, maintain contact with the system throughout any procedure requiring ESD protection. ● Keep the work area free of nonconductive materials, such as ordinary plastic assembly aids and foam packing. 1 . Inform users that the BlackArmor NAS server will be down for maintenance while the fan is replaced. 2 . Power down the BlackArmor server as follows: a . Open the BlackArmor Manager Web interface. b . In the menu bar, select System and then click Shutdown/Reboot. c . Click Shut Down and then click OK. The server begins to shut down, as indicated on the LCD display. Wait for the server to power off before continuing. 3 . Using a Phillips-head screwdriver, remove the two screws securing the cooling fan/faceplate assembly to the server. 4 . Gently remove the faceplate assembly and set it down. 5 . Disconnect the power cord from the wire/connector clipped to the inner BlackArmor case. ©2009 Seagate Technology LLC 3
-
 1
1 -
 2
2 -
 3
3
 |
 |