Seagate BlackArmor NAS 400 BlackArmor NAS 440/420 Hard Drive Replacement Proce - Page 1
Seagate BlackArmor NAS 400 Manual
 |
View all Seagate BlackArmor NAS 400 manuals
Add to My Manuals
Save this manual to your list of manuals |
Page 1 highlights
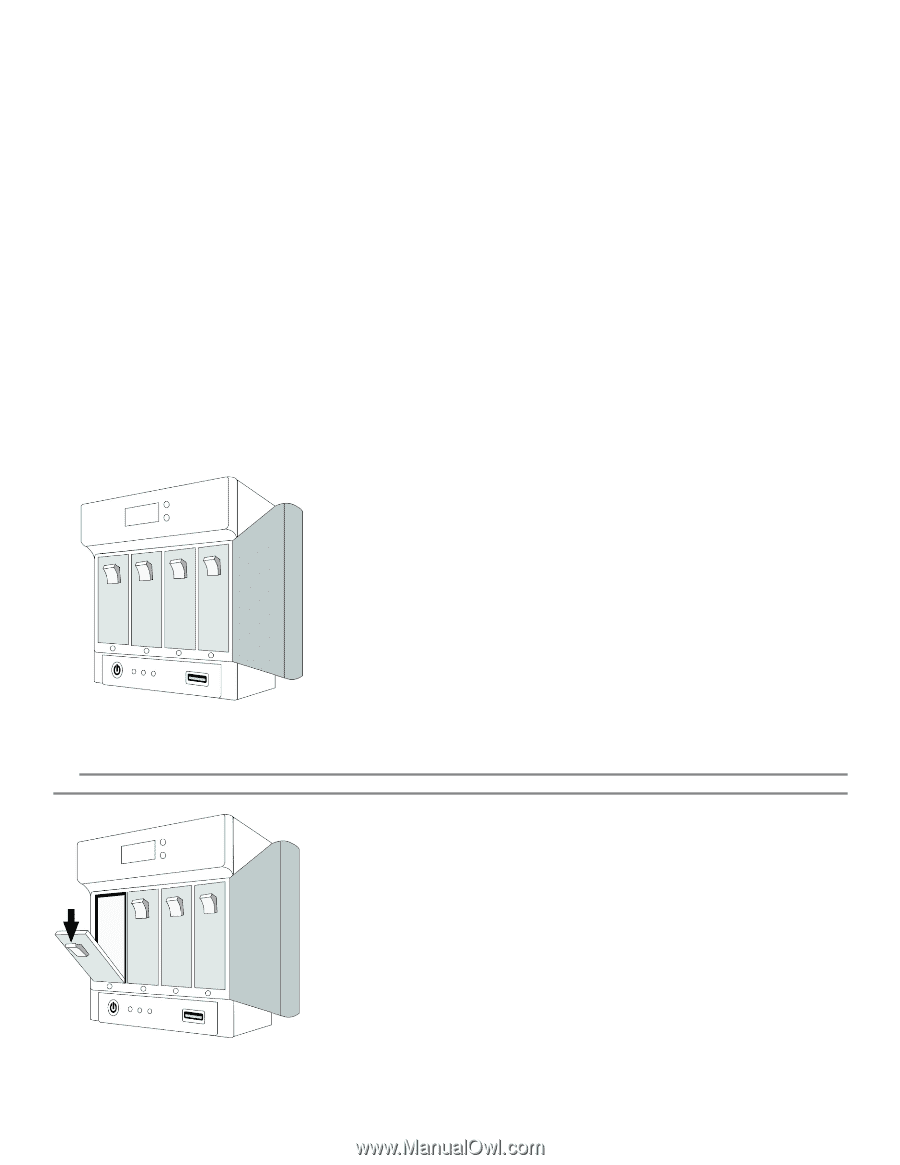
BlackArmor® NAS 440/420 Hard Drive Replacement Procedures Follow these steps to replace a hard drive in the BlackArmor® NAS 440/420 server. You may also use these instructions to replace a damaged hard drive carrier. NOTE: Only Seagate hard drives can be used for replacement. Failure to use Seagate replacement parts can and will forfeit the warranty period of the BlackArmor NAS 440/420. WARNING: ESD Precautions Electrostatic discharge (ESD) can damage the processor, hard drives, main board, memory modules (RAM), and other BlackArmor components. Always observe the following precautions before replacing a hard drive: ● Do not remove a component from its protective packaging until you are ready to install it. ● Do not touch the component pins, leads, or circuitry. ● Wear a wrist grounding strap and attach it to a metal part of the system before handling components. If a wrist strap is not available, maintain contact with the system throughout any procedure requiring ESD protection. ● Keep the work area free of nonconductive materials, such as ordinary plastic assembly aids and foam packing. Removing a Hard Drive 1 . Open the BlackArmor Manager Web interface. 2 . In the menu bar, select Storage, and then click Disk Manager. 3 . Beside the failed disk drive, click the Safely Remove Disk icon, and then click OK. 1 . Open the front panel of the server. 2 . Locate the failed hard drive. Ensure that there is no activity on the drive by checking its LED-it should not be illuminated. WARNING: Never remove more than one drive at a time. Failure to do so will result in data loss. ©2009 Seagate Technology LLC 1
-
 1
1 -
 2
2
 |
 |