Sealey PBI4424GS Instruction Manual - Page 9
Risk Of A Spark Near The Battery
 |
View all Sealey PBI4424GS manuals
Add to My Manuals
Save this manual to your list of manuals |
Page 9 highlights
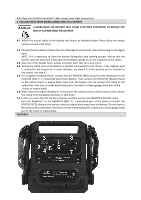
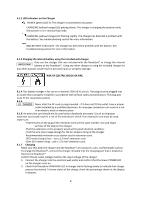
3. When the display on the Roadstart® shows 100 (%), the internal battery is fully charged and the Roadstart® is ready to use. Complete charging may take up to 24 hours. NOTE: The yellow CHARGING LED on the charge will remain flashing after display shows 100%, because charger enters automatically into maintaining mode. 4. After charge is complete and the Roadstart® is ready for use, disconnect the charger from the AC outlet, and then disconnect the charger from Roadstart®. 7. OPERATING INSTRUCTIONS 7.1. Jump starting a vehicle engine A SPARK NEAR THE BATTERY MAY CAUSE A BATTERY EXPLOSION. TO REDUCE THE RISK OF A SPARK NEAR THE BATTERY: 1. Turn the vehicle's ignition OFF before making cable connections. 2. Connect the Roadstart® to the vehicle's battery as described in section 4. If you have connected the clamps backward, an audible alarm will sound. DO NOT turn the Roadstart® ON/OFF switch to the ON position. This could cause serious damage to the Roadstart® or the vehicle. Reverse the connections and the audio alarm will stop. 3. Turn the Roadstart® ON/OFF switch to the ON position. 4. Crank the engine. If the engine does not start within 8 seconds, stop cranking and wait at least 3 minutes before attempting to start the vehicle again. This permits the Roadstart® battery to cool down. 5. After the engine starts, immediately turn the Roadstart® ON/OFF switch to the OFF position. 6. Disconnect the Roadstart® from the vehicle, as described in section 4.6. 7. Return the battery clamps to the clamp holders. Recharge the Roadstart® as soon as possible after use. 7.2. When using the other features of the Roadstart®, always observe the following steps: 1. Ensure the battery clamps are securely clipped on the clamp holders. 2. Charge the Roadstart® as soon as possible after using the feature. 7.3. Powering a 12V DC device: The Roadstart® is a power source for all 12V DC accessories that are equipped with a 12V accessory plug. Make sure the device to be powered is OFF before inserting the 12V DC accessory plug into the 12V DC accessory outlet. 1. Open the protective cover of the DC power outlet on the front of the Roadstart®. 2. Plug the device into the outlet and turn the device on (if required). 3. If the device draws more than 15A or has a short circuit, the circuit breaker of the Roadstart® will trip and disconnect the power to the device. Disconnect the device and the beaker will automatically reset. The DC power outlet is wired directly to the internal battery. Extended operation of a 12V device may result in excessive battery drain. Recharge immediately after unplugging the device. 7.4 Powering a USB Device The Roadstart® is a power source for all accessories that are equipped with a USB plug. The USB port provides up to 2.1A at 5V DC. 1. Ensure the battery clamps are securely clipped on the storage holders. 2. Press the USB button on the front of the unit. 3. Plug the device into the USB port on the front of the unit. 9
-
 1
1 -
2
-
3
-
 4
4 -
 5
5 -
 6
6 -
 7
7 -
 8
8 -
 9
9 -
 10
10 -
 11
11 -
 12
12
 |
 |
