Sennheiser XSW 2-ME2 Instruction manual - XS Wireless 1 & XS Wireless 2 PD - Page 91
Establishing a radio link | Synchronizing, the receiver and transmitter
 |
View all Sennheiser XSW 2-ME2 manuals
Add to My Manuals
Save this manual to your list of manuals |
Page 91 highlights
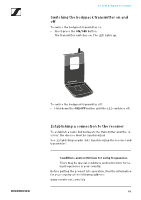
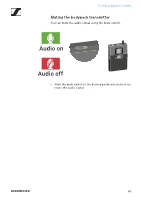
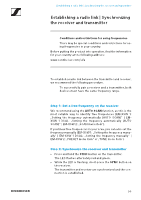
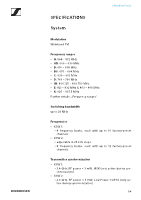
Establishing a radio link | Synchronizing the receiver and transmitter Establishing a radio link | Synchronizing the receiver and transmitter Conditions and restrictions for using frequencies There may be special conditions and restrictions for using frequencies in your country. Before putting the product into operation, find the information for your country at the following address: www.sennheiser.com/sifa To establish a radio link between the transmitter and receiver, we recommend the following procedure. To successfully pair a receiver and a transmitter, both devices must have the same frequency range. Step 1: Set a free frequency on the receiver We recommend using the AUTO SCAN function, as this is the most reliable way to identify free frequencies (EM-XSW 1: „Setting the frequency automatically (AUTO SCAN)" | EMXSW 1 DUAL: „Setting the frequency automatically (AUTO SCAN)" | EM-XSW 2: „SCAN menu item"). If you know free frequencies in your area, you can also set the frequency manually (EM-XSW 1: „Setting the frequency manually" | EM-XSW 1 DUAL: „Setting the frequency manually" | EM-XSW 2: „PRESET menu item" or „TUNE menu item"). Step 2: Synchronize the receiver and transmitter ▷ Press and hold the SYNC button on the transmitter. The LED flashes alternately red and green. ▷ While the LED is flashing, short-press the SYNC button on the receiver. The transmitter and receiver are synchronized and the connection is established. 90
-
 1
1 -
2
-
3
-
4
-
5
-
6
-
7
-
8
-
9
-
10
-
11
-
12
-
13
-
14
-
15
-
16
-
17
-
18
-
19
-
20
-
21
-
22
-
23
-
24
-
25
-
26
-
27
-
28
-
29
-
30
-
31
-
32
-
33
-
34
-
35
-
36
-
37
-
38
-
39
-
40
-
41
-
42
-
43
-
44
-
45
-
46
-
47
-
48
-
49
-
50
-
51
-
52
-
53
-
54
-
55
-
56
-
57
-
58
-
59
-
60
-
61
-
62
-
63
-
64
-
65
-
66
-
67
-
68
-
69
-
70
-
71
-
72
-
73
-
74
-
75
-
76
-
77
-
78
-
79
-
80
-
81
-
82
-
83
-
84
-
85
-
 86
86 -
 87
87 -
 88
88 -
 89
89 -
 90
90 -
 91
91 -
 92
92 -
 93
93 -
 94
94 -
 95
95 -
 96
96 -
97
-
98
-
99
-
100
-
101
-
102
-
103
-
104
-
105
-
106
-
107
-
108
-
109
-
110
 |
 |