Sharp LC-42LE620UT LC-42LE620UT LC-46LE620UT LC-55LE620UT Operation Manual - Page 34
Menu Operation Button, Video Menu, Using the remote control, ENTER, RETURN, INPUT
 |
View all Sharp LC-42LE620UT manuals
Add to My Manuals
Save this manual to your list of manuals |
Page 34 highlights
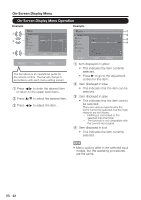
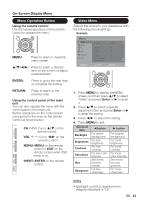
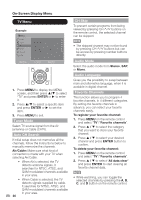
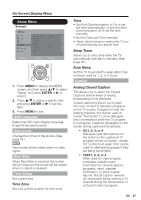
On-Screen Display Menu Menu Operation Button Using the remote control Use the following buttons on the remote control to operate the menu. Video Menu Adjusts the picture to your preference with the following picture settings. Example MENU: Press to open or close the menu screen. */+/,/-: Press to select a desired item on the screen or adjust a selected item. ENTER: Press to go to the next step or complete the setting. RETURN: Press to return to the previous step. Using the control panel of the main unit You can also operate the menu with the control panel of the main unit. Button operations on the control panel correspond to the ones on the remote control as shown below. CH "/#: Cursor */+ on the remote control. VOL (/): Cursor ,/- on the remote control. MENU: MENU on the remote control or EXIT on the remote control while OSD menu is on. INPUT: ENTER on the remote control. 1. Press MENU to display the MENU screen, and then press */+ to select "Video" and press Enter or -.to enter it. 2. Press */+.to select a specific adjustment item and press Enter or -. to enter the setting. 3. Press ,/- to adjust the setting. 4. Press MENU to exit. Selected item Backlight ,.button For darker background -.button For brighter background Brightness Contrast Saturation Hue Sharpness For less brightness For less contrast For less color intensity Skin tones become reddish For less sharpness For more brightness For more contrast For more color intensity Skin tones become greenish For more sharpness • Backlight control is disabled when Adaptive Backlight is "On". !##
-
 1
1 -
2
-
3
-
4
-
5
-
6
-
7
-
8
-
9
-
10
-
11
-
12
-
13
-
14
-
15
-
16
-
17
-
18
-
19
-
20
-
21
-
22
-
23
-
24
-
25
-
26
-
27
-
28
-
 29
29 -
 30
30 -
 31
31 -
 32
32 -
 33
33 -
 34
34 -
 35
35 -
 36
36 -
 37
37 -
 38
38 -
 39
39 -
40
-
41
-
42
-
43
-
44
-
45
-
46
-
47
-
48
-
49
-
50
-
51
-
52
-
53
-
54
-
55
 |
 |
