Sharp LC-43LB481U User Guide LC 32 43 50LB481U - Page 72
Changing caption settings, Settings > System > Time - manual
 |
View all Sharp LC-43LB481U manuals
Add to My Manuals
Save this manual to your list of manuals |
Page 72 highlights
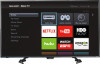
LC-32LB481U / LC-43LB481U / LC-50LB481U 32" / 43" / 50" Full HD LED 1080p Sharp Roku TV Changing caption settings You can change many different settings that affect the appearance of captions. To change caption settings, from the Home screen menu, navigate to Settings > Captions, and then press the RIGHT arrow. At this point, you can choose the following options: • Captions mode-Choose Off, On, Instant replay, or When mute. • If you choose On, your TV displays captions whenever they are available in the program information. This setting applies to Antenna TV, the AV input, and streaming channels. • If you choose Instant Replay, your TV displays captions only during a replay operation; that is, after pressing to jump back a few seconds in streaming video. This setting applies only to streaming channels when the program being streamed supports instant replay. • If you choose When mute, your TV displays captions only when the sound is muted. This setting applies to Antenna TV, the AV input, and streaming channels. Note If is not available on your remote control, you can use on the Roku mobile app or the Jump Back button on a universal remote. For more information, see Other devices on page 72. This setting reflects the Closed captioning settings in the Options menu for certain TV inputs, as explained in Options menu settings on page 52. Note that, once enabled, the captions mode remains set for all applicable inputs until you turn it off. Note Some streaming channels require you to enable captions through a setting within their channel even though you have turned on captions everywhere else. • Text style-Choose from a list of fonts. As you move the highlight to each font, you can see a sample of the result in an adjacent panel. • Text edge effect-Choose from a list of edge effect styles, such as raised, depressed, and various shadows. As you move the highlight to each effect, you can see a sample of the result in an adjacent panel. • Text size-Choose from a list of sizes. As you move the highlight to each size, you can see a sample of the result in an adjacent panel. • Text color-Choose from a list of colors for the text. As you move the highlight to each color, you can see a sample of the result in an adjacent panel. • Text opacity-Choose from a list of opacity settings for the text. This setting determines how much the area behind the text shows through the text. A value of 100% blocks all of the content behind the text. As you move the highlight to each setting, you can see a sample of the result in an adjacent panel. • Background color-Choose from a list of colors for the background area behind the text. As you move the highlight to each color, you can see a sample of the result in an adjacent panel. Note that you won't see any change unless you set the Background opacity to a value other than Off. • Background opacity-Choose from a list of opacity settings for the background of the caption. This setting determines how much the area behind the caption background shows through the background. A value of 100% blocks all of the content behind the background. As you move the highlight to each setting, you can see a sample of the result in an adjacent panel. • Window color-Choose from a list of colors for the window rectangle surrounding the entire caption. As you move the highlight to each color, you can see a sample of the result in an adjacent panel. Note that you won't see any change unless you set the Window opacity to a value other than Default or Off. • Window opacity-Choose from a list of opacity settings for the window rectangle surrounding the entire caption. This setting determines how much the area behind the caption window shows through the window. A value of 100% blocks all of the content behind the window. As you move the highlight to each setting, you can see a sample of the result in an adjacent panel. Changing time settings You can change time settings to suit your preferences. You can find the following settings by navigating from the Home screen menu to Settings > System > Time: • Sleep timer-Set a time delay after which your TV will automatically shut off. This setting reflects the setting you can make in the Options menu from any TV input, as explained in Options menu settings on page 52. Note that the sleep timer setting is not input specific. • Time zone-Select whether to set the time zone automatically or manually, and if set manually, select your current time zone. Typically, a TV connected to the Internet can discover its own time zone automatically, and a TV that is not connected to the Internet must be set manually. Initially, this setting is made when you set up the TV tuner, as explained in Setting up Antenna TV on page 43. Correct time zone information is needed to correctly display program data. • Clock format-Select whether to display time in a 12-hour or 24-hour format, or to turn off time display. This setting is available only on TVs that are connected to the Internet. Non-connected TVs do not display the time. 67
-
 1
1 -
2
-
3
-
4
-
5
-
6
-
7
-
8
-
9
-
10
-
11
-
12
-
13
-
14
-
15
-
16
-
17
-
18
-
19
-
20
-
21
-
22
-
23
-
24
-
25
-
26
-
27
-
28
-
29
-
30
-
31
-
32
-
33
-
34
-
35
-
36
-
37
-
38
-
39
-
40
-
41
-
42
-
43
-
44
-
45
-
46
-
47
-
48
-
49
-
50
-
51
-
52
-
53
-
54
-
55
-
56
-
57
-
58
-
59
-
60
-
61
-
62
-
63
-
64
-
65
-
66
-
 67
67 -
 68
68 -
 69
69 -
 70
70 -
 71
71 -
 72
72 -
 73
73 -
 74
74 -
 75
75 -
 76
76 -
 77
77 -
78
-
79
-
80
-
81
-
82
-
83
-
84
-
85
-
86
-
87
-
88
-
89
-
90
-
91
-
92
-
93
-
94
 |
 |