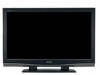
Sharp LC46SB54U Operation Manual - Page 6

Quick, Reference - manual

Page 6 highlights

QUICK REFERENCE • Before attaching (or detaching) the stand, unplug the AC cord from the AC iNPUT terminal. • Before performing work spread cushioning over the base area to lay the TV on This will prevent it from being damaged • Attach the stand in the correct direction. • Do not remove the stand from the _/unless using an optional wall mount bracket to mount it. Be sure to follow the instructions, incorrect installation of the stand may result in tbe 1]/falling over, I Confirm that there are 8 screws (4 short screws and 4 long screws) and a hex key supplied with the stand unit. tiff 2 Altach the supporting post for the stand unit onto the base using the box for the stand unit as shown below. • The supporting post altaches to the base at an oft centered location onthe base Be sure to attach the supporling post in 1hedirection indicated below and altach the stand to the TV with the wider side of 1he base facing tor_sard "- o |-" _| I_ A ° = This _ sbould be mounted on tbe wall only with the AN-52AG4 (SHARP) wall mount bracket. The use of other wall mount brackets may result in an unstable installation and may cause serious injuries. installing the TV requires special skill that should only be performed by qualified service personnel Customers should not attempt to do the work themselves. SHARP bears no responsibility for improper mounting or mounting that results in accident or injury. Using an optional bracket to mount the TV • You carl ask a qua

  • 1
  • 2
  • 3
  • 4
  • 5
  • 6
  • 7
  • 8
  • 9
  • 10
  • 11
  • 12
  • 13
  • 14
  • 15
  • 16
  • 17
  • 18
  • 19
  • 20
  • 21
  • 22
  • 23
  • 24
  • 25
  • 26
  • 27
  • 28
  • 29
  • 30
  • 31
  • 32

QUICK
REFERENCE
Before attaching
(or detaching)
the stand, unplug the AC
cord from the AC iNPUT terminal.
Before performing
work spread
cushioning
over the base
area to lay the TV on
This will prevent it from being
damaged
Attach
the
stand
in the
correct
direction.
Do not
remove
the
stand
from
the
_/unless
using
an
optional
wall
mount
bracket
to mount
it.
Be sure to follow
the instructions,
incorrect
installation
of the
stand
may result
in tbe
1]/falling
over,
I
Confirm
that
there
are 8 screws
(4 short
screws
and
4 long screws)
and
a hex key supplied
with
the
stand
unit.
tiff
2
Altach
the supporting
post for the
stand
unit
onto
the
base
using
the
box for
the stand
unit as shown
below.
• The supporting post altaches to the base at an oft centered
location onthe base Be sure to attach the supporling post in
1hedirection indicated below andaltach the stand to the TV
with the wider side of 1he base facing tor_sard
II
TI _L°ng
.......
Hexkey
Forwarded,/
:3
1"_Insert
the
stand
into the
openings
on the bottom
of the
TV.
"2' Insert
and
tighten
the 4 short
screws
into the
4
holes
on the
rear of the TV.
"r
Softcushion
_,__",
,,
• To detach the stand,
perform the steps in reverse order
"-
o
|-"
_|
I_
A
°
=
This
_
sbould
be mounted
on
tbe
wall
only
with
the
AN-52AG4
(SHARP) wall
mount
bracket.
The
use
of
other
wall
mount
brackets
may result
in an unstable
installation
and
may cause
serious
injuries.
installing
the
TV requires
special
skill
that
should
only
be performed
by qualified
service
personnel
Customers
should
not
attempt
to
do the work
themselves.
SHARP
bears
no responsibility
for
improper
mounting
or
mounting
that
results
in
accident
or injury.
Using
an
optional
bracket
to
mount
the
TV
• You carl
ask a qua<lified service
professional
about
using
an optional
AN
52AG4
bracket
to mount
the TV
to the wall.
• Carefully
read the
instructions
that
come
with
the
bracket
before
beginning
work.
f
Hanging
on
the
wall
AN
52AG4
wall
mount
bracket.
See the
bracket
instructions
for details.)
Vertical mounting
Angular
mounting
About
setting
the ]_/angle
015710/15120
<
The center
of the display:
6 3A inches
(174.25
ram)
under
the
"A" position.
Refer
to the operation
manual
of AN
52AG4
for
details.
Detach the cable clamp
on the rear of the TV when using
the optional mount
bracket.
• To use this TV mounted on a wall,
remove the covers at
the 4 locations on the rear of the TV, and then use the
screws
supplied with the wall mount
bracket to secure the
bracket to the rear of the %/