Sharp LC52SB57UN LC-52SB57UN LC-46SB57UN Operation Manual - Page 25
Digital Setup - update
 |
UPC - 074000372030
View all Sharp LC52SB57UN manuals
Add to My Manuals
Save this manual to your list of manuals |
Page 25 highlights
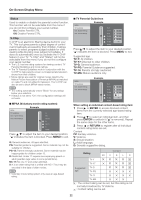
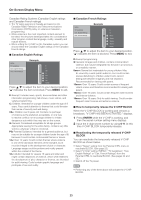
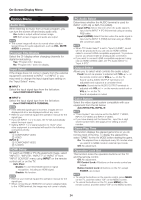
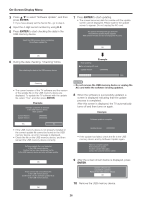
On-Screen Display Menu Caption Setup This function allows you to adjust the closed caption screen appearance to suit your preference. You can adjust 7 items: "Caption Size", "Font Style", "Foreground Color", "Foreground Opacity", "Background Color", "Background Opacity" and "Character Edge". Example: Selectable items available for "Font Style". Default: The font specified by broadcasting station or default font. Type 0: Proportional font used in the MENU screen. Type 1: Monospaced with serifs. Type 2: Proportionally spaced with serifs. Type 3: Monospaced without serifs. Type 4: Proportionally spaced without serifs. Type 5: Casual font type. Type 6: Cursive font type. Type 7: Small capitals. • For resetting adjustments to the factory preset values, press a/b to select "Reset", and then press ENTER. • The default value depends on the broadcasting station. Digital Caption Info. (Digital Caption Information) This function allows viewing of digital closed caption information for the digital broadcast program being viewed. • This list is not displayed for analog broadcasts or external input audio/video. • This information is not included in CC1, CC2, Text1, or Text2, and is not displayed in a list. Favorite CH (Favorite Channel Setting) This function allows you to program 4 favorite channels, in 4 different categories. By setting the favorite channels in advance, you can select your favorite channels easily. To register your favorite channel: Select "Register" and then press ENTER. Press a/b/c/ d to select the position in the category, and then press ENTER to register. To delete your favorite channel: Select "1 Data Clear" and then press ENTER. Press a/b/c/d to select the channel you want to delete, and then press ENTER. Select "Yes" and then press ENTER. To delete all the favorite channels, select "All Data Clear". • This function will be canceled when you press EXIT on the remote control unit. • When "Demo Mode" is set to "Feature Demo", pressing FREEZE pauses/restarts demo. • "Demo Mode" may not be selected depending on input signal type. • "Demo Mode" may be automatically canceled depending on input signal type. Digital Setup This setting allows you to optimize the settings of Digital broadcasting. Audio Setup You can output digital audio to an AV amplifier or similar device whose DIGITAL AUDIO INPUT terminal is connected to the DIGITAL AUDIO OUTPUT terminal on the TV. Please select an audio output format compatible with the audio format of the program you are watching and the equipment connected. PCM: The optical output terminal outputs audio signal in PCM form. If your digital audio system does not support Dolby Digital, select "PCM". Dolby Digital: The optical output terminal outputs audio signal in Dolby Digital form. It reproduces sound from surround program of digital. Identification The current version of the TV software is displayed. Software Update This function allows software updates by inserting a USB memory device with the update file into the SERVICE terminal on the TV. To check for the availability of a software update, visit www.sharpusa.com. If you have any questions, please call 1-800-BE-SHARP (800-237-4277). CAUTION • Do not remove the USB memory device or unplug the AC cord while the software is being updated. • Be sure to properly follow the whole procedure described below, step by step. Otherwise, for example, the TV cannot read the data in the USB memory device and software updating will fail. 1 Insert the USB memory device with the update file into the SERVICE terminal on the TV. • Before setting the channel, select the channel you want to register as a favorite channel. Demo Mode You can select the image from several types of demo mode. 120Hz Demo 1/120Hz Demo 2/10 bit Demo/ Feature Demo/Auto Play If you select "Auto Play", you need to set playback type. Continuous: Play Demos continuously. 10 min.: Play Demos every 10 minutes. 20 min.: Play Demos every 20 minutes. 2 Press MENU to display the MENU screen, and then press c/d to select "Digital Setup". 25
-
 1
1 -
2
-
3
-
4
-
5
-
6
-
7
-
8
-
9
-
10
-
11
-
12
-
13
-
14
-
15
-
16
-
17
-
18
-
19
-
 20
20 -
 21
21 -
 22
22 -
 23
23 -
 24
24 -
 25
25 -
 26
26 -
 27
27 -
 28
28 -
 29
29 -
 30
30 -
31
 |
 |