Sharp NC1100CM Installation Manual - NEC
Sharp NC1100CM Manual
 |
View all Sharp NC1100CM manuals
Add to My Manuals
Save this manual to your list of manuals |
Sharp NC1100CM manual content summary:
- Sharp NC1100CM | Installation Manual - NEC - Page 1
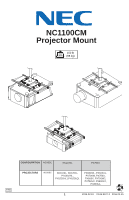
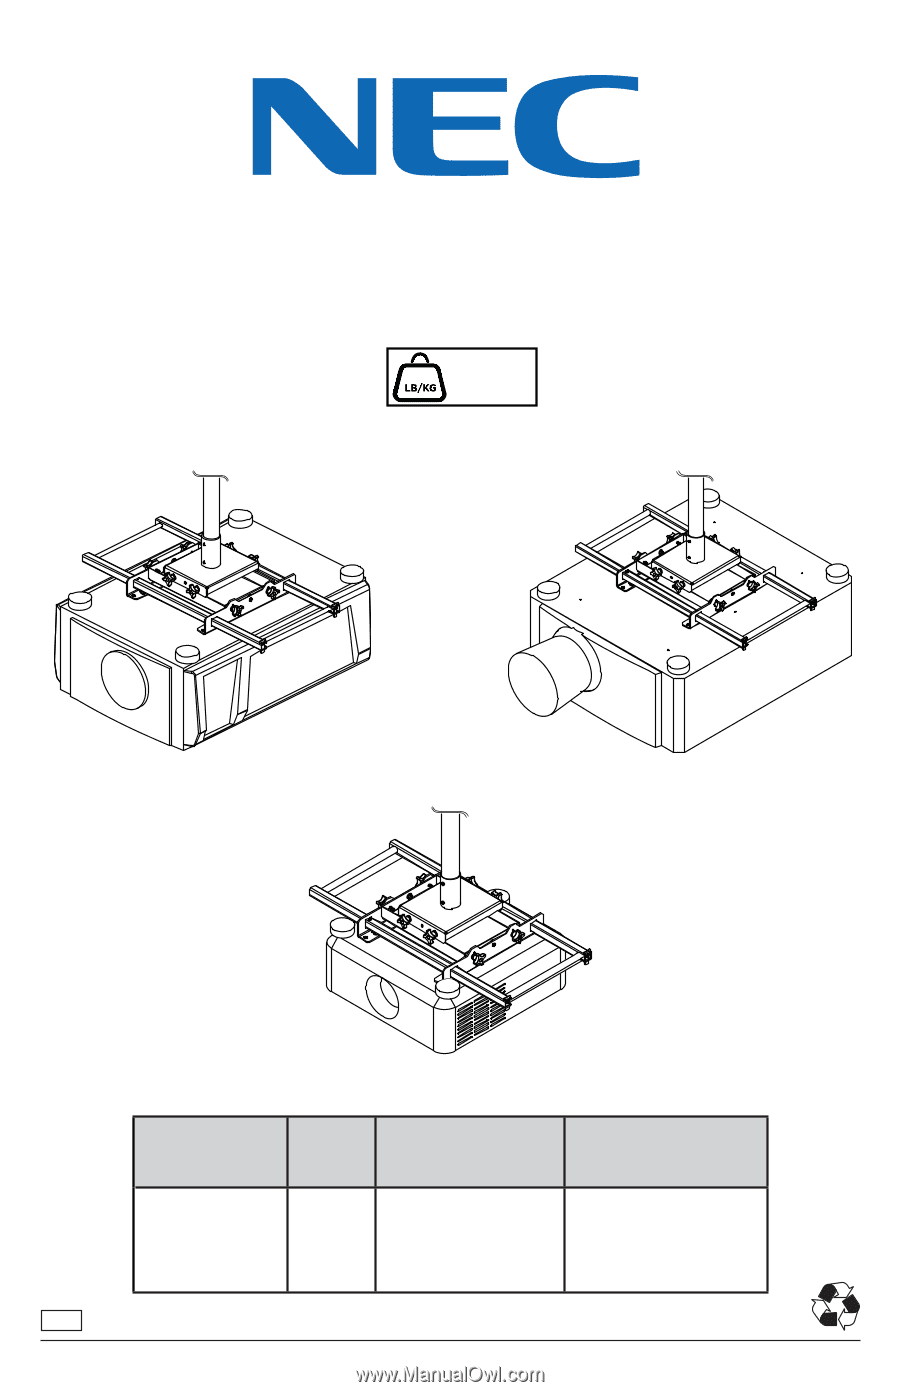
NC1100CM Projector Mount MAX 150 lb (68 kg) ENG CONFIGURATION NC900C NC1100L PX750U PROJECTORS NC900C NC1100L, NC1201L, PH1202HL, PH1202HL1,PH1201QL PX602WL, PX602UL, PX700W, PX750U, PX800X, PX700W2, PX750U2, PX800X2, PX803UL 1 2016-02-10 #:126-9107-2 2016-04-15 - Sharp NC1100CM | Installation Manual - NEC - Page 2
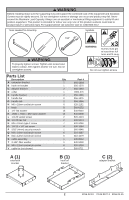
position equipment. This product is intended for indoor use only. Use of this product outdoors could lead to product failure or personal injury. For support please call customer care at 1-800-865-2112. Tools Needed for Assembly. Symbols 7/16" WARNING x3 Screws must get at least three full turns - Sharp NC1100CM | Installation Manual - NEC - Page 3
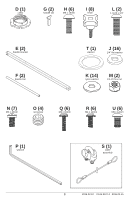
D (1) collar G (2) handle tab H (6) M6 x 16mm I (8) knob L (2) 1-4x20 x 3/4" E (2) handle bracket F (2) handle bar T (1) washer J (16) 1/4" flat washer K (14) nylon washer M (2) 1/4-20 hex nut N (7) M5 x 10mm O (4) set screw Q (6) M4 x 16mm R (6) M4 x 12mm U (6) M6 x 12mm P (1) wrench - Sharp NC1100CM | Installation Manual - NEC - Page 4
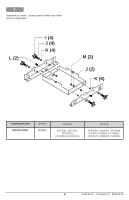
1 Assemble as shown. Locate projector below and follow proper configuration. L (2) I (4) J (4) K (4) M (2) J (2) K (6) CONFIGURATION PROJECTORS NC900C NC900C NC1100L NC1100L, NC1201L, PH1202HL, PH1202HL1,PH1201QL PX750U PX602WL, PX602UL, PX700W, PX750U, PX800X, PX700W2, PX750U2, PX800X2, - Sharp NC1100CM | Installation Manual - NEC - Page 5
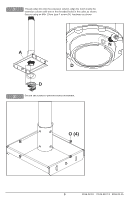
2 Thread collar (D) onto the extension column. Align the notch inside the extension column with one of the threaded holes in the collar as shown. Secure using an M5x 10mm type-F screw (N). hardware as shown. N A D D 3 Secure set screws to prevent excess movement. O (4) 5 2016-02-10 #:126- - Sharp NC1100CM | Installation Manual - NEC - Page 6
4 Attach assembly to projector as shown. Note the orientation for each specific projector. J (6) H or U (6) x3 NC1100L Configuration H or U(6) J (6) x3 NC900C Configuration R or Q (4) S (4) x3 PH1000U Configuration 6 center screw not required 2016-02-10 #:126-9107-2 2016-04-15 - Sharp NC1100CM | Installation Manual - NEC - Page 7
5 E PX750U Configuration F NC900C Configuration NC1100L Configuration 6 N (4) 7 2016-02-10 #:126-9107-2 2016-04-15 - Sharp NC1100CM | Installation Manual - NEC - Page 8
7 a Position second handle bar in the relief cut in the handle brackets at the opposite end of the assembly. Secure using the handle tabs with M5 x 10 mm type-F screws (N). F a G a N a 8 2016-02-10 #:126-9107-2 2016-04-15 - Sharp NC1100CM | Installation Manual - NEC - Page 9
8-1 Hook the assembly to the ceiling mount assembly as shown. Use handle bars (F) to lift projector. Attach cable assembly. S 8-2 J(4) I(4) K(4) CLAMP U-BOLT S 9 2016-02-10 #:126-9107-2 2016-04-15 - Sharp NC1100CM | Installation Manual - NEC - Page 10
9 Adjust tilt and roll by loosening the knobs, setting the position, then retightening the knobs. Loosen Adjust Tighten Loosen Adjust Tighten generic projector generic projector 10 2016-02-10 #:126-9107-2 2016-04-15 - Sharp NC1100CM | Installation Manual - NEC - Page 11
10 Adjust swivel by loosening set screws (O), turning assembly, then retightening. O (4) Loosen Adjust Tighten TOP VIEW 11 2016-02-10 #:126-9107-2 2016-04-15 - Sharp NC1100CM | Installation Manual - NEC - Page 12
by the customer or a person who is not authorized for such service or repairs by Peerless, (b) the failure to utilize proper packing when returning the product, (c) incorrect installation or the failure to follow Peerless' instructions or warnings when installing, using or storing the product, or
-
 1
1 -
 2
2 -
 3
3 -
 4
4 -
 5
5 -
 6
6 -
 7
7 -
8
-
9
-
10
-
11
-
12
 |
 |
1
2016-02-10
#:126-9107-2
2016-04-15
ENG
Projector Mount
NC1100CM
150 lb
(68 kg)
MAX
CONFIGURATION
NC900C
NC1100L
PX750U
PROJECTORS
NC900C
NC1100L, NC1201L,
PH1202HL,
PH1202HL1,PH1201QL
PX602WL, PX602UL,
PX700W, PX750U,
PX800X, PX700W2,
PX750U2, PX800X2,
PX803UL