Sharp PN-V600 Operation Manual - Page 24
Audio, Setup, Menu Items, Off If No Operation
 |
View all Sharp PN-V600 manuals
Add to My Manuals
Save this manual to your list of manuals |
Page 24 highlights
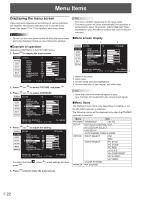
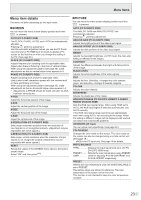
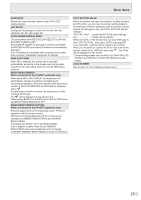
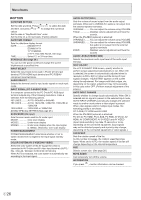
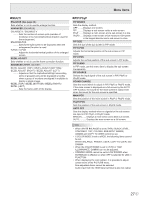
Menu Items USER Adjusts each item when the WHITE BALANCE is set to USER. R-CONTRAST.....Adjusts bright-toned red component. G-CONTRAST....Adjusts bright-toned green component. B-CONTRAST.....Adjusts bright-toned blue component. R-OFFSET..........Adjusts dark-toned red component. G-OFFSET..........Adjusts dark-toned green component. B-OFFSET..........Adjusts dark-toned blue component. COPY TO USER Copies the value set for PRESET to the USER setting. Select "ON" and then press MENU . GAMMA Selects the gamma. USER sets the gamma to the sent value (see page 36). (In PIP mode, the main side setting is reflected in the image.) DISPLAY COLOR PATTERN Displays a color pattern. Can be displayed while the menu screen is displayed, so you can refer to the pattern while adjusting the image. OFF No pattern display. WHITE White single color pattern display. RED Red single color pattern display. GREEN Green single color pattern display. BLUE Blue single color pattern display. USER Red/green/blue mixed color pattern display. When USER is selected, set each color's level. RESET Resets the values of the PICTURE menu items to the factory preset values. Select "ON" and then press MENU . nAUDIO TREBLE Adjusts the volume of treble-level sound. BASS Adjusts the volume of bass-level sound. BALANCE Adjusts the balance of the audio sound between right and left. RESET Resets the values of the AUDIO menu items to the factory preset values. Select "ON" and then press MENU . nSETUP OSD H-POSITION Adjusts the horizontal display position of menu screen. OSD V-POSITION Adjusts the vertical display position of menu screen. MONITOR Select the installation direction of the monitor. LANDSCAPE............Horizontal orientation PORTRAIT Vertical orientation LANGUAGE Sets the display language for the menu screen. POWER ON DELAY You can delay the screen display after the monitor is turned on. The period can be set up to 60 seconds in units of one second. When this function is activated, the power LED flashes (at approx. 1 second interval) in orange. This function is disabled when 0 is specified. OPERATION MODE MODE1 OFF IF NO OPERATION is set to ON, and STANDBY MODE is set to LOW POWER. (These settings can not be changed.) MODE2 Will perform standard operation. OFF IF NO OPERATION is set to OFF, and STANDBY MODE is set to STANDARD. These settings can be changed. STANDBY MODE When STANDARD is selected, startup time from standby mode is reduced. Note, however that, more power will be consumed in standby mode. When LOW POWER is selected, current consumption is reduced while the monitor is in standby mode. Note, however, that the startup time from standby mode becomes longer. If set to LOW POWER, certain RS-232C commands cannot be used in standby mode, and control via LAN will be disabled. OFF IF NO OPERATION Determines whether or not to set the monitor to go into standby mode when there is no operation from the remote control unit, RS-232C commands, or LAN for over 4 hours. HOT PLUG CONTROL Sets whether to use hot plug control for the PC/AV HDMI and PC/AV DVI-D input terminals. RS-232C/LAN SELECT Selects the method with which to control the monitor from the computer. ID No. SET Assigns ID numbers to monitors connected in a daisy chain (see page 34), using the remote control unit or RS-232 cables. The numbers 1 to 255 are available for ID numbers. If "0" is set, the system regards this as the state where no ID number is set. AUTO ASSIGN ID No. ID No. to be used will be automatically assigned when multiple monitors are connected with RS-232C. Select ON, then press MENU . Perform operations with the primary monitor. E 24
-
 1
1 -
2
-
3
-
4
-
5
-
6
-
7
-
8
-
9
-
10
-
11
-
12
-
13
-
14
-
15
-
16
-
17
-
18
-
 19
19 -
 20
20 -
 21
21 -
 22
22 -
 23
23 -
 24
24 -
 25
25 -
 26
26 -
 27
27 -
 28
28 -
 29
29 -
30
-
31
-
32
-
33
-
34
-
35
-
36
-
37
-
38
-
39
-
40
-
41
-
42
-
43
-
44
-
45
-
46
-
47
-
48
-
49
-
50
-
51
-
52
-
53
-
54
-
55
-
56
-
57
-
58
-
59
-
60
-
61
 |
 |
