Sharp PRO-60X5FD User Manual - Page 36
Game Play Time, Operation Lock Out, Power LED Setting, Demo Mode, adjust 7 items: Caption Size - led tv manual
 |
View all Sharp PRO-60X5FD manuals
Add to My Manuals
Save this manual to your list of manuals |
Page 36 highlights
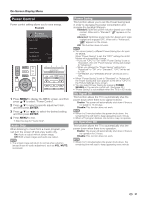
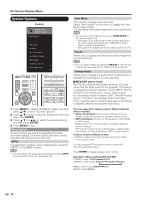
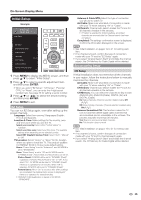
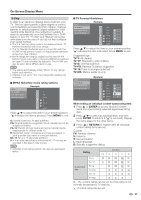
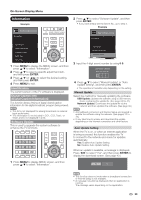
On-Screen Display Menu Position For adjusting a picture's horizontal and vertical position. H-Pos.: Centers the image by moving it to the left or right. V-Pos.: Centers the image by moving it up or down. • For resetting adjustments to the factory preset values, press a/b to select "Reset", and then press ENTER. • When connecting a PC to the HDMI terminal, the image position will be automatically adjusted. It cannot be manually adjusted. • The screen position variable ranges depend on the View Mode or the signal type. The ranges can be seen on the position-setting screen. • Adjustments are stored separately according to input source. • "Position" does not work when USB mode, Home Network (DLNA) mode or an Internet application is used. • You may not be able to adjust the position while in 3D mode. Caption Setup This function allows you to adjust the closed caption screen appearance to suit your preference. You can adjust 7 items: "Caption Size", "Font Style", "Foreground Color", "Foreground Opacity", "Background Color", "Background Opacity" and "Character Edge". Example: Selectable items available for "Font Style". Default: The font specified by broadcasting station or default font. Type 0: Proportional font used in the MENU screen. Type 1: Monospaced with serifs. Type 2: Proportionally spaced with serifs. Type 3: Monospaced without serifs. Type 4: Proportionally spaced without serifs. Type 5: Casual font type. Type 6: Cursive font type. Type 7: Small capitals. • For resetting adjustments to the factory preset values, press a/b to select "Reset", and then press ENTER. • The default value depends on the broadcasting station. Game Play Time This function displays the elapsed game time so you do not lose track of the time. To display the elapsed time, select "GAME" for the AV MODE before starting the game. On: The elapsed time is displayed every 30 minutes when you switch to GAME mode in external input mode. Off: No adjustment. Operation Lock Out This function locks the operation buttons on the TV and the remote control. Off: No adjustment. RC Control Lock: All buttons on the remote control are locked. Button Control Lock: All buttons on the TV, except POWER, are locked. When "RC Control Lock" or "Button Control Lock" is selected, a confirmation screen appears. Yes: Locks the operation buttons. No: No adjustment. • To unlock the buttons on the remote control by using the control panel of the main unit (see page 26): 1 Press MENU to display the MENU screen, and then press CHU/V to select "System Options", and then press INPUT. 2 Press CHU/V to select "Operation Lock Out", and then press INPUT. 3 Press CHU/V to select "Off", and then press INPUT. 4 Press MENU to exit. • To unlock the buttons on the TV, press MENU on the remote control, and then select "Off" in "Operation Lock Out". Power LED Setting When this function is set to "On", the Power LED on the front of the TV turns on. • The Power LED lights blue in 2D mode. • The Power LED lights white in 3D mode. • "On" is the factory preset value. If you want to turn off the LED, set the function to "Off". Demo Mode You can select the image from several types of demo mode. Intelligent Variable Contrast/RGB+Y/Precision Color Plus/Connected TV/Feature Demo/Auto Play If you have selected "Auto Play", you need to select the desired playback type(s), and then set the playback time. Continuous: Play Demos continuously. 10 min.: Play Demos every 10 minutes. 20 min.: Play Demos every 20 minutes. • This function will be canceled when you press EXIT on the remote control unit. • When "Demo Mode" is set to "Feature Demo", pressing FREEZE pauses/restarts demo. • "Demo Mode" may not be selected depending on input signal type or application status. • "Demo Mode" may be automatically canceled depending on input signal type. 34
-
 1
1 -
2
-
3
-
4
-
5
-
6
-
7
-
8
-
9
-
10
-
11
-
12
-
13
-
14
-
15
-
16
-
17
-
18
-
19
-
20
-
21
-
22
-
23
-
24
-
25
-
26
-
27
-
28
-
29
-
30
-
 31
31 -
 32
32 -
 33
33 -
 34
34 -
 35
35 -
 36
36 -
 37
37 -
 38
38 -
 39
39 -
 40
40 -
 41
41 -
42
-
43
-
44
-
45
-
46
-
47
-
48
-
49
-
50
-
51
-
52
-
53
-
54
-
55
-
56
-
57
-
58
-
59
-
60
-
61
-
62
-
63
-
64
-
65
-
66
-
67
-
68
-
69
-
70
-
71
-
72
-
73
-
74
-
75
-
76
-
77
-
78
-
79
-
80
-
81
-
82
-
83
-
84
-
85
-
86
-
87
-
88
-
89
-
90
-
91
-
92
-
93
-
94
-
95
-
96
 |
 |