Sharp VL-A110U VLA110U Operation Manual
Sharp VL-A110U Manual
 |
View all Sharp VL-A110U manuals
Add to My Manuals
Save this manual to your list of manuals |
Sharp VL-A110U manual content summary:
- Sharp VL-A110U | VLA110U Operation Manual - Page 1
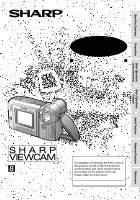
Summary Preparation LIQUID CRYSTAL DISPLAY CAMCORDER MODEL VL-A110U OPERATION MANUAL Basic Operations Camera Recording Basic Operations Playback Useful Features Advanced Features NTSC Please read this operation manual carefully before using the VIEWCAM. Important For assistance in reporting - Sharp VL-A110U | VLA110U Operation Manual - Page 2
instructions in the literature accompanying this unit. CAUTION (applies to the supplied AC adapter) TO PREVENT ELECTRIC SHOCK, MATCH WIDE BLADE OF PLUG TO WIDE SLOT, FULLY INSERT. CAUTION If the AC adapter is misplaced or needs to be replaced, obtain the same type of adapter from a SHARP service - Sharp VL-A110U | VLA110U Operation Manual - Page 3
with the instructions, may cause batteries backwards. Warn children not to take out batteries or install them. Parents should install the lithium battery in the VIEWCAM. Your VIEWCAM COPYRIGHT WARNING: It is the intent of SHARP that this unit be used in full necessary. NOTE The VIEWCAM's LCD panel is a - Sharp VL-A110U | VLA110U Operation Manual - Page 4
manufacturer's instructions, and should use a mounting accessory recommended battery power, or other sources, refer to the operating instructions polarized plug. 13. Power-Cord Protection-Power-supply cords should be routed so that cable system. This will prevent damage to the product due to lightning - Sharp VL-A110U | VLA110U Operation Manual - Page 5
voltage or other hazards. Refer all servicing to qualified service personnel. 19. Damage Requiring Service-Unplug this product from the wall outlet and refer servicing to qualified service personnel under the following conditions: a. When the power-supply cord or plug is damaged, b. If liquid - Sharp VL-A110U | VLA110U Operation Manual - Page 6
small, portable tripods may be difficult to attach and may not be sturdy enough to support your VIEWCAM. Be sure to use only a strong, stable tripod. • When using your VIEWCAM in a cold environment, the LCD monitor screen often appears less bright immediately after the power is turned on. This is - Sharp VL-A110U | VLA110U Operation Manual - Page 7
air and lens paper designed for photographic lenses to clean the lens. LCD Monitor Screen The VIEWCAM is equipped with a large LCD monitor screen that allows you to record scenes while comfortably holding the camcorder. The LCD monitor screen can be rotated for easy recording at high or low angles - Sharp VL-A110U | VLA110U Operation Manual - Page 8
Supplied Accessories Battery pack *BT-H22 AC adapter *UADP-0312TAZZ Audio/video cable Infrared remote control QCNW-1448TAZZ RRMCG0085TASA or QCNW-1295TAZZ CR2025 type lithium battery Shoulder strap UBNDS0010TASA Lens cap GCOVH1225TASA AA battery for remote control ן2 * Note: The part - Sharp VL-A110U | VLA110U Operation Manual - Page 9
Extended type battery pack BT-H32 Sun hood VR-60BFN Accessory shoe adapter VR-30ADN Tripod adapter for 180° recording VR-33FAN Note: The listed model names are for U.S. accessories. For optional and additional accessories, contact your local dealer, call the Sharp Accessories and Supply Center - Sharp VL-A110U | VLA110U Operation Manual - Page 10
Contents Operation Summary Part Names 3 Quick Reference Index 5 Warning Indicators 6 Preparation Inserting and Removing the Battery Pack 7 Charging the Battery Pack 8 Powering the VIEWCAM from an AC Outlet........... 9 Inserting and Removing a Cassette 10 Installing the Lithium Memory - Sharp VL-A110U | VLA110U Operation Manual - Page 11
Hood 32 Self Recording 33 Setting the VIEWCAM to Full Auto Mode 35 Program Search Manual Exposure 46 Picture/Backlight Adjustments 47 Gamma Playback 48 Turning Off the LCD Monitor Backlight 48 Editing 49 References Useful Information 50 Demonstration Mode 54 Before Requesting Service - Sharp VL-A110U | VLA110U Operation Manual - Page 12
IN jack [pp. 8, 9] When the cassette compartment door is open Lens hood [p. 32] Cassette holder [p. 10] Shoulder strap loop [p. 17] Cassette compartment door [p. 10] Lithium battery holder [p. 11] Cassette compartment door release [p. 10] 3 - Sharp VL-A110U | VLA110U Operation Manual - Page 13
Operation Summary Rear view RECord START/STOP button [p. 18] LCD monitor screen Power Zoom Wide angle/ Telephoto control [p. 19] VOLume control switch (CAMERA/VCR select switch) [pp. 18, 21] Bottom view Battery compartment door release [p. 7] Battery compartment door [p. 7] Tripod socket 4 - Sharp VL-A110U | VLA110U Operation Manual - Page 14
Reference Index This index lists some example uses of the VIEWCAM's features. • To quickly check what you have just • To record a backlit subject. -See page 30 (Gamma Brightness Compensation) or page 46 (Manual Exposure) • To record in a dark or poorly-illuminated location. -See page 31 (Gain-up - Sharp VL-A110U | VLA110U Operation Manual - Page 15
a few hours until the dew disappears (see page 51). About 10 seconds after this warning appears, the VIEWCAM automatically turns off. The battery is almost depleted. Replace it with a fully charged battery pack (see page 7). The video heads are clogged and should be cleaned (see page 51). There is - Sharp VL-A110U | VLA110U Operation Manual - Page 16
, do not tilt the VIEWCAM so that the battery compartment faces down. The battery pack may fall out. • Do not expose the battery compartment door to strong force, as it may come off. • Use only SHARP model BT-H22 or BT-H32 battery packs with this VIEWCAM. Use of other batteries may present a risk of - Sharp VL-A110U | VLA110U Operation Manual - Page 17
: • Charge only SHARP model BT-H22 or BT-H32 battery packs. Other types of battery packs may burst, causing personal injury and damage. DC IN jack To power outlet 4 When the battery is fully charged, the CHARGE indicator will light up in green. Remove the DC plug from the VIEWCAM, and close the - Sharp VL-A110U | VLA110U Operation Manual - Page 18
from an AC Outlet Caution: • The supplied AC adapter is specially designed for use with this VIEWCAM, and should not be used as a power supply for other camcorders. Cautions: • BEFORE REMOVING THE DC PLUG, ALWAYS STOP THE TAPE AND TURN THE POWER OFF. If you remove the DC plug during recording - Sharp VL-A110U | VLA110U Operation Manual - Page 19
If this happens, repeat the insertion procedure. • Do not attempt to pick up the VIEWCAM by the cassette compartment door. Notes: • If the battery power is too low, you may not be able to eject the cassette. Replace the battery pack with a fully charged one. • See page 53 for more information on the - Sharp VL-A110U | VLA110U Operation Manual - Page 20
door release Note: The cassette holder will extend and open when the VIEWCAM is connected to a power source. Be sure to close the cassette lithium battery. • Should the lithium battery leak, wipe the battery compartment and holder clean, and then insert a new battery. • The lithium battery will - Sharp VL-A110U | VLA110U Operation Manual - Page 21
language selection screen appears. MENU button Operation buttons Setting the Language When using the VIEWCAM for the first time, select the desired language for the on-screen display by in the following sections of this operation manual are based on the use of on-screen displays in English. 12 - Sharp VL-A110U | VLA110U Operation Manual - Page 22
Preparation English On-screen Displays The following on-screen displays appear when "ENGLISH" is selected as the on-screen display language (see page 12). Camera Mode Preparation PIC GAMA QK EFF E F F REW COUNTER FOCUS WH I T E EXPO BA L. SURE T I - RE- SCENE T L E TURN 1 6 9 MENU VCR - Sharp VL-A110U | VLA110U Operation Manual - Page 23
IMAGE PAGE MENU 2 DATE / HEURE AFF I CHAGE SE L E CT I ON RE GLAGE 12H / 24H OFF DATE + HEURE JAN 1 2 0 00 1 2 0 0 AM 12H REGLAGE IMAGE PAGE REM- L E C- AV . BOBIN TURE RAP. ARRET F I X E E F F . COMP GAMM T EUR RECHERCHE MENU MON T A GE OF F T E L E COM. ON REGLAGE IMAGE 14 - Sharp VL-A110U | VLA110U Operation Manual - Page 24
Preparation Preparation Spanish On-screen Displays The following on-screen displays appear when "ESPAÑOL" is selected as the onscreen display language (see page 12). Camera Mode EF. IMA. EF. REV. GAM. RA P. CONT AD. ENFOQUE BAL. EXBCO PO. T I - RE- MENU TULO TOR. 16 9 ESCE. VCR Mode MENU - Sharp VL-A110U | VLA110U Operation Manual - Page 25
Example: Setting the date to June 2, 2001 (JUN. 2. 2001) and the time to 10:30 am (10:30 AM). Note: • Check that the lithium memory battery has been installed before setting the date and time. Power switch MENU button DISPLAY button 1 Hold down the Lock button and slide the Power switch - Sharp VL-A110U | VLA110U Operation Manual - Page 26
through the loop at the end of the lens cap cord (E). Hand strap flap Grip strap 2 Pass your hand • Always replace the lens cap on the lens when the VIEWCAM is not in use. • Attach the lens cap to the it through the loop on the left side of the LCD screen. 2 Loosen the strap in the buckle, then - Sharp VL-A110U | VLA110U Operation Manual - Page 27
The picture from the lens is now displayed on the LCD monitor screen. • The VIEWCAM is now ready to record (Recording Standby mode). Lock button back to CAMERA. Maximum Continuous Recording and Actual Recording Times Battery Max. continuous Actual recording pack recording time time BT-H22 - Sharp VL-A110U | VLA110U Operation Manual - Page 28
lets you enjoy easy video recording in a more relaxed posture without having to hold the VIEWCAM up to your eye. The LCD monitor also makes it easier to record high-angle and low-angle shots. Holding the VIEWCAM Put the fingers of your right hand through the hand strap, and place your right - Sharp VL-A110U | VLA110U Operation Manual - Page 29
the tape reaches the end, an on-screen indicator displays the approximate remaining recording time. Remaining Battery Power Display When using the VIEWCAM with the battery pack as the power source, you can turn on and off the remaining battery power display by pressing the DISPLAY button. If the - Sharp VL-A110U | VLA110U Operation Manual - Page 30
STOP button (A). REW P LAY FF STOP ST I LL Power switch LCD monitor screen Notes: • If you wish to turn the Operation button indicators forward) the tape to the desired point. REW P LAY FF STOP ST I LL While the VIEWCAM is in VCR mode, push the Volume control to the םor מside to increase - Sharp VL-A110U | VLA110U Operation Manual - Page 31
rotate it to the right (W). Terminal cover 2 Connect the VIEWCAM to your TV (or VCR) with the supplied audio/video cable, as shown. 3 Turn on the TV and set it to the "AV" or "VIDEO" channel. (See the operation manual of your TV.) • When connecting to a TV via a VCR, turn on the VCR and - Sharp VL-A110U | VLA110U Operation Manual - Page 32
the desired scene, press the PLAY button (D) to return to normal playback. Notes: • The sound is off during Still mode. • To protect the tape, the VIEWCAM automatically returns to normal playback if it is left in Still mode for more than 5 minutes. • If the still function is used when connected to - Sharp VL-A110U | VLA110U Operation Manual - Page 33
UUsesfuel fFuealturFeseatures Operations of the On-screen Controls Using the Control Buttons The following buttons on the VIEWCAM can be used to control the various functions, settings and on-screen displays. MENU button DISPLAY button Operation buttons MENU button Each time you press - Sharp VL-A110U | VLA110U Operation Manual - Page 34
Useful Features Adjusting the Menu Settings Follow the procedure below to adjust the desired menu settings. Camera mode 1 Hold down the Lock button and slide the Power switch to CAMERA. 2 Press the MENU button until appears. 5 Press the SET button (B) to select the desired setting. • Each time you - Sharp VL-A110U | VLA110U Operation Manual - Page 35
Recording the Date and Time Follow the procedure shown below to record the date and time, or the date only, along with the subject. Note: • Before performing the procedure below, make sure that the date and time have been correctly set (see page 16). 1 In Recording Standby mode, press the MENU - Sharp VL-A110U | VLA110U Operation Manual - Page 36
function allows you to gradually bring the image and sound in or out at the beginning or end of a scene to create a scene transition. This VIEWCAM features one normal and two animated fade modes. Type of Fade Modes NORMAL: The picture fades in from and out to white. HOLIDAY: The picture - Sharp VL-A110U | VLA110U Operation Manual - Page 37
START/STOP button at the point where you wish to stop recording. • The picture and sound fade out as the screen gradually turns white. The VIEWCAM then returns to Recording Standby mode. 2 Press the QK. REW button ( ). • The tape rewinds to the point of 5 seconds before the current tape position - Sharp VL-A110U | VLA110U Operation Manual - Page 38
scene. RE T UR N QU I CK RE TURN T I - RE- SCENE T L E TURN 1 6 9 MENU When the tape reaches the end of the last recorded scene, the VIEWCAM enters the Recording Standby mode. Notes: • To cancel the quick return function, press the RETURN button again in step 2. • If the cassette has been - Sharp VL-A110U | VLA110U Operation Manual - Page 39
Gamma Brightness Compensation When the subject is backlit, the image will be darkened if it is recorded normally. The gamma brightness compensation function improves the picture by increasing the brightness of the subject while leaving the brighter portions of the image unaffected. 1 Press the MENU - Sharp VL-A110U | VLA110U Operation Manual - Page 40
Press the GAMA EFF. button until "GAMMA" disappears. Notes: • The Gain-up mode will disengage and the indicator will disappear automatically if the VIEWCAM is moved to a bright location. • Some picture noise appears in Gain-up mode. The picture noise increases when the indicator is displayed. GAMA - Sharp VL-A110U | VLA110U Operation Manual - Page 41
a magnified image of a subject which is within approximately 5 feet (1.5 m) of the VIEWCAM, do not zoom in on it. Instead, zoom out all the way by pushing :9 button. Note: • You can only use the wide screen function when the VIEWCAM is in Camera mode. Notes: • When you are recording a macro shot, - Sharp VL-A110U | VLA110U Operation Manual - Page 42
LCD VIEWCAM upside down with the lens at the bottom, the subject will be recorded upside down. Notes: • You will need the VR-33FAN tripod adapter for 180° recording (optional accessory mode, it is not possible to record using manual recording modes, change picture adjustments, display menus, record - Sharp VL-A110U | VLA110U Operation Manual - Page 43
START ME S SAGE PRESS REC S TART FOR L E A V I NG YOUR ME S SAGE. At the end of the recording, the screen fades out, and the VIEWCAM returns to Recording Standby mode. Note: • When you want to stop recording before message recording stops automatically, press the REC STOP button (B). • To cancel - Sharp VL-A110U | VLA110U Operation Manual - Page 44
, record subjects in Full Auto mode. If "AUTO" is not displayed even when the DISPLAY button is pressed, perform the procedure below to set the VIEWCAM to Full Auto mode. 1 In Recording Standby mode, press the MENU button until appears. If "PIC. EFF." is not displayed above the D button, press this - Sharp VL-A110U | VLA110U Operation Manual - Page 45
Program Search The program search function automatically finds and plays back the beginning of a number of previously recorded scenes. Up to 10 different scenes can be found on one tape. Note: • This function does not work if no recording has been made since the cassette was loaded, if the cassette - Sharp VL-A110U | VLA110U Operation Manual - Page 46
Useful Features Tape Counter Feature The tape counter shows elapsed playback or recording time in hours, minutes and seconds. (The counter continues to count internally even while it is not being displayed.) This feature can be set and used in both VCR and Camera modes. Using the Counter VCR mode 1 - Sharp VL-A110U | VLA110U Operation Manual - Page 47
Using the Counter Memory Use the counter memory feature when you want to return to the beginning of a particular scene. The position where the counter was reset (0:00.00) is stored in memory to make it easier to return to that point on the tape. VCR mode 1 During playback, press the MENU button - Sharp VL-A110U | VLA110U Operation Manual - Page 48
compartment cover. 2 Insert the two supplied AA (R6 or UM/ SUM-3) batteries with the battery poles positioned as indicated. 1 2 Operating the Remote Control Aim the remote control at the remote sensor of the VIEWCAM, and press the control buttons for operation. Remote sensor 16 ft Approximate - Sharp VL-A110U | VLA110U Operation Manual - Page 49
Advanced Features Digital Picture Effects These digital picture effects let you record the subject with a more dramatic effect. Type of Digital Picture Effects B/W EFF.: The picture is recorded in black- and-white. SEPA EFF.: The picture is recorded in sepia color similar to that of an old - Sharp VL-A110U | VLA110U Operation Manual - Page 50
mode that will create the best results for a specific type of shooting situation. Just select one of the four scene settings shown below. The VIEWCAM will automatically set the exposure, white balance, and shutter speed to produce the optimum picture quality for the selected situation. Type of Scene - Sharp VL-A110U | VLA110U Operation Manual - Page 51
Superimposing a Title Use the title feature to superimpose titles on your videos when recording. There are eight titles preset for your convenience which you can choose from. 1 In Recording Standby mode, press the MENU button until appears. T I - RE- SCENE T L E TURN 1 6 9 MENU 3 Press the ĭ or - Sharp VL-A110U | VLA110U Operation Manual - Page 52
Advanced Features Changing the Preset Titles You can make a new title of your own by changing any of the eight preset titles. The maximum number of title characters is fifteen. Example: Changing "WEDDING DAY" to "IN HAWAII". 1 Press the MENU button until appears, and then press the TITLE button - Sharp VL-A110U | VLA110U Operation Manual - Page 53
The Auto Focus may not be able to focus on the subject in the situations shown below. In such situations, set the VIEWCAM to Manual Focus mode and focus manually. 1 In Recording Standby mode, press the MENU button until appears. FOCUS WH I T E E XPO BAL. SURE 2 Press the FOCUS button (D) to set - Sharp VL-A110U | VLA110U Operation Manual - Page 54
white balance has been locked, white balance shifts may occur due to slight changes in illumination or depending on the subject. • Do not move the VIEWCAM while "WHITE BAL." is flashing in step 3. • If "WHITE BAL." does not stop flashing in step 3, press the WHITE BAL. button to cancel the locking - Sharp VL-A110U | VLA110U Operation Manual - Page 55
Exposure The VIEWCAM is preset to Auto Exposure mode, which automatically chooses the optimal aperture. When there is too much contrast in brightness between the subject and background, however, you may not be able to record a clear image. In this case, use the manual exposure function to correct - Sharp VL-A110U | VLA110U Operation Manual - Page 56
the EXIT button () to turn off the adjustment screen. Notes: • If you set the backlight ("BACKLIGHT") to "AUTO" in Camera mode and then set the VIEWCAM to VCR mode, the backlight mode automatically changes to "NORMAL". • When the color or tint is adjusted, the picture on the screen may differ from - Sharp VL-A110U | VLA110U Operation Manual - Page 57
playback, press the MENU button until appears. GAMA COUEFF. NTER SEARCH Turning Off the LCD Monitor Backlight The LCD monitor uses a fluorescent lamp for backlighting (see page 52). In order to reduce battery consumption, you can turn off the lamp when backlighting is not necessary (e.g. when you - Sharp VL-A110U | VLA110U Operation Manual - Page 58
tape, or transposing one sequence with another. This VIEWCAM lets you monitor the source program on the built-in LCD monitor without having to connect it to an external TV or video monitor. Connect the VIEWCAM to a VCR with the supplied audio/video cable, as shown. Recording Yellow: To VIDEO IN - Sharp VL-A110U | VLA110U Operation Manual - Page 59
Situation (Lux) Blue sky Position the subject in the center. Focus manually when you need to position the subject off center (see page 44). shot. Frequent zooming produces unattractive pictures. It also increases the battery power consumption. • When image shakes are noticeable during zoomed-in - Sharp VL-A110U | VLA110U Operation Manual - Page 60
VIEWCAM in a humid room. • How to prevent trouble due to dew formation. When using the VIEWCAM in a place where dew formation is likely to occur, allow the VIEWCAM SHARP service center or your dealer for further advice. Plastic bag Q Be sure to tightly seal the plastic bag containing the VIEWCAM. - Sharp VL-A110U | VLA110U Operation Manual - Page 61
the Fluorescent Lamp This VIEWCAM uses a fluorescent lamp to backlight the LCD monitor. If the monitor becomes dark or difficult to view, the fluorescent lamp may need to be replaced. Contact the nearest SHARP service center or your dealer for further advice. Battery Pack Battery pack consumption - Sharp VL-A110U | VLA110U Operation Manual - Page 62
before using the AC adapter or connecting the VIEWCAM to a TV. AC Adapter (Supplied Accessory) The supplied AC adapter is compatible with 50 Suitable AC plug adapter AC 110-240 V Television Signal Standards In any country, you can always watch the video picture by using the LCD monitor screen. - Sharp VL-A110U | VLA110U Operation Manual - Page 63
DEMO MODE O F F L ANGUA GE MENU button Operation buttons Watching the Demonstration 1 Make sure that there is no video cassette in the VIEWCAM. • If a cassette is in the VIEWCAM, Demo mode does not work. Perform the procedure on page 10 to remove it. 2 Hold down the Lock button and slide the - Sharp VL-A110U | VLA110U Operation Manual - Page 64
for service, please check the following troubleshooting table. Power Symptom Possible cause Suggested solution No power. Power source is not properly connected. Connect power source properly (pp. 7, 9). Battery pack is not charged. Charge battery pack sufficiently (p. 8). Dew in VIEWCAM - Sharp VL-A110U | VLA110U Operation Manual - Page 65
pack. AC adapter or battery pack may have Call for service (p. 57). malfunctioned. Cannot edit to connected Audio/video cable is not properly VCR. connected. Connect audio/video cable properly (p. 49). Lens makes rattling Does not indicate a malfunction. sound when VIEWCAM is moved in - Sharp VL-A110U | VLA110U Operation Manual - Page 66
LCD battery pack) DC 7.0 V (with AC adapter SERVICE INFORMATION (For the U.S.) For the location of the nearest Sharp Authorized Service, or to obtain product literature, accessories, supplies or customer assistance, please call 1-800-BE SHARP (1-800-237-4277) or visit SHARP's website (http://www.sharp - Sharp VL-A110U | VLA110U Operation Manual - Page 67
La batería podría caerse. • No exponga la puerta del compartimiento de la batería a una fuerza excesiva porque podría desprenderse. • Utilice solamente baterías SHARP modelo BT-H22 o BT-H32 con esta VIEWCAM. La utilización de otras baterías puede causar un riesgo de incendio o explosión. 58 - Sharp VL-A110U | VLA110U Operation Manual - Page 68
clavija de CC de la VIEWCAM y cierre la tapa de terminales. Precaución: • Cuando desconecte las clavijas, sujete las clavijas y tire de ellas, no del cable. 59 PIC GAMA Q K EFF E F F REW Notas: • Los procedimientos de operación de las secciones siguientes de este manual de operación se basan en - Sharp VL-A110U | VLA110U Operation Manual - Page 69
los dedos en el portavideocasete. • No aplique fuerza al portavideocasete, excepto cuando presione la marca PUSH para cerrarlo. • No incline la VIEWCAM ni la tome al revés cuando inserte o extraiga un videocasete. Esto podría estropear la cinta. • Extraiga el videocasete si no piensa utilizar - Sharp VL-A110U | VLA110U Operation Manual - Page 70
el botón de bloqueo y deslice el interruptor de alimentación hasta CAMERA. • La imagen captada por el objetivo se visualiza en la pantalla del monitor LCD. • La VIEWCAM está ahora lista para grabar (modo de espera de grabación). Botón de bloqueo AUTO Notas: • El altavoz se apaga en el modo de - Sharp VL-A110U | VLA110U Operation Manual - Page 71
través del altavoz incorporado. Interruptor de alimentación Pantalla del monitor LCD Para detener la reproducción Pulse el botón STOP (A). REW P la cinta hasta el punto deseado. REW P LAY FF STOP ST I LL Mientras la VIEWCAM está en el modo de vídeo, empuje el control de volumen hacia el lado ϩ - Sharp VL-A110U | VLA110U Operation Manual - Page 72
any): Where to Obtain Service: What to do to Obtain Service: VL-A110U Camcorder (Be sure to have this information available when you need service for your Product.) One (1) year parts and ninety (90) days labor from date of purchase except for the rechargeable battery incorporated in this Product
-
 1
1 -
 2
2 -
 3
3 -
 4
4 -
 5
5 -
 6
6 -
 7
7 -
8
-
9
-
10
-
11
-
12
-
13
-
14
-
15
-
16
-
17
-
18
-
19
-
20
-
21
-
22
-
23
-
24
-
25
-
26
-
27
-
28
-
29
-
30
-
31
-
32
-
33
-
34
-
35
-
36
-
37
-
38
-
39
-
40
-
41
-
42
-
43
-
44
-
45
-
46
-
47
-
48
-
49
-
50
-
51
-
52
-
53
-
54
-
55
-
56
-
57
-
58
-
59
-
60
-
61
-
62
-
63
-
64
-
65
-
66
-
67
-
68
-
69
-
70
-
71
-
72
 |
 |
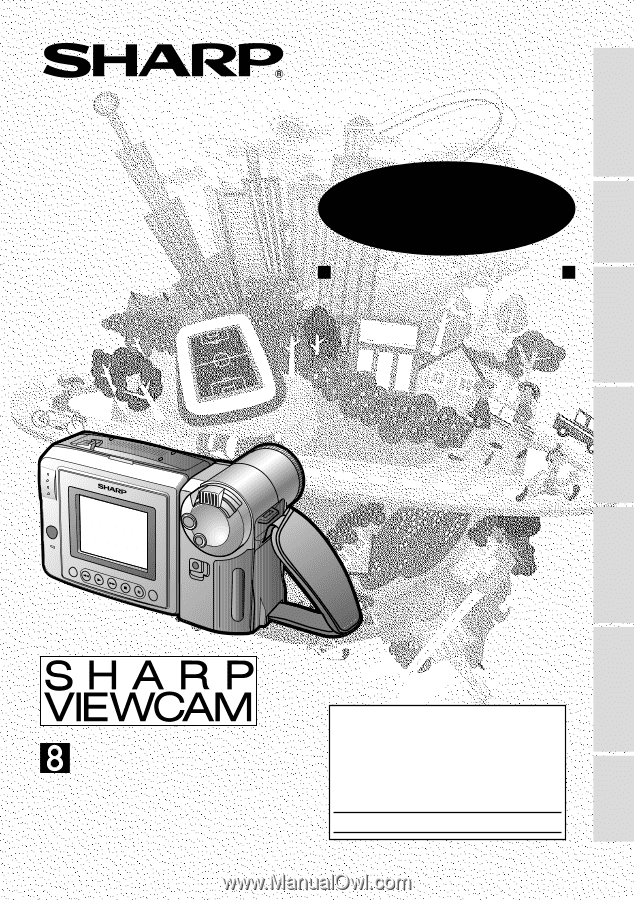
LIQUID CRYSTAL DISPLAY CAMCORDER
OPERATION MANUAL
Important
Model No.:
Serial No.:
Please read this operation manual
carefully before using the VIEWCAM.
For assistance in reporting the theft or
loss of
this product, record on the line
below the
model number and serial number which
are located on the bottom of the unit.
Please retain this information.
•
See page 54 for use of Demo mode.
References
Preparation
Basic Operations
Playback
Useful Features
Operation Summary
Basic Operations
Camera Recording
Advanced Features
NTSC
MODEL
VL
-
A110U