Singer 1 One Instruction Manual 31 - Page 32
How To Adjust The Stitch, Length, How To Adjust The Seam, Width
 |
View all Singer 1 One manuals
Add to My Manuals
Save this manual to your list of manuals |
Page 32 highlights
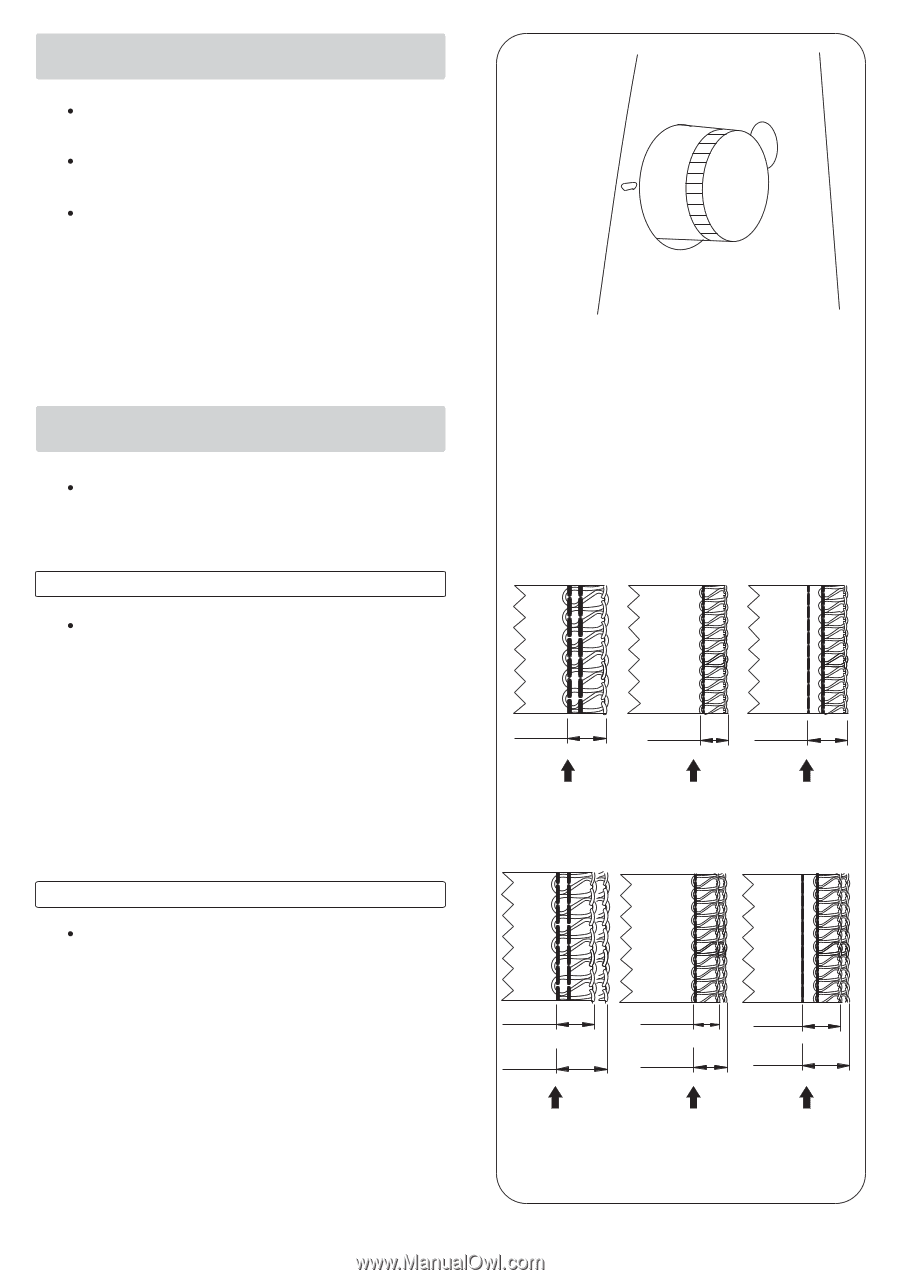
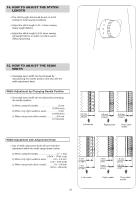
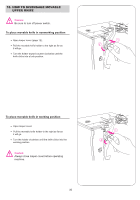
14. HOW TO ADJUST THE STITCH LENGTH The stitch length dial should be set on the N setting for most sewing conditions. 4 Adjust the stitch length to N~ 4 when sewing 3 heavy weight fabrics. N Adjust the stitch length to 2~N when sewing 2 lightweight fabrics to obtain excellent seams without puckering. 15. HOW TO ADJUST THE SEAM WIDTH Overedge seam width can be achieved by repositioning the needle position and also with the width adjustment knob. Width Adjustment by Changing Needle Position Overedge seam width can be adjusted by changing the needle position. a) When using left needle 6 mm (15/64 inch) b) When only right needle is used 4 mm (10/64 inch) c) When using chain stitch needle 8.8 mm (11/32 inch) 6.0 mm (15/64") Left needle 4.0 mm (10/64") 8.8 mm (11/32") Right needle Chain stitch needle Width Adjustment with Adjustment Knob Use of width adjustment knob will permit further adjustment within the width range shown below. a) When using left needle 5 ~ 7 mm (13/64 ~ 17/64 inch) b) When only right needle is used............3.0 ~ 5.0 mm (1/8 ~ 3/16 inch) c) When using chain stitch needle............7.8 ~ 9.8 mm (5/16 ~ 3/8 inch) 5 mm (13/64") 7 mm (17/64") Left needle 3 mm (1/8") 5 mm (3/16") 7.8 mm (5/16") 9.8 mm (3/8") Right needle Chain stitch needle 31
-
 1
1 -
2
-
3
-
4
-
5
-
6
-
7
-
8
-
9
-
10
-
11
-
12
-
13
-
14
-
15
-
16
-
17
-
18
-
19
-
20
-
21
-
22
-
23
-
24
-
25
-
26
-
 27
27 -
 28
28 -
 29
29 -
 30
30 -
 31
31 -
 32
32 -
 33
33 -
 34
34 -
 35
35 -
 36
36 -
 37
37 -
38
-
39
-
40
-
41
-
42
-
43
-
44
-
45
-
46
-
47
-
48
-
49
-
50
-
51
-
52
-
53
-
54
-
55
-
56
-
57
-
58
-
59
-
60
-
61
-
62
-
63
-
64
-
65
-
66
-
67
-
68
-
69
-
70
-
71
-
72
-
73
-
74
 |
 |