Singer 2273 Esteem II Instruction Manual - Page 23
Sewing on Buttons
 |
View all Singer 2273 Esteem II manuals
Add to My Manuals
Save this manual to your list of manuals |
Page 23 highlights
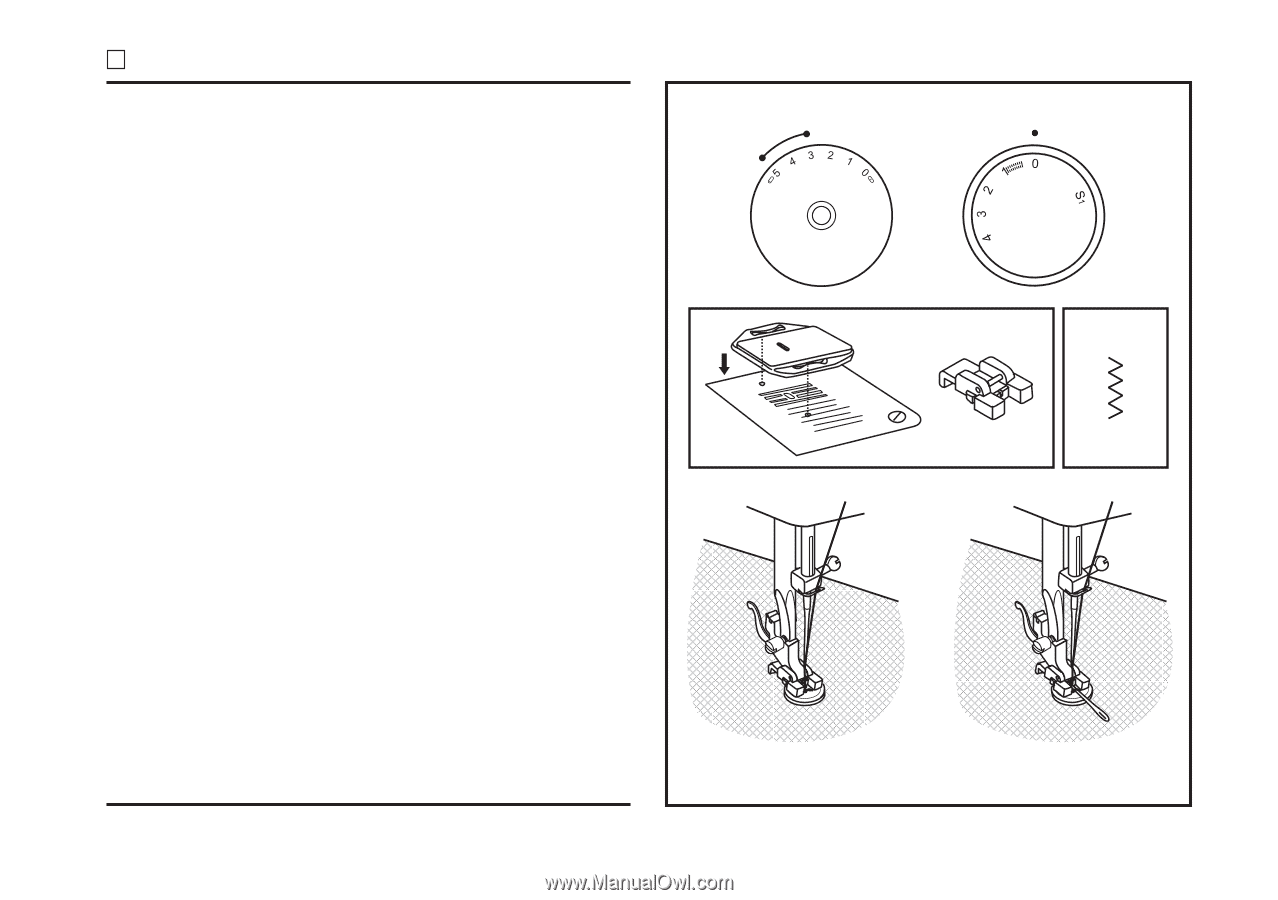
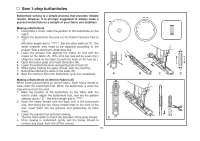
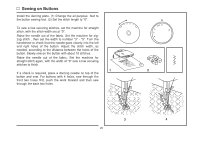
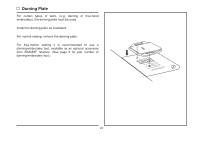
Sewing on Buttons Install the darning plate. (1) Change the all purpose foot to the button sewing foot. (2) Set the stitch length to "0". To sew a few securing stitches, set the machine for straight stitch, with the stitch width set at "0". Raise the needle out of the fabric. Set the machine for zigzag stitch , then set the width to number "3" - "5". Turn the handwheel to check that the needle goes cleanly into the left and right holes of the button. Adjust the stitch width, as needed, according to the distance between the holes of the button. Slowly sew on the button with about 10 stitches. Raise the needle out of the fabric. Set the machine for straight stitch again, with the width at "0" sew a few securing stitches to finish. 1 2 If a shank is required, place a darning needle on top of the button and sew. For buttons with 4 holes, sew through the front two holes first, push the work forward and then sew through the back two holes. 3 4 20
-
 1
1 -
2
-
3
-
4
-
5
-
6
-
7
-
8
-
9
-
10
-
11
-
12
-
13
-
14
-
15
-
16
-
17
-
 18
18 -
 19
19 -
 20
20 -
 21
21 -
 22
22 -
 23
23 -
 24
24 -
 25
25 -
 26
26 -
 27
27 -
 28
28 -
29
-
30
-
31
 |
 |