Singer 7285Q Patchwork Instruction Manual - Page 16
Converting To Free-arm Sewing, Large Extension Table Optional
 |
View all Singer 7285Q Patchwork manuals
Add to My Manuals
Save this manual to your list of manuals |
Page 16 highlights
CONVERTING TO FREE-ARM SEWING
-
 1
1 -
2
-
3
-
4
-
5
-
6
-
7
-
8
-
9
-
10
-
 11
11 -
 12
12 -
 13
13 -
 14
14 -
 15
15 -
 16
16 -
 17
17 -
 18
18 -
 19
19 -
 20
20 -
 21
21 -
22
-
23
-
24
-
25
-
26
-
27
-
28
-
29
-
30
-
31
-
32
-
33
-
34
-
35
-
36
-
37
-
38
-
39
-
40
-
41
-
42
-
43
-
44
-
45
-
46
-
47
-
48
-
49
-
50
-
51
-
52
-
53
-
54
-
55
-
56
-
57
-
58
-
59
-
60
-
61
-
62
-
63
-
64
-
65
-
66
-
67
-
68
-
69
-
70
-
71
-
72
-
73
-
74
-
75
-
76
-
77
-
78
-
79
-
80
-
81
-
82
-
83
-
84
 |
 |
14
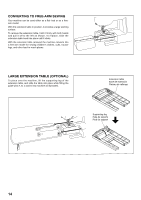
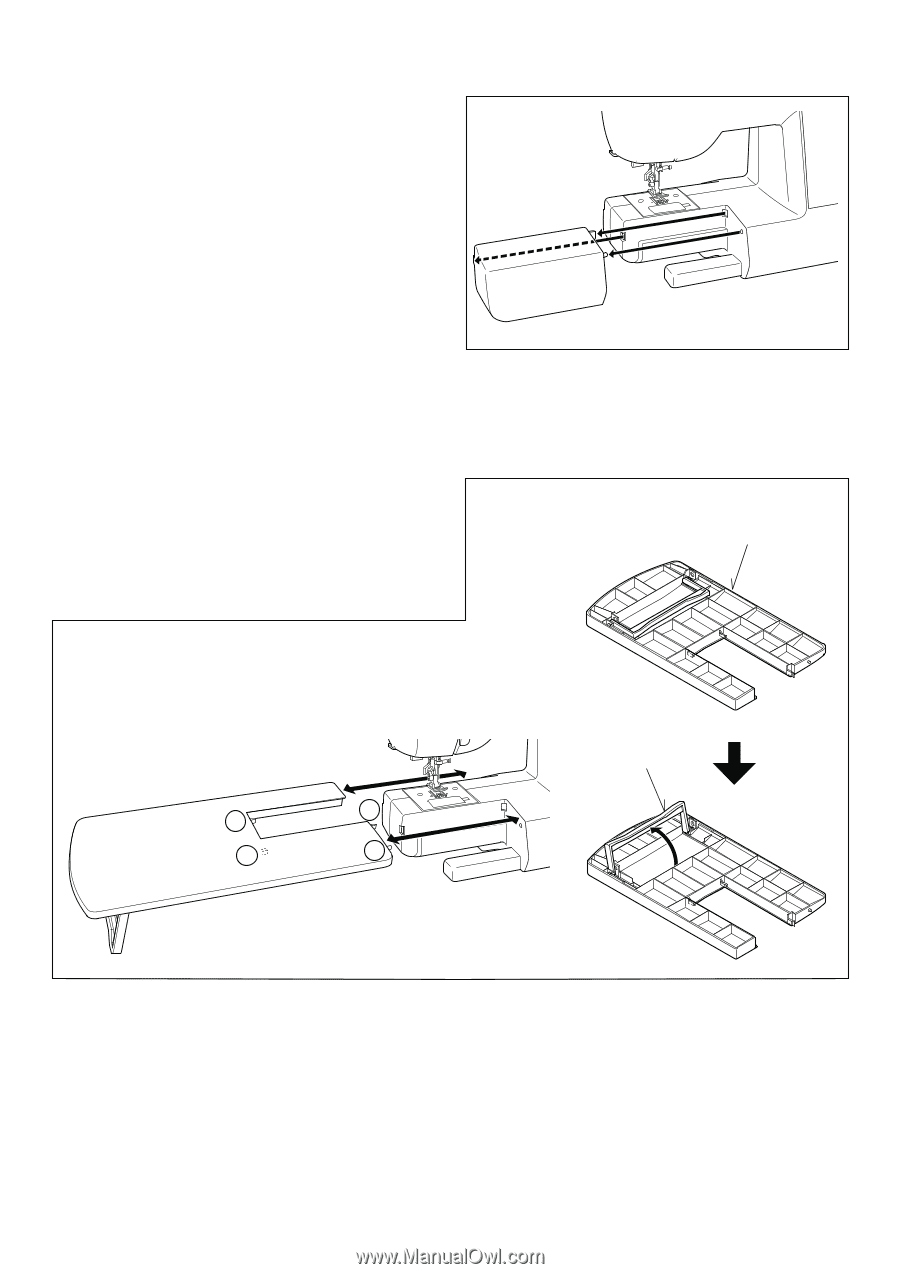
CONVERTING TO FREE-ARM SEWING
<RXU PDFKLQH FDQ EH XVHG HLWKHU DV D ÀDWº EHG RU DV D IUHHº
arm model.
With the extension table in position, it provides a large working
surface.
7R UHPRYH WKH H[WHQVLRQ WDEOH± KROG LW ¿UPO\ ZLWK ERWK KDQGV
and pull it off to the left as shown. To replace, slide the
extension table back into place until it clicks.
With the extension table removed the machine converts into
a free-arm model for sewing children’s clothes, cuffs, trouser
legs, and other hard-to-reach places.
LARGE EXTENSION TABLE (OPTIONAL)
To place onto the machine, lift the supporting leg of the
H[WHQVLRQ WDEOH± DQG VOLGH WKH WDEOH LQWR SODFH ZKLOH ¿WWLQJ WKH
guide pins A, B, C and D into machine as illustrated.
C
D
B
A
Extension table
Base de extensión
Plateau de rallonge
Supporting leg
Pata de soporte
Pied de support