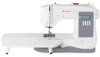
Singer Confidence 7640 Confidence 7640 Stitch Applications Guide - Page 10
Attach the Darning/Embroidery Foot
 |
View all Singer Confidence 7640 manuals
Add to My Manuals
Save this manual to your list of manuals |
Page 10 highlights
English 41 ZIGZAG STITCH 42 ZIGZAG STITCH 43 ZIGZAG STITCH Thread Painting Roll & Whip Heirloom Hems Attaching Hook Closures teeth (see your machine's manual for details). Remove the presser foot and presser foot holder. Attach the Darning/Embroidery Foot (additional accessory for some machine models). Select the zigzag stitch. Place a piece of stabilizer underneath the fabric to give the stitches added support. It may be helpful to draw your monogram on the main fabric using a removable fabric marker, to help guide you. Move the layers together manually as you stitch. For more information on freemotion sewing, see this video. Thread painting is a type of free-motion sewing. Multiple thread colors can be layered to create colorful images. To set the machine for thread painting, first disengage or cover the machine's feed teeth (see your machine's manual for details). Remove the presser foot and presser foot holder. Attach the Darning / Embroidery Foot (additional accessory for some machine models). Select the zigzag stitch. For machine models with adjustable stitch width, adjust the stitch width as desired for your project. Place batting or stabilizer under the fabric. Move the layers together manually as you stitch. For more information on thread painting and free-motion sewing, see this video. Heirloom sewing incorporates several different techniques, and one of these techniques is the Roll & Whip Hem, done using a zigzag stitch. This hem works on fine, lightweight fabrics like batiste. Thread the machine with lightweight thread. A size 9/70 or 11/80 needle (additional accessory for some machine models) is recommended. Set the machine for zigzag stitch. For machines with adjustable stitch length and stitch width, use with a width setting of at least 5.0mm and a length setting of approximately 2.0mm. Use an Open Toe Foot (additional accessory for some machine models) so that the area in front of the needle is unobstructed. Position the fabric so the right movement of the zigzag goes off the edge of the fabric. As the stitch then moves to the left, it "rolls" the fabric over, stitching it in place. Use the zigzag stitch to attach some larger sizes or styles of hook and eye closures. Disengage or cover the machine's feed teeth 10 of 360
-
 1
1 -
2
-
3
-
4
-
 5
5 -
 6
6 -
 7
7 -
 8
8 -
 9
9 -
 10
10 -
 11
11 -
 12
12 -
 13
13 -
 14
14 -
 15
15 -
16
-
17
-
18
-
19
-
20
-
21
-
22
-
23
-
24
-
25
-
26
-
27
-
28
-
29
-
30
-
31
-
32
-
33
-
34
-
35
-
36
-
37
-
38
-
39
-
40
-
41
-
42
-
43
-
44
-
45
-
46
-
47
-
48
-
49
-
50
-
51
-
52
-
53
-
54
-
55
-
56
-
57
-
58
-
59
-
60
-
61
-
62
-
63
-
64
-
65
-
66
-
67
-
68
-
69
-
70
-
71
-
72
-
73
-
74
-
75
-
76
-
77
-
78
-
79
-
80
-
81
-
82
-
83
-
84
-
85
-
86
-
87
-
88
-
89
-
90
-
91
-
92
-
93
-
94
-
95
-
96
-
97
-
98
-
99
-
100
-
101
-
102
-
103
-
104
-
105
-
106
-
107
-
108
-
109
-
110
-
111
-
112
-
113
-
114
-
115
-
116
-
117
-
118
-
119
-
120
-
121
-
122
-
123
-
124
-
125
-
126
-
127
-
128
-
129
-
130
-
131
-
132
-
133
-
134
-
135
-
136
-
137
-
138
-
139
-
140
-
141
-
142
-
143
-
144
-
145
-
146
-
147
-
148
-
149
-
150
-
151
-
152
-
153
-
154
-
155
-
156
-
157
-
158
-
159
-
160
-
161
-
162
-
163
-
164
-
165
-
166
-
167
-
168
-
169
-
170
-
171
-
172
-
173
-
174
-
175
-
176
-
177
-
178
-
179
-
180
-
181
-
182
-
183
-
184
-
185
-
186
-
187
-
188
-
189
-
190
-
191
-
192
-
193
-
194
-
195
-
196
-
197
-
198
-
199
-
200
-
201
-
202
-
203
-
204
-
205
-
206
-
207
-
208
-
209
-
210
-
211
-
212
-
213
-
214
-
215
-
216
-
217
-
218
-
219
-
220
-
221
-
222
-
223
-
224
-
225
-
226
-
227
-
228
-
229
-
230
-
231
-
232
-
233
-
234
-
235
-
236
-
237
-
238
-
239
-
240
-
241
-
242
-
243
-
244
-
245
-
246
-
247
-
248
-
249
-
250
-
251
-
252
-
253
-
254
-
255
-
256
-
257
-
258
-
259
-
260
-
261
-
262
-
263
-
264
-
265
-
266
-
267
-
268
-
269
-
270
-
271
-
272
-
273
-
274
-
275
-
276
-
277
-
278
-
279
-
280
-
281
-
282
-
283
-
284
-
285
-
286
-
287
-
288
-
289
-
290
-
291
-
292
-
293
-
294
-
295
-
296
-
297
-
298
-
299
-
300
-
301
-
302
-
303
-
304
-
305
-
306
-
307
-
308
-
309
-
310
-
311
-
312
-
313
-
314
-
315
-
316
-
317
-
318
-
319
-
320
-
321
-
322
-
323
-
324
-
325
-
326
-
327
-
328
-
329
-
330
-
331
-
332
-
333
-
334
-
335
-
336
-
337
-
338
-
339
-
340
-
341
-
342
-
343
-
344
-
345
-
346
-
347
-
348
-
349
-
350
-
351
-
352
-
353
-
354
-
355
-
356
-
357
-
358
-
359
-
360
 |
 |
