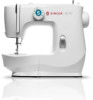
Singer M2100 M2100 Stitch Applications Guide - Page 5
Hem Foot, sometimes called a Rolled Hem Foot - how to thread
 |
View all Singer M2100 manuals
Add to My Manuals
Save this manual to your list of manuals |
Page 5 highlights
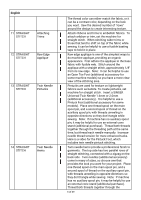
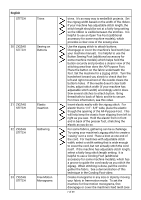
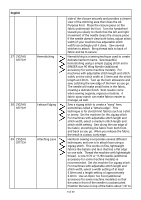
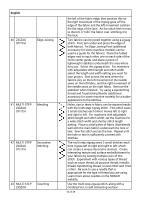
English 20 STRAIGHT STITCH Narrow / Rolled Hems 21 STRAIGHT STITCH Topstitched Hems 22 STRAIGHT STITCH Understitching 23 STRAIGHT STITCH Stay Stitching 24 STRAIGHT STITCH Darning pre-made in packages, or you can make it yourself. To insert piping, sandwich the piping between the fabric layers, with the bulk of the piping on the left side. It may be helpful to baste the layers together before stitching them at the machine. Set the machine for straight stitch and attach the Zipper Foot (additional accessory for some machine models). There is a demonstration of this in our Zipper Foot video. Very narrow hems can be stitched at the edge of light to medium weight fabrics using a Narrow Hem Foot, sometimes called a Rolled Hem Foot (additional accessory for some machine models). This foot has a small scroll in front that feeds the fabric while the machines sews a straight stitch to secure the hem in place. See this video for information on using the Narrow/Rolled Hem Foot. Sew simple hems using a straight stitch. The stitches will be seen on both the top side and back side of your project. Use a thread that matches the fabric for a hem that is less noticeable, or choose a contrasting thread for a bold appearance. Understitching is used to help prevent a waistline or neckline facing from rolling to the outside. Set the machine for straight stitch. Sew though the facing and seam allowance only. The understitching will not be visible from the outside of the project. Sleeves, necklines, and princess seams are curved and can become distorted and difficult to join to the rest of the garment. Stay-stitching is used to help stabilize fabric by preventing stretching and distortion. Set the machine for straight stitch. Sew just inside the seam allowance. Small holes or tears in fabric can be repaired using a Darning / Embroidery Foot (additional accessory for some machine models) and the straight stitch. Place a small piece of fabric behind the area to be repaired. Set the machine for straigth stitch, cover or disengage the feed teeth (check your machine manual), and thread the machine with a color that blends well with the fabric. Manually move the fabric in a back-andforth motion as you step on the foot control. There is a demonstration of darning in our Darning/Embroidery Foot video. 5 of 49
-
 1
1 -
 2
2 -
 3
3 -
 4
4 -
 5
5 -
 6
6 -
 7
7 -
 8
8 -
 9
9 -
 10
10 -
 11
11 -
12
-
13
-
14
-
15
-
16
-
17
-
18
-
19
-
20
-
21
-
22
-
23
-
24
-
25
-
26
-
27
-
28
-
29
-
30
-
31
-
32
-
33
-
34
-
35
-
36
-
37
-
38
-
39
-
40
-
41
-
42
-
43
-
44
-
45
-
46
-
47
-
48
-
49
 |
 |
