Smeg KD120XU Instruction Manual - Page 5
The appliance is supplied WITHOUT A PLUG. It is
 |
View all Smeg KD120XU manuals
Add to My Manuals
Save this manual to your list of manuals |
Page 5 highlights
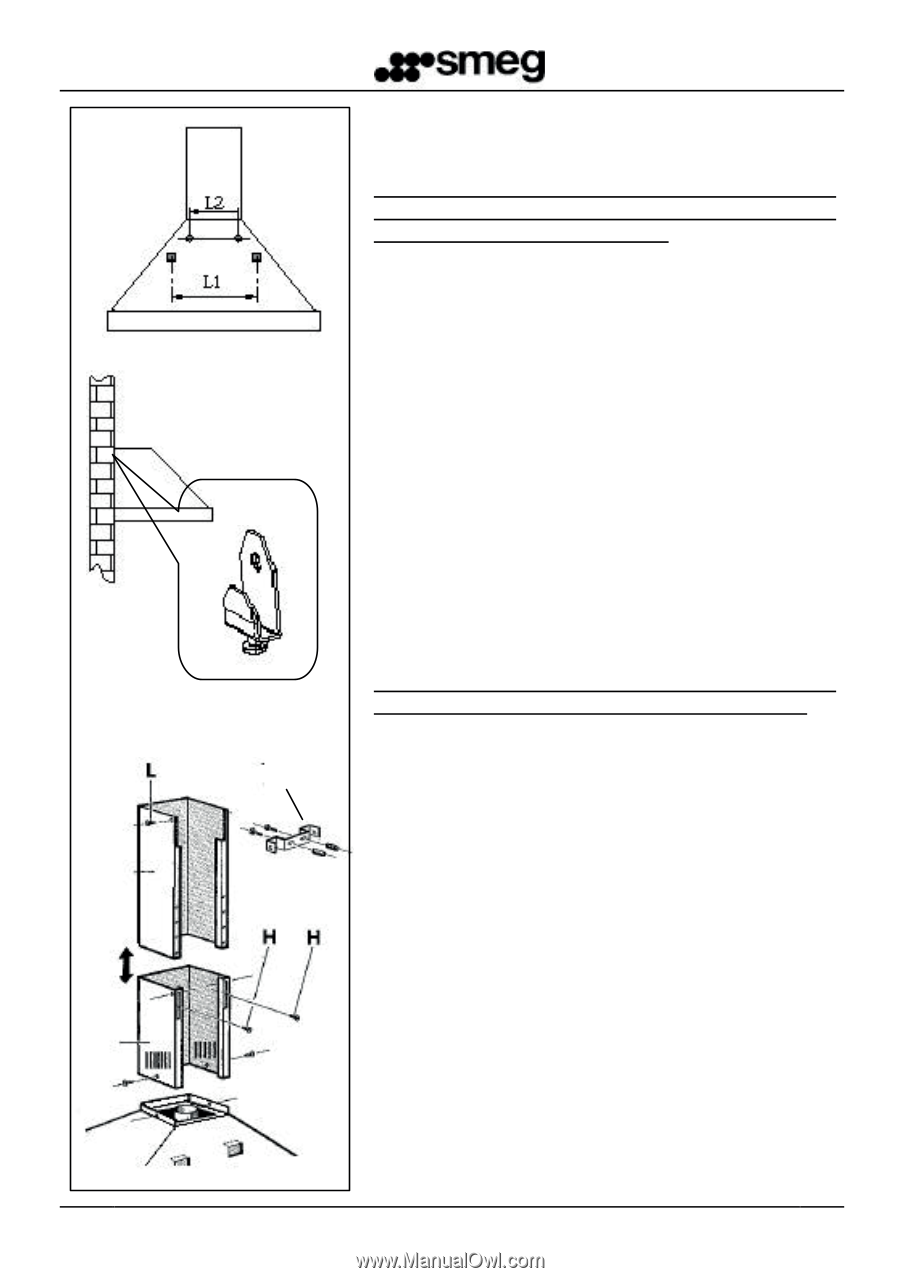
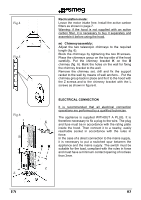
Fig.4 Fig.5 Fig.6 B Z EN Recirculation mode: Leave the motor intake free. Install the active carbon filters as shown in page 7. Warning: if the hood is not supplied with an active carbon filter, it is necessary to buy it separately and assemble it before using the hood. m) Chimneyassembly: Adjust the two telescopic chimneys to the required length (fig. 6). Block the chimneys by tightening the two H screws . Place the chimneys group on the top side of the hood carefully. Put the chimney bracket K on the B chimney (fig. 6). Mark the holes on the wall for fixing the chimney bracket to the wall. Remove the chimney set, drill and fix the support racket to the wall by means of wall anchors. . Put the chimney group back in place and fix it to the hood with the Z screws and to the chimney bracket with the L screws as shown in figure 6. ELECTRICAL CONNECTION It is recommended that all electrical connection operations are performed by a qualified technician. The appliance is supplied WITHOUT A PLUG. It is K therefore necessary to fix a plug to the wire. The plug and fuse must be in accordance with the rating plate inside the hood. Then connect it to a nearby, easily reachable socket in accordance with the rules in force. In the case of a direct connection to the mains supply, it is necessary to put a switched spur between the appliance and the mains supply. The switch must be suitable for the load, compliant with the rules in force and must have a minimum contact opening of not less than 3mm. Z 03
-
 1
1 -
 2
2 -
 3
3 -
 4
4 -
 5
5 -
 6
6 -
 7
7 -
 8
8 -
 9
9 -
 10
10 -
 11
11
 |
 |