Smeg STU8649 Installation manual - Page 12
Leveling
 |
View all Smeg STU8649 manuals
Add to My Manuals
Save this manual to your list of manuals |
Page 12 highlights
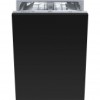
EN INSTALLATION INSTRUCTION • If the appliance is not in a niche and can therefore be accessed on one side, cover the door hinge area for safety reasons (cutting hazard). Covers are available as accessories from specialized retailers or from the Technical Service Centre. • To build in the dishwasher, purchase the relative kit from specialized retailers or from the Technical Service Centre. 5.1 Leveling 5.1.2 Levelling the appliance Level the appliance using the relative adjustable feet (e.g.: ref. A fig. 5-01); use an open-ended wrench to rotate the feet until the dishwasher is perfectly level. Some models are fitted with just one rear foot which can be adjusted with a screw located at the bottom front of the appliance (ref. A fig. 5-02); use a suitable Phillips screwdriver or 8 mm hex head bushing to turn the screw until the dishwasher is perfectly level. Use a spirit level to check the appliance is perfectly level (ref. B fig. 5-01). Leveling is vital for assuring correct dishwasher operation. Make sure to leave a gap of at least 3 mm (7/64") between the top of the dishwasher and the worktop (ref. C fig. 5-01). Fig. 5-01 12
-
 1
1 -
2
-
3
-
4
-
5
-
6
-
 7
7 -
 8
8 -
 9
9 -
 10
10 -
 11
11 -
 12
12 -
 13
13 -
 14
14 -
 15
15 -
 16
16 -
 17
17 -
18
-
19
-
20
-
21
-
22
-
23
-
24
-
25
-
26
-
27
-
28
-
29
-
30
-
31
-
32
-
33
-
34
 |
 |
