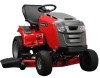
Snapper NXT2346 Operater's Manual - Page 7
Maintenance - parts
 |
View all Snapper NXT2346 manuals
Add to My Manuals
Save this manual to your list of manuals |
Page 7 highlights
Determine The Starting System Before starting the engine, you must determine the type of starting system that is on your engine. Your engine will have one of the following types. Electronic Fuel Management System: This features an Electronic Control Unit that monitors engine and temperature conditions. It does not have a manual choke or a primer. Choke System: This features a choke to be used for starting in cool temperatures. Some models will have a separate choke control while others will have a combination choke/throttle control. This type does not have a primer. To start your engine, follow the instructions for your type of starting system. Note: Some engines and equipment have remote controls. See the equipment manual for location and operation of remote controls. 3. Turn the fuel shut-off valve (A), if equipped, to the on position (Figure 4). 4. Move the throttle control (B) to the fast position. Operate the engine in the fast position. 5. Move the choke control (C), or the combination choke/throttle lever, to the choke position. Note: Choke is usually unnecessary when restarting a warm engine. 6. Turn the electric start switch (D) to the on/start position (Figure 4). NOTE: If the engine does not start after repeated attempts, go to BRIGGSandSTRATTON.COM or call 1-800-233-3723 (in USA). NOTICE: To extend the life of the starter, use short starting cycles (five seconds maximum). Wait one minute between starting cycles. Electronic Fuel Management System - Figure 4 1. Check the oil level. See the How To Check/Add Oil section. 2. Make sure equipment drive controls, if equipped, are disengaged. 3. Turn the fuel shut-off valve (A), if equipped, to the on position (Figure 4). 7. As the engine warms up, move the choke control (C) to the run position. How To Stop The Engine - Figure 4 4. Move the throttle control (B) to the fast position. Operate the engine in the fast position. 5. Turn the electric start switch (D) to the on/start position (Figure 4). NOTE: If the engine does not start after repeated attempts, go to BRIGGSandSTRATTON.COM or call 1-800-233-3723 (in USA). NOTICE: To extend the life of the starter, use short starting cycles (five seconds maximum). Wait one minute between starting cycles. WARNING Fuel and its vapors are extremely flammable and explosive. Fire or explosion can cause severe burns or death. Do not choke the carburetor to stop engine. 1. Move the throttle control to the slow position. Turn the key switch (D) to the off Choke System - Figure 4 1. Check the oil level. See the How To Check/Add Oil section. 2. Make sure equipment drive controls, if equipped, are disengaged. position (Figure 4). Remove the key and keep in a safe place out of the reach of children. 2. After the engine stops, turn the fuel shut-off valve (A), if equipped, to the closed position. Maintenance t for tion We recommend that you see any Briggs & Stratton Authorized Dealer for all c maintenance and service of the engine and engine parts. o NOTICE: All the components used to build this engine must remain in place for proper u operation. N d WARNING: When performing maintenance that requires the unit to be tipped, the fuel tank must be empty or fuel can leak out and result in a fire or o explosion. r Emissions Control p Maintenance, replacement, or repair of the emissions control devices and systems may be performed by any non-road engine repair establishment or individual. e However, to obtain "no charge" emissions control service, the work must be performed R by a factory authorized dealer. See the Emissions Warranty. Maintenance Chart First 5 Hours Change oil 3 Every 8 Hours or Daily Check engine oil level Clean area around muffler and controls Clean finger guard/rotating screen Every 25 Hours or Annually Clean air filter 1 Clean pre-cleaner 1 Every 50 Hours or Annually Change engine oil 4 Replace oil filter (if equipped) 4 WARNING Check muffler and spark arrester Unintentional sparking can result in fire or electric shock. Every 100 Hours or Annually Unintentional start-up can result in entanglement, traumatic amputation, or laceration. Fire hazard Change engine oil 5 Replace oil filter 5 Annually Before performing adjustments or repairs: Disconnect the spark plug wire and keep it away from the spark plug. Disconnect battery at negative terminal (only engines with electric start.) Use only correct tools. Do not tamper with governor spring, links or other parts to increase engine speed. Replacement parts must be of the same design and installed in the same position as the original parts. Other parts may not perform as well, may damage the unit, and may result in injury. Do not strike the flywheel with a hammer or hard object because the flywheel may later shatter during operation. When testing for spark: Use approved spark plug tester. Do not check for spark with spark plug removed. Replace air filter Replace pre-cleaner Replace spark plugs Clean air cooling system 1 Replace fuel filter Check valve clearance 2 1 In dusty conditions or when airborne debris is present, clean more often. 2 Not required unless engine performance problems are noted. 3 Only engines without oil filter. 4 Engines without oil filter or with standard black oil filter (see Specifications page for part number). 5 Engines with high-efficiency yellow or orange oil filter (see Specifications page for part number). en 7
-
 1
1 -
 2
2 -
 3
3 -
 4
4 -
 5
5 -
 6
6 -
 7
7 -
 8
8 -
 9
9 -
 10
10 -
 11
11 -
 12
12 -
13
-
14
-
15
-
16
-
17
-
18
-
19
-
20
-
21
-
22
-
23
-
24
-
25
-
26
-
27
-
28
 |
 |
