Sony BDP-BX650 Operating Instructions - Page 34
[Network Settings], [Easy Network Settings - screen mirroring
 |
View all Sony BDP-BX650 manuals
Add to My Manuals
Save this manual to your list of manuals |
Page 34 highlights
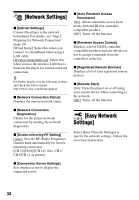
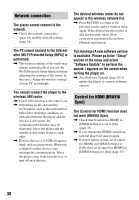
[Network Settings] x [Internet Settings] Connect the player to the network beforehand. For details, see "Step 2: Preparing for Network Connection" (page 19). [Wired Setup]: Select this when you connect to a broadband router using a LAN cable. [Wireless Setup(built-in)]: Select this when you use the wireless LAN that is built into the player for wireless network connection. z For further details, visit the following website and check the FAQ contents: http://www.sony.com/bluraysupport/ x [Network Connection Status] Displays the current network status. x [Auto Renderer Access Permission] [On]: Allows automatic access from newly detected DLNA controllercompatible product. [Off]: Turns off the function. x [Renderer Access Control] Displays a list of DLNA controllercompatible products and sets whether or not to accept commands from the controllers in the list. x [Registered Remote Devices] Displays a list of your registered remote devices. x [Remote Start] [On]: Turns the player on or off using your remote device when connecting to the network. [Off]: Turns off the function. x [Network Connection Diagnostics] Checks for the proper network connection by running the network diagnostics. x [Screen mirroring RF Setting] [Auto]: Sets the RF (Radio Frequency) channel band automatically for Screen mirroring connection. [CH 1]/[CH 6]/[CH 11]: Sets CH 1/ CH 6/CH 11 as priority. [Easy Network Settings] Select [Easy Network Settings] to specify the network settings. Follow the on-screen instructions. x [Connection Server Settings] Sets whether or not to display the connected server. 34
-
 1
1 -
2
-
3
-
4
-
5
-
6
-
7
-
8
-
9
-
10
-
11
-
12
-
13
-
14
-
15
-
16
-
17
-
18
-
19
-
20
-
21
-
22
-
23
-
24
-
25
-
26
-
27
-
28
-
 29
29 -
 30
30 -
 31
31 -
 32
32 -
 33
33 -
 34
34 -
 35
35 -
 36
36 -
 37
37 -
 38
38 -
 39
39 -
40
-
41
-
42
-
43
-
44
-
45
-
46
-
47
-
48
 |
 |
