Sony BDV-E780W Operating Instructions - Page 28
Step 4: Setting up the Wireless System - wireless speakers
 |
UPC - 027242809758
View all Sony BDV-E780W manuals
Add to My Manuals
Save this manual to your list of manuals |
Page 28 highlights
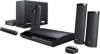
Getting Started Step 4: Setting up the Wireless System The unit transmits sound to the surround amplifier that is connected to the surround speakers. To activate wireless transmission, perform the following Steps. 1 Insert the wireless transceiver into the unit. Rear panel of the unit EZW-RT50 Wireless transceiver 2 Insert the wireless transceiver into the surround amplifier. Rear panel of the surround amplifier EZW-RT50 Wireless transceiver 3 Connect the AC power cord (mains lead) of the unit. Before connecting the AC power cord, make sure all connections in "Step 2: Connecting the System" (page 20) are secure. 4 Press "/1 to turn the system on. "/1 5 Connect the AC power cord (mains lead) of the surround amplifier. LINK/STANDBY indicator LINK/STANDBY When wireless transmission is activated, the LINK/STANDBY indicator turns green. If the LINK/STANDBY indicator does not turn on, see "Surround amplifier" (page 13) and "Wireless sound" (page 71). About the standby mode The surround amplifier enters standby mode automatically (the LINK/STANDBY indicator turns red) when the main unit is in standby mode or wireless transmission is deactivated. The surround amplifier turns on automatically (the LINK/STANDBY indicator turns green) when the main unit is turned on and wireless transmission is activated. To specify the wireless connection If you use multiple wireless products or your neighbors use wireless products, interference may occur. To prevent this, you can specify the wireless connection to link the main unit to the surround amplifier (Secure Link function). For details, see "Further Settings for the Wireless System" (page 54). 28US
-
 1
1 -
2
-
3
-
4
-
5
-
6
-
7
-
8
-
9
-
10
-
11
-
12
-
13
-
14
-
15
-
16
-
17
-
18
-
19
-
20
-
21
-
22
-
 23
23 -
 24
24 -
 25
25 -
 26
26 -
 27
27 -
 28
28 -
 29
29 -
 30
30 -
 31
31 -
 32
32 -
 33
33 -
34
-
35
-
36
-
37
-
38
-
39
-
40
-
41
-
42
-
43
-
44
-
45
-
46
-
47
-
48
-
49
-
50
-
51
-
52
-
53
-
54
-
55
-
56
-
57
-
58
-
59
-
60
-
61
-
62
-
63
-
64
-
65
-
66
-
67
-
68
-
69
-
70
-
71
-
72
-
73
-
74
-
75
-
76
-
77
-
78
-
79
-
80
-
81
-
82
-
83
-
84
 |
 |
