Sony CDP-CX230 Operating Instructions - Page 7
Sonyhits
 |
View all Sony CDP-CX230 manuals
Add to My Manuals
Save this manual to your list of manuals |
Page 7 highlights
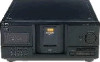
Getting Started 4 Insert a disc with the label side facing right. With the label side facing right After inserting the disc, you can input the original disc titles instead of the disc numbers (see "Labeling Discs" on page 18) to locate it easily when you start playing. ALL DISCS CD1 DISC SONYHITS 20 5 Repeat Steps 3 and 4 to insert more discs. 6 Close the front cover by pressing § OPEN/ CLOSE. The supplied CD booklet holdGeres htetPlpinlyaogyu ilSonctagaterCateDds disc You can store up to 200 CD booklets. Insert a booklet and stick the number label on the film of a pocket and the booklet so that you can locate the disc easily. Notes • Do not insert an empty 8 cm (3-inch) CD adaptor (CSA-8). It may damage the player. • Do not attach anything such as seals or sleeves to CDs. It may damage the player or the disc. • If you drop a disc into the player and the CD won't go into the slot correctly, consult your nearest Sony dealer. • When transporting the player, remove all discs from the player. • Make sure you have inserted the disc into each slot at a right angle to the rotary table. If the disc is not put in straight, it may damage the player or the disc. • Make sure the rotary table comes to a complete stop before inserting or removing discs. The front panel closes automatically when you press ·. Be careful not to put your hand into the player after pressing · otherwise your hand may be caught in the front panel. Removing CDs After following Steps 1 to 3 of "Inserting CDs" on page 6, remove the discs. Then close the front cover. The rotary table turns and the disc slot at the loading position is set to the playing position. Always close the front cover except when you insert or remove discs. 7GB
-
 1
1 -
 2
2 -
 3
3 -
 4
4 -
 5
5 -
 6
6 -
 7
7 -
 8
8 -
 9
9 -
 10
10 -
 11
11 -
 12
12 -
13
-
14
-
15
-
16
-
17
-
18
-
19
-
20
-
21
-
22
-
23
-
24
-
25
-
26
-
27
-
28
-
29
-
30
-
31
-
32
-
33
-
34
-
35
-
36
-
37
-
38
-
39
-
40
-
41
-
42
-
43
-
44
-
45
-
46
-
47
-
48
-
49
-
50
-
51
-
52
-
53
-
54
-
55
-
56
-
57
-
58
-
59
-
60
-
61
-
62
-
63
-
64
-
65
-
66
-
67
-
68
-
69
-
70
-
71
-
72
-
73
-
74
-
75
-
76
-
77
-
78
-
79
-
80
 |
 |
