Sony CDX-C8050X Operating Instructions - Page 30
TV/Video
 |
View all Sony CDX-C8050X manuals
Add to My Manuals
Save this manual to your list of manuals |
Page 30 highlights
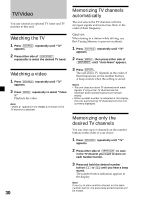
TV/Video You can connect an optional TV tuner and TV monitor to this unit. Watching the TV 1 Press (SOURCE) repeatedly until "TV" appears. 2 Press either side of (DISC/PRST) repeatedly to select the desired TV band. Watching a video 1 Press (SOURCE) repeatedly until "TV" appears. 2 Press (MODE) repeatedly to select "Video 1." Playback the video. Note "Video 2" appears if the VIDEO 2 terminal of the TV monitor is selected. Memorizing TV channels automatically The unit selects the TV channels with the strongest signals and memorizes them in the order of their frequency. Caution When tuning in a station while driving, use Best Tuning Memory to prevent accidents. 1 Press (SOURCE) repeatedly until "TV" appears. 2 Press (MENU), then press either side of (DISC/PRST) until "Auto Mem" appears. 3 Press (ENTER). The unit stores TV channels in the order of their frequencies on the number buttons. A beep sounds when the setting is stored. Notes • The unit does not store TV channels with weak signals. If only a few TV channels can be received, some number buttons will remain empty. • When a preset number is indicated in the display, the unit starts storing TV channels from the one currently displayed. Memorizing only the desired TV channels You can store up to 6 channels on the number buttons in the order of your choice. 1 Press (SOURCE) repeatedly until "TV" appears. 2 Press either side of (SEEK/AMS) to tune in the TV channel you want to store on each number button. 3 Press and hold the desired number button ((1) to (6)) until you hear a beep sound. The number button indication appears in the display. 30 Note If you try to store another channel on the same number button, the previously stored channel will be erased.
-
 1
1 -
2
-
3
-
4
-
5
-
6
-
7
-
8
-
9
-
10
-
11
-
12
-
13
-
14
-
15
-
16
-
17
-
18
-
19
-
20
-
21
-
22
-
23
-
24
-
 25
25 -
 26
26 -
 27
27 -
 28
28 -
 29
29 -
 30
30 -
 31
31 -
 32
32 -
 33
33 -
 34
34 -
 35
35 -
36
-
37
-
38
-
39
-
40
-
41
-
42
-
43
-
44
-
45
-
46
-
47
-
48
-
49
-
50
-
51
-
52
-
53
-
54
-
55
-
56
-
57
-
58
-
59
-
60
-
61
-
62
-
63
-
64
-
65
-
66
-
67
-
68
-
69
-
70
-
71
-
72
-
73
-
74
-
75
-
76
-
77
-
78
-
79
-
80
-
81
-
82
-
83
-
84
-
85
-
86
-
87
-
88
-
89
-
90
-
91
-
92
-
93
-
94
-
95
-
96
-
97
-
98
-
99
-
100
-
101
-
102
-
103
-
104
-
105
-
106
-
107
-
108
-
109
-
110
-
111
-
112
-
113
-
114
-
115
-
116
 |
 |
