Sony CDX-GT10W Operating Instructions - Page 6
Storing and receiving stations, Changing the sound settings - where is the select button
 |
View all Sony CDX-GT10W manuals
Add to My Manuals
Save this manual to your list of manuals |
Page 6 highlights
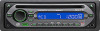
Radio Storing and receiving stations Caution When tuning in stations while driving, use Best Tuning Memory (BTM) to prevent an accident. Storing automatically - BTM 1 Press (SOURCE) repeatedly until "TUNER" appears. To change the band, press (MODE) repeatedly. You can select from FM1, FM2, FM3, AM1 or AM2. 2 Press and hold (BTM) until "BTM" flashes. The unit stores stations in order of frequency on the number buttons. A beep sounds when the setting is stored. Storing manually 1 While receiving the station that you want to store, press and hold a number button ((1) to (6)) until "MEM" appears. The number button indication appears in the display. Note If you try to store another station on the same number button, the previous stored station will be replaced. Receiving the stored stations 1 Select the band, then press a number button ((1) to (6)). Tuning automatically 1 Select the band, then press (SEEK) -/+ to search for the station. Scanning stops when the unit receives a station. Repeat this procedure until the desired station is received. Tip If you know the frequency of the station you want to listen to, press and hold (SEEK) -/+ to locate the approximate frequency, then press (SEEK) -/+ repeatedly to fine adjust to the desired frequency (manual tuning). Other functions Changing the sound settings Adjusting the sound characteristics - BAL/FAD/SUB You can adjust the balance, fader, and subwoofer volume. 1 Press the select button repeatedly until "BAL," "FAD" or "SUB" appears. The item changes as follows: LOW*1 t MID*1 t HI*1 t BAL (left-right) t FAD (front-rear) t SUB (subwoofer volume)*2 t AUX*3 *1 When EQ3 is activated (page 6). *2 When the audio output is set to "SUB" (page 7). "ATT" is displayed at the lowest setting, and can be adjusted up to 20 steps. *3 When AUX source is activated (page 7). 2 Rotate the volume control dial to adjust the selected item. After 3 seconds, the setting is complete and the display returns to normal play/reception mode. Customizing the equalizer curve - EQ3 "CUSTOM" of EQ3 allows you to make your own equalizer settings. 1 Select a source, then press (EQ3) repeatedly to select "CUSTOM." 2 Press the select button repeatedly until "LOW," "MID" or "HI" appears. 3 Rotate the volume control dial to adjust the selected item. The volume level is adjustable in 1 dB steps, from -10 dB to +10 dB. Repeat steps 2 and 3 to adjust the equalizer curve. To restore the factory-set equalizer curve, press and hold the select button before the setting is complete. After 3 seconds, the setting is complete and the display returns to normal play/reception mode. Tip Other equalizer types are also adjustable. 6
-
 1
1 -
 2
2 -
 3
3 -
 4
4 -
 5
5 -
 6
6 -
 7
7 -
 8
8 -
 9
9 -
 10
10 -
 11
11 -
 12
12 -
13
-
14
-
15
-
16
-
17
-
18
-
19
-
20
-
21
-
22
-
23
-
24
 |
 |
